Activating the NetSuite Connector
The activation of the integration connector can be done from BSS Setup. For creating a new NetSuite instance you must navigate to BSS > Setup > System Options > Systems Setup and select the Activate action for the NetSuite connector. You will be asked to set a unique name for the new instance that will be created.

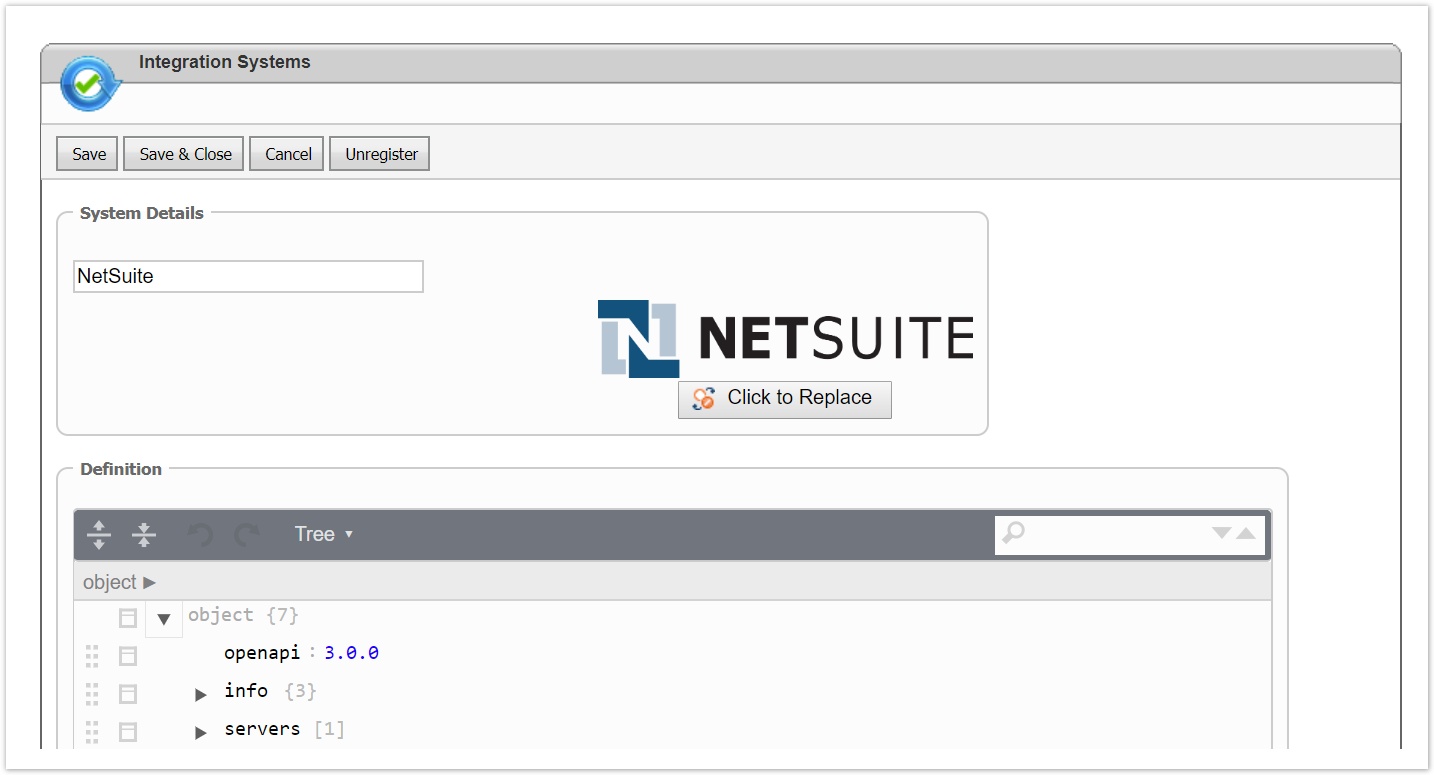
You will then redirected to the "Edit Integration" page of the new instance where you must press Save for the creation to be completed.
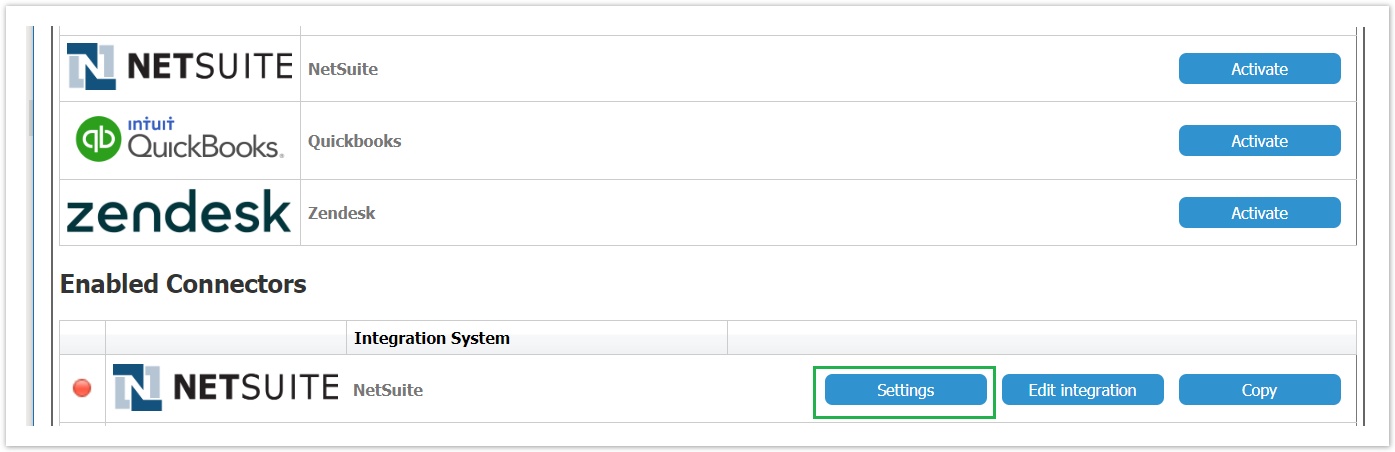
The new instance is now available in the list of "Enabled Connectors". From this section, by selecting "Settings" you can configure your instance.
Defining your Installation URL and the Server Variables
You enter a meaningful name for the instance and then select "NetSuite Instance URL" from the Web API drop-down list and enter the Server Variables
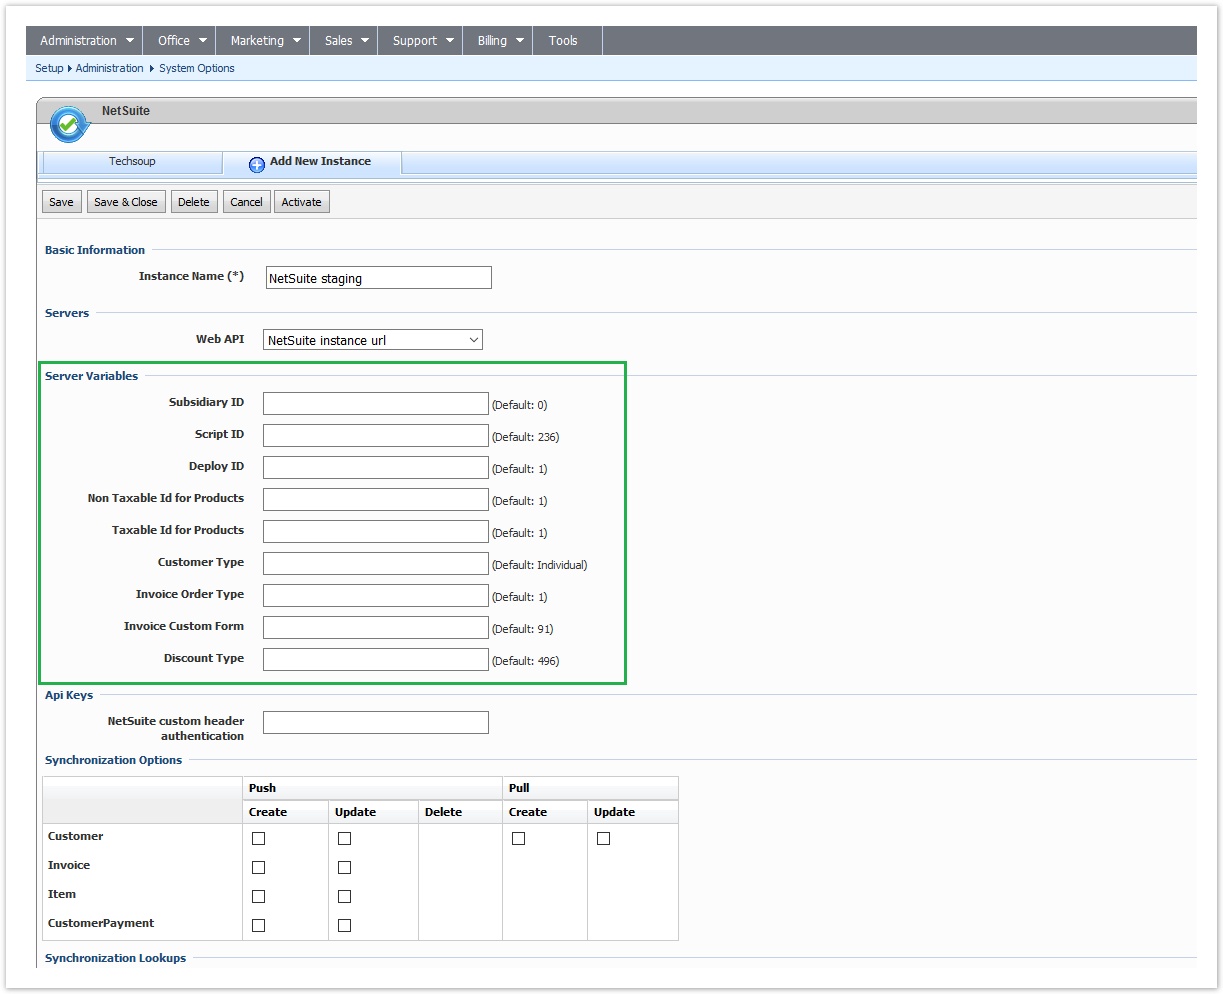
Some variables from NetSuite cannot be mapped and therefore server variables must be used for this scope. The needed values are already defined in the installation but they should be overridden with correct values by using the provided text boxes. The below chapters include all defined variables along with an explanation and example for each one.
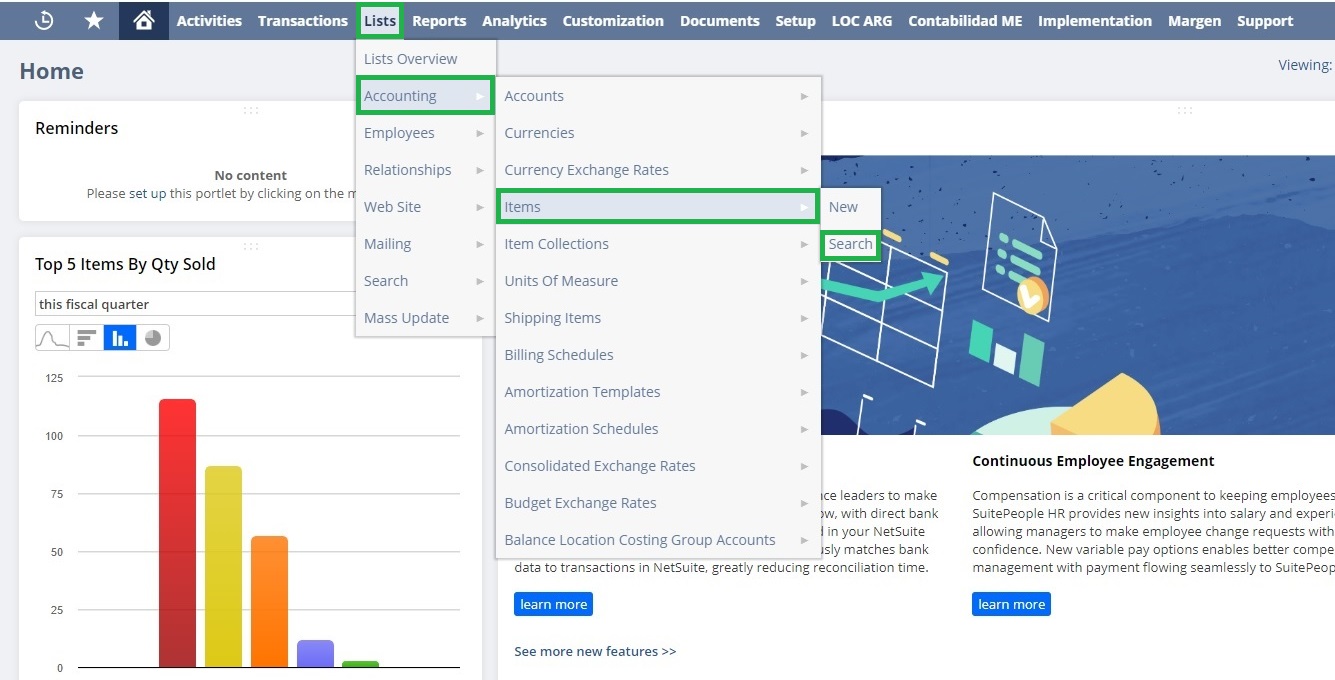
| Server Variable | Used for | Explanation | Location - (Click to Enlarge) |
|---|---|---|---|
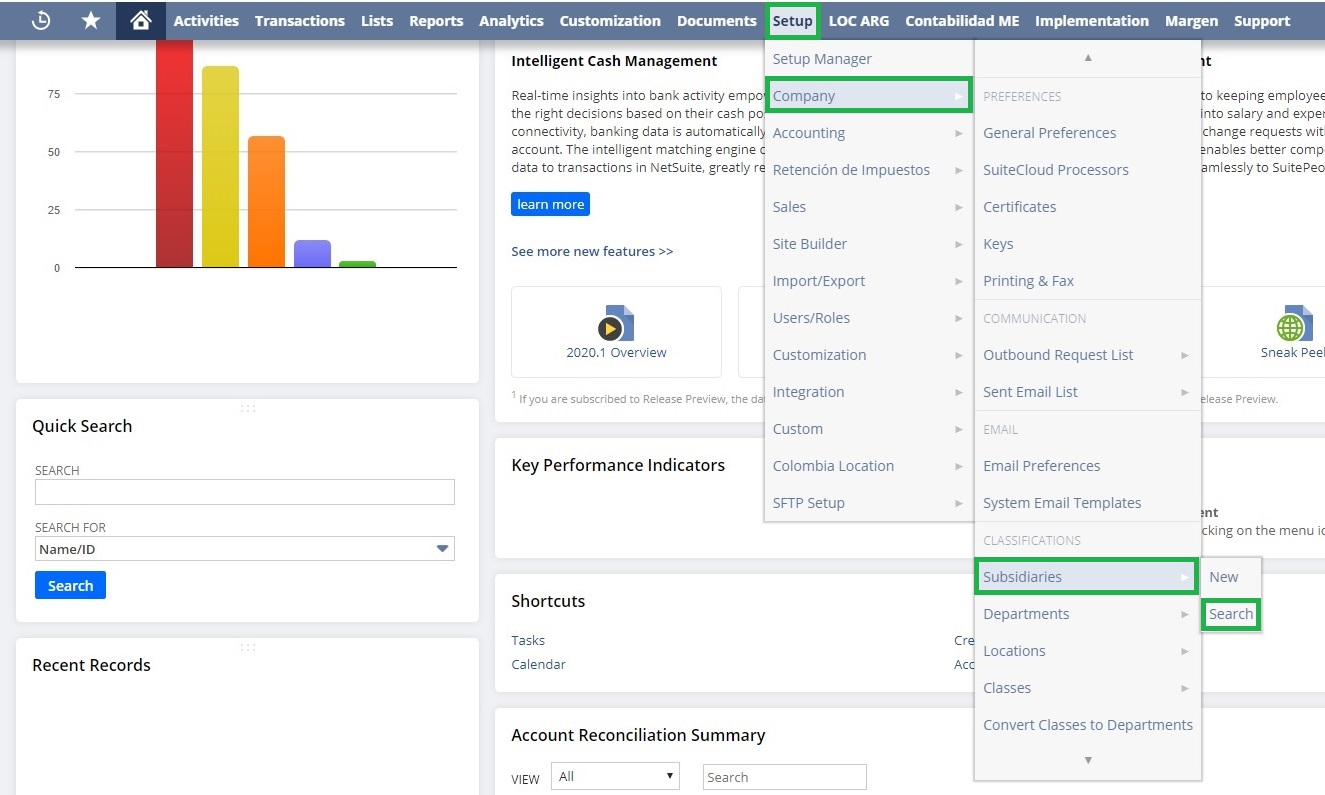
| Subsidiary ID | Authentication, Synchronization | The subsidiary is used in order to define the "company department" that integration will work on |
|
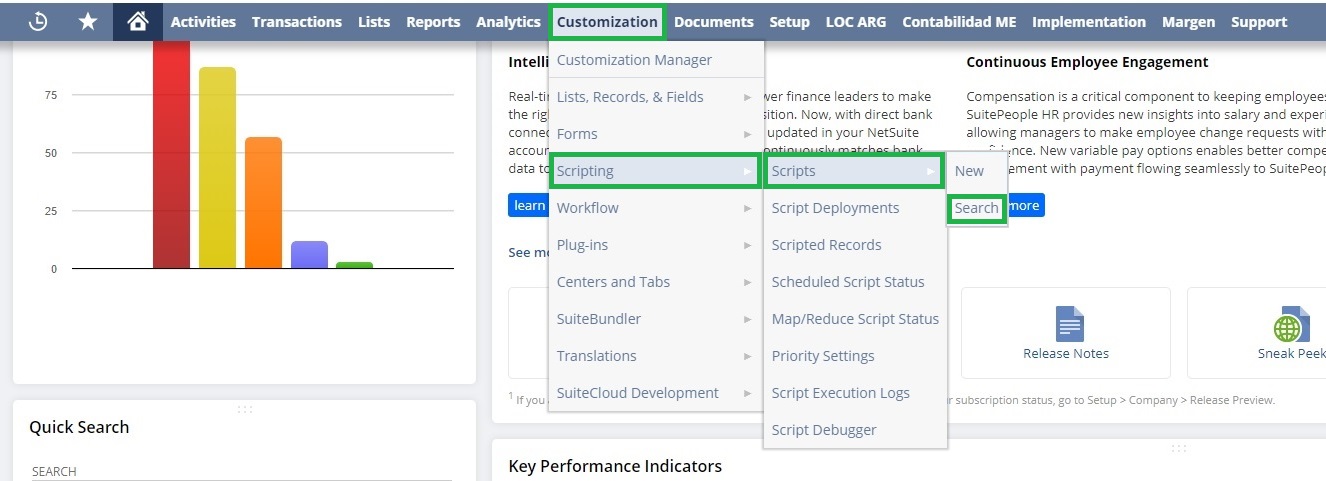
Script ID | Synchronization | Defines the script id that will be used in the synchronization URL |
|
Deploy ID | Synchronization | Defines the deploy id that will be used in the synchronization URL |
|
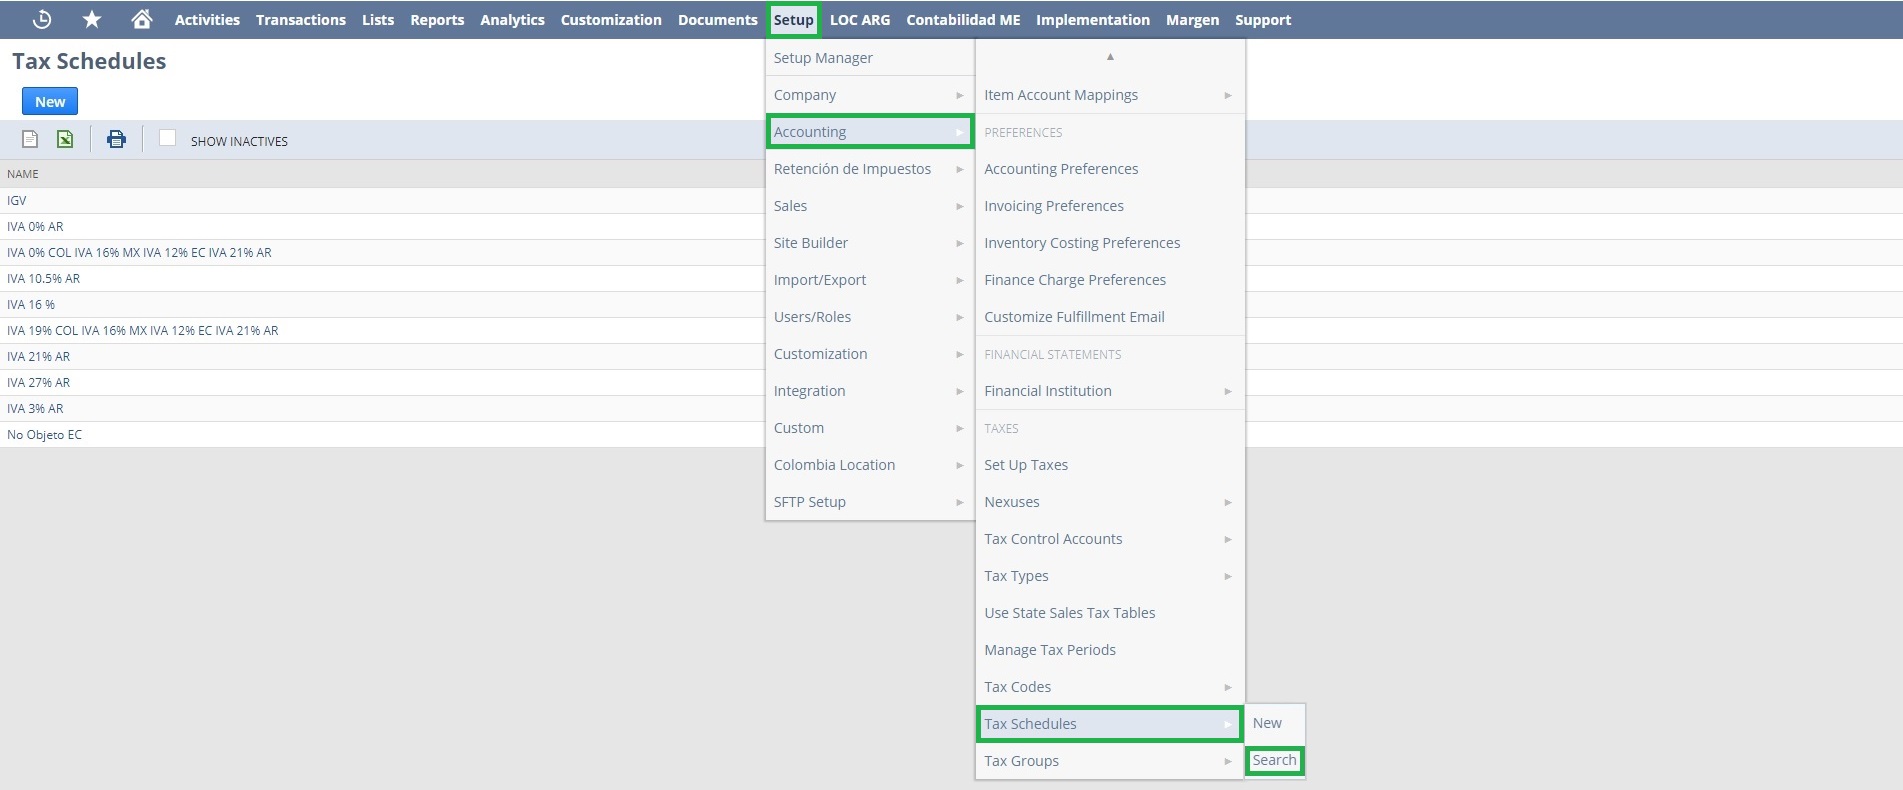
| Non Taxable ID for Products | Product Synchronization | NetSuite Internal ID in order to mark a product as non-taxable |
|
| Taxable ID for products | Product Synchronization | NetSuite Internal ID in order to mark a product as taxable |
|
| Customer Type | Account Synchronization | Defines if the customer will be synced as a "Company" or as an "Individual" | - |
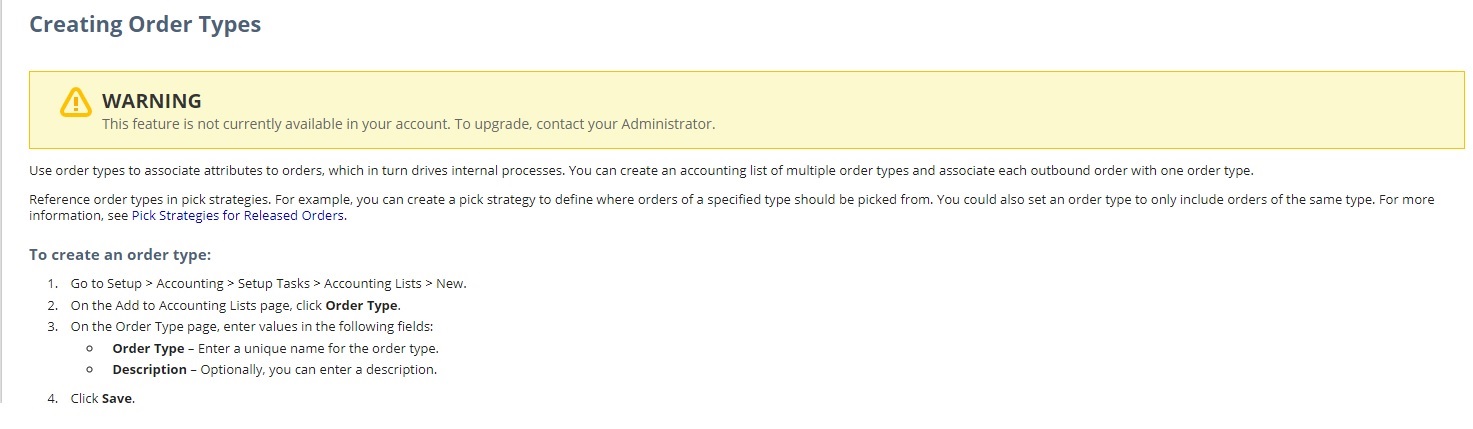
| Invoice Order Type | Invoice Synchronization | The id of the default Order Type for the Invoices |
|
| Invoice Custom Form | Invoice Synchronization | NetSuite InternalID for the custom form that will be used to create the invoice |
|
| Discount Type | Invoice Synchronization | NetSuite Internal ID in order to add a discount as a coupon (used only when an InvoiceItem include one or more discount items) |
|

Authentication
A valid NLAuth header must be set in the corresponding textbox in order for BSS to be able to authenticate itself with Zendesk. In order to be able to set a value on a custom header, api key type is used from OpenApi specification.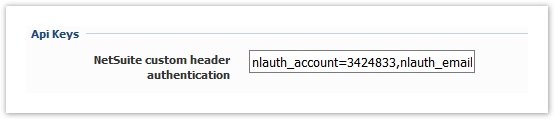
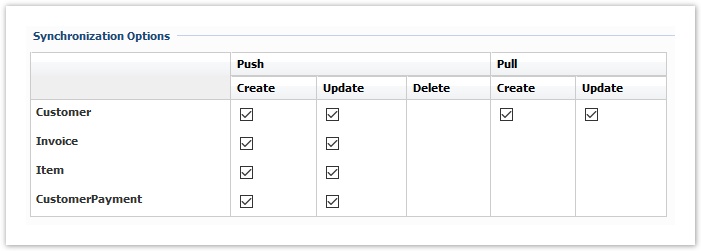
Synchronization Options
This table presents all available operations for the supported entities. In order to be able to sync an entity, the corresponding action must be checked.
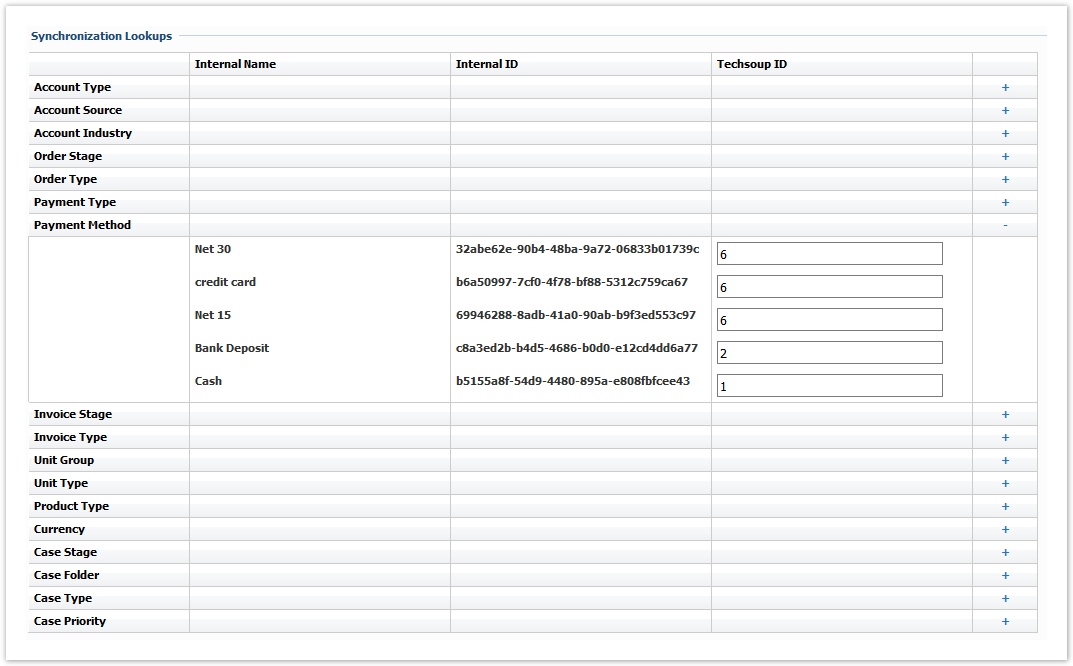
Synchronization Lookups
Lookups enable the mapping between entities that cannot be synced with the Integration Framework. For each of these entities, a table is available with all the available values in BSS. To map any of these entities and values the relevant value from the NetSuite entity must be set, in order to be used during synchronization.
For the NetSuite connector the following lookups must be setup:
| Push | Pull | ||||
|---|---|---|---|---|---|
| Account | Account Type → NetSuite Customer Category Currency → NetSuite Currency | Account Type → Netsuite Customer Category Currency → NetSuite Currency | |||
| Product | Product Type → Netsuite Product class | - | |||
| Invoice | - | - | |||
| Payments | Payment Type → Netsuite Payment class Payment Method → Netsuite Payment method Currency → NetSuite Currency | - | |||
Below is an example of Payment Method lookup between BSS and NetSuite