Windows Server Roles and Features Prerequisites
interworks.cloud Platform | Windows Server Roles and Features Prerequisites |
|---|
This guide will assist you in preparing a Windows Server for the installation of interworks.cloud Platform Components. There are certain Roles and Features of Windows Server that need to be installed before the installation of any interworks.cloud Platform Component. Follow the steps below, in order to install the required Roles and Features.
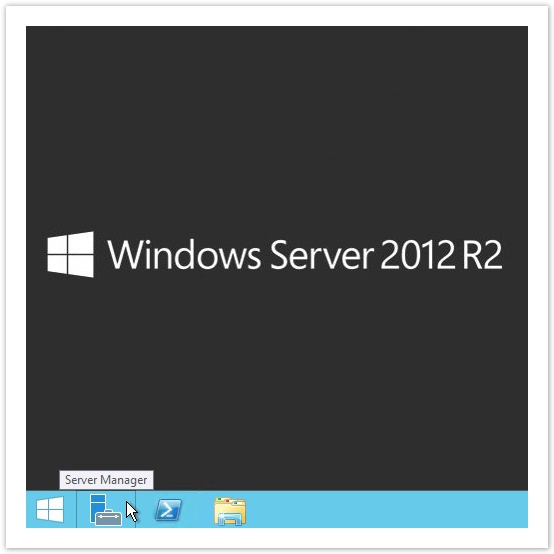
1) Start Windows Server Manager.
Fig 1. Windows Server Taskbar
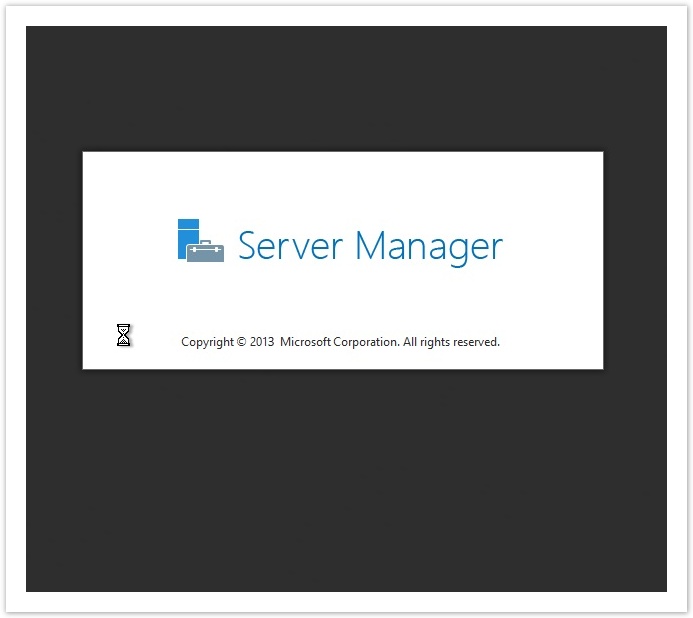
Fig 2. Windows Server Manager is launching
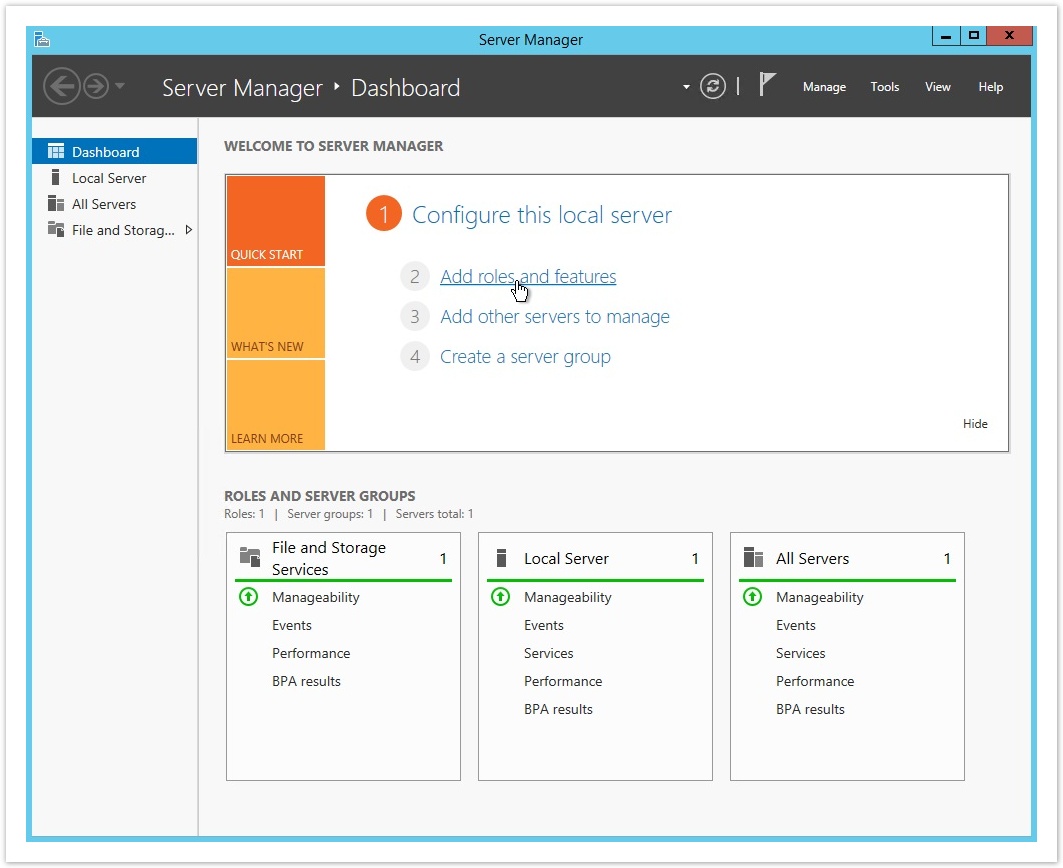
2) In Windows Server Manager welcome page, click on "Add roles and features".
Fig 3. Adding roles and features
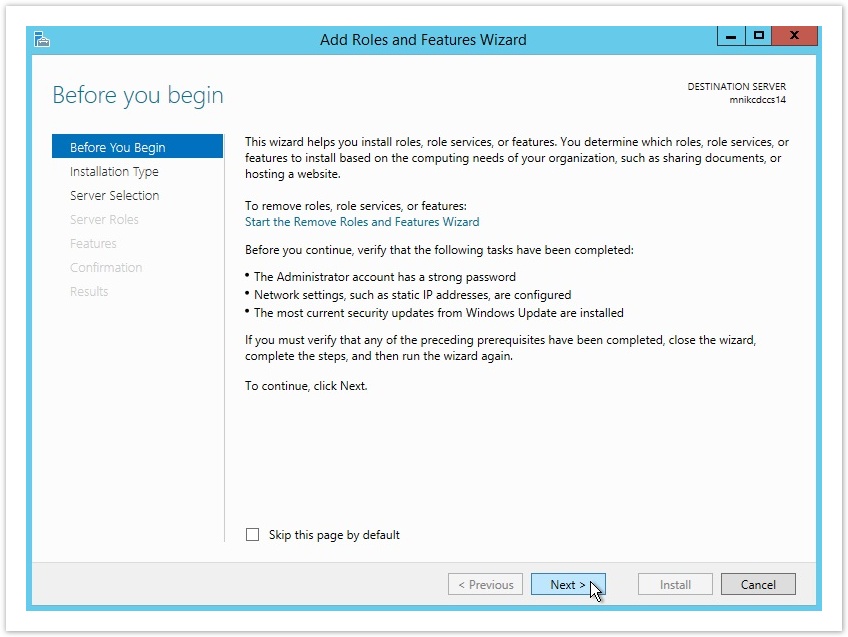
3) Click on Next in the Add Roles and Features Wizard welcome page.
Fig 4. Add Roles and Features Wizard welcome page
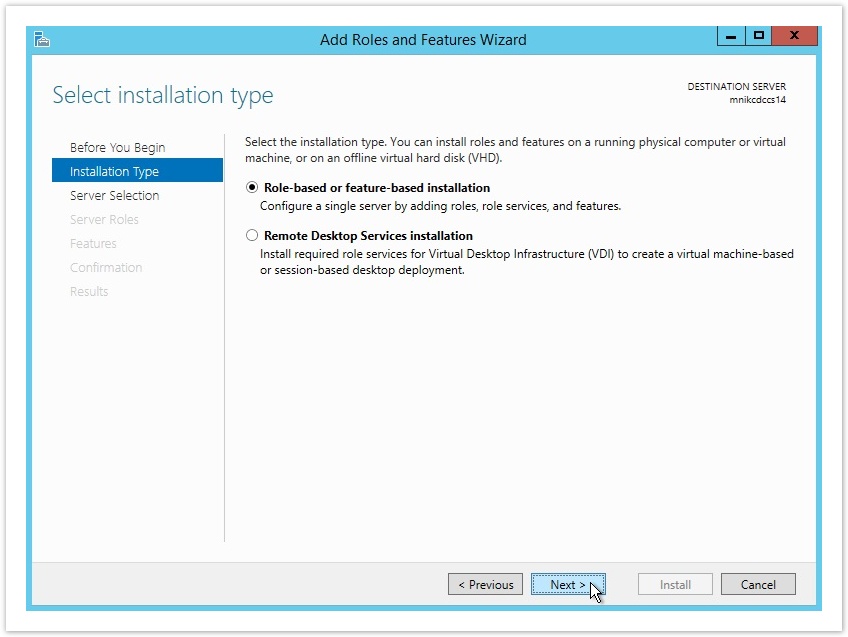
4) In the Installation Type page, select Role-based or feature-based installation and click on Next.
Fig 5. Installation Type page
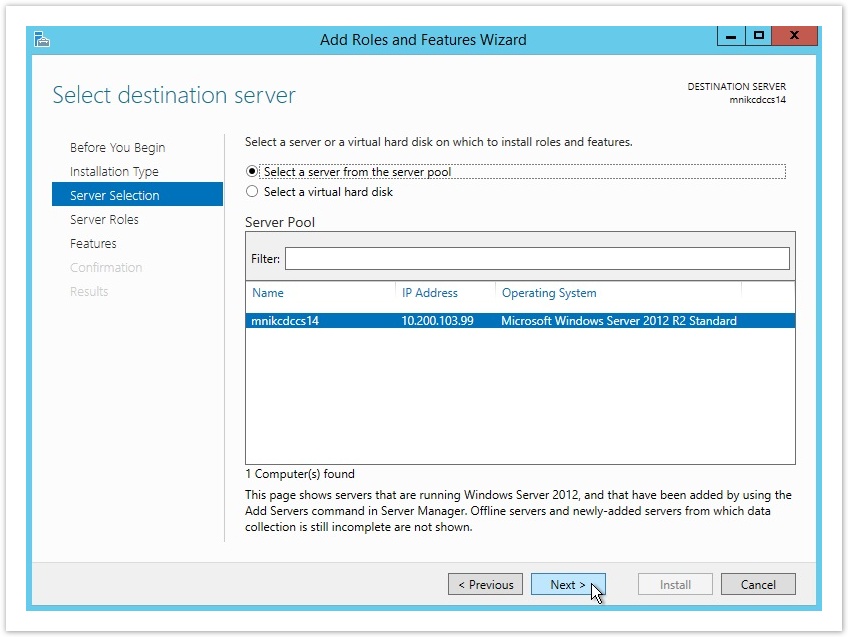
5) In the Server Selection page, select the destination server on which to install roles and features and click on Next.
Fig 6. Server Selection page
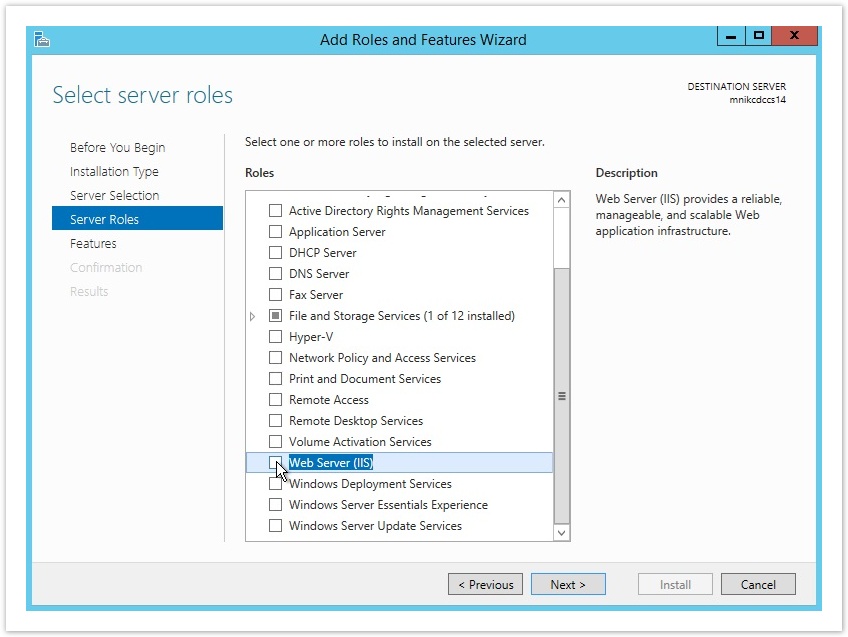
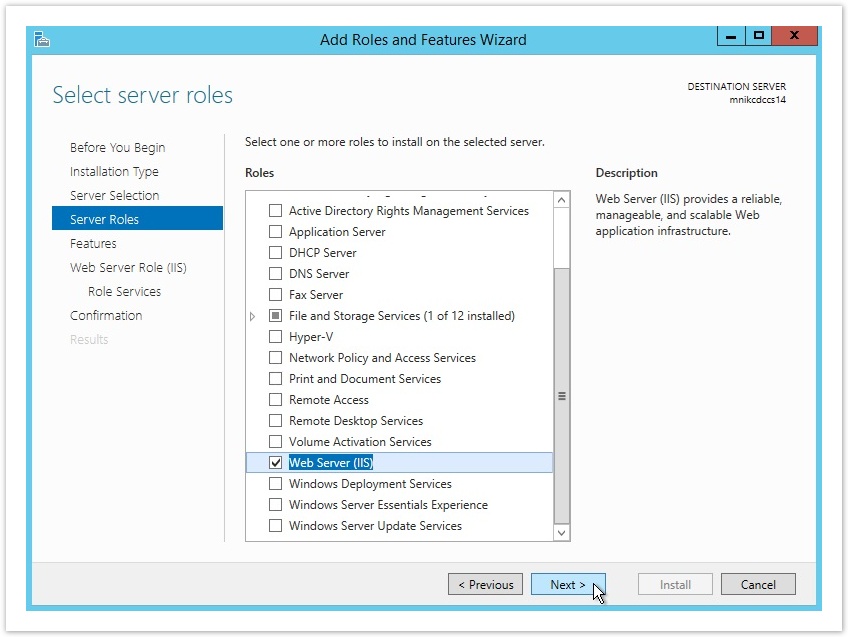
6) In the Server Roles page, select the Web Server (IIS) role.
Fig 7. Selecting to install the Web Server (IIS) role
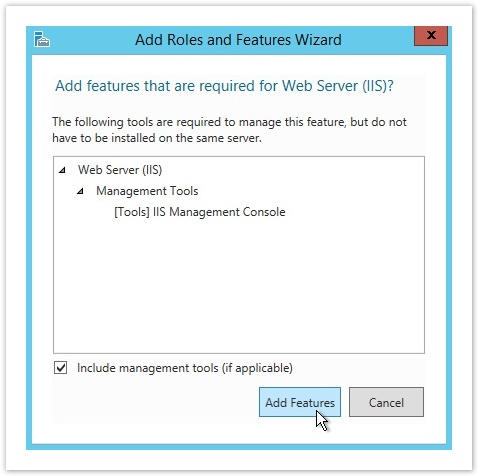
7) In the pop up window, click on Add Features.
Fig 8. Adding features that are required for Web Server (IIS)
8) You will notice that the Web Server (IIS) role is now selected. Click on Next to continue.
Fig 9. Web Server (IIS) role is selected
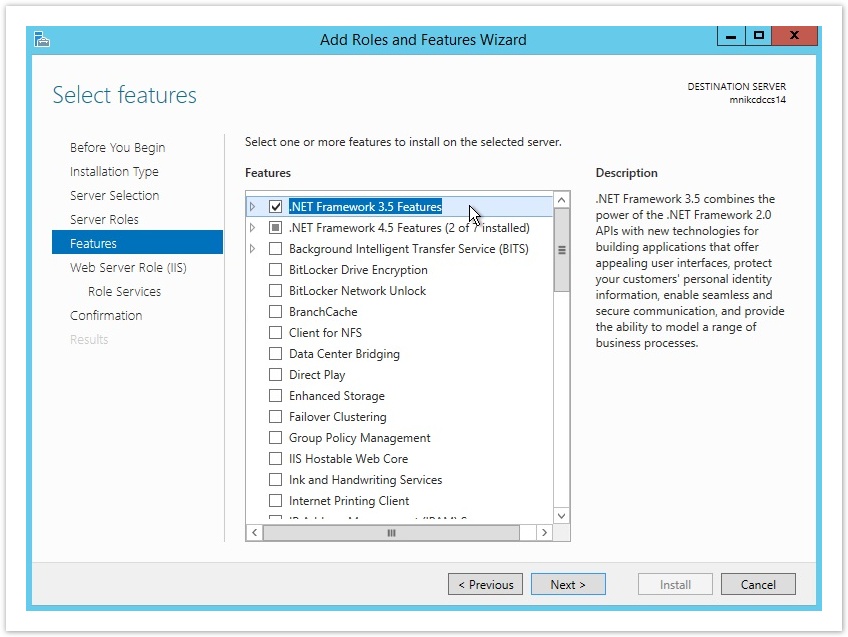
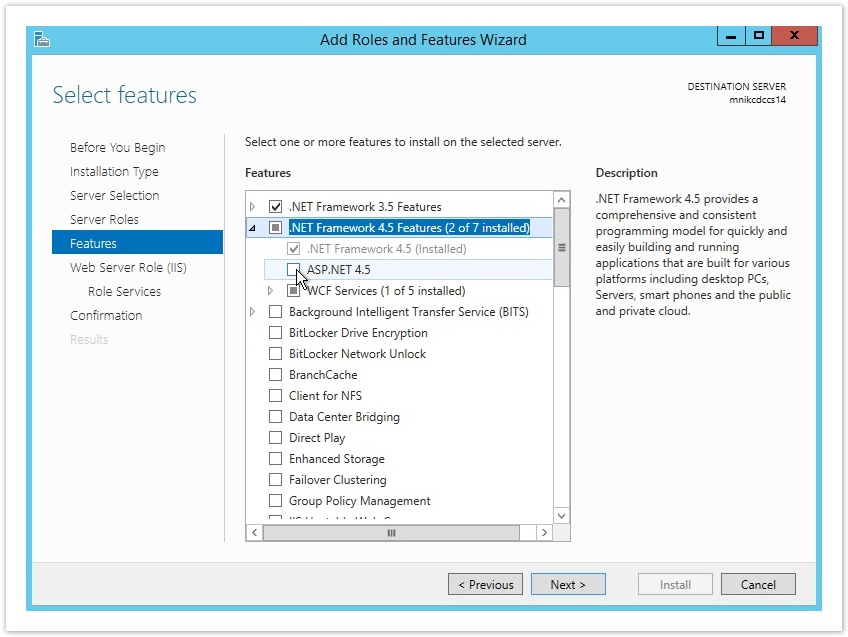
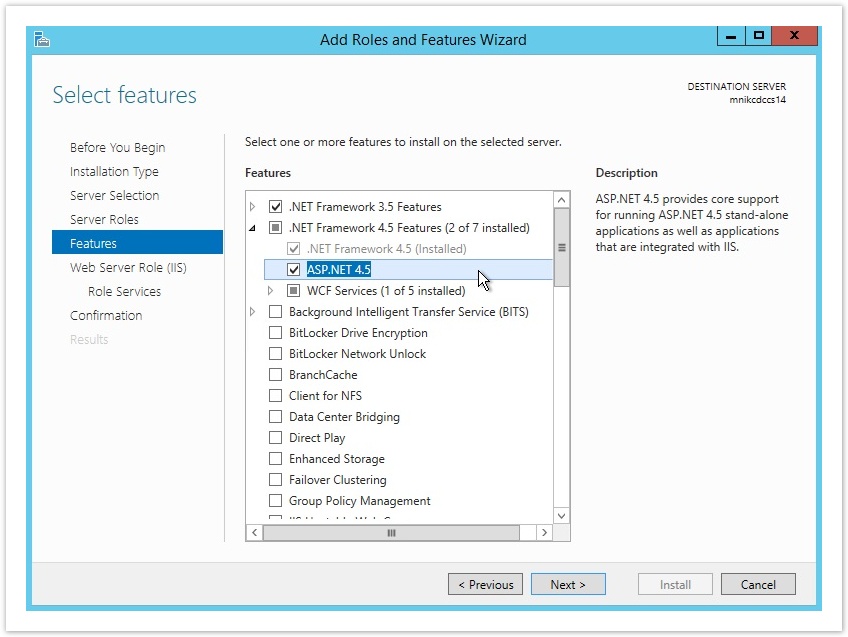
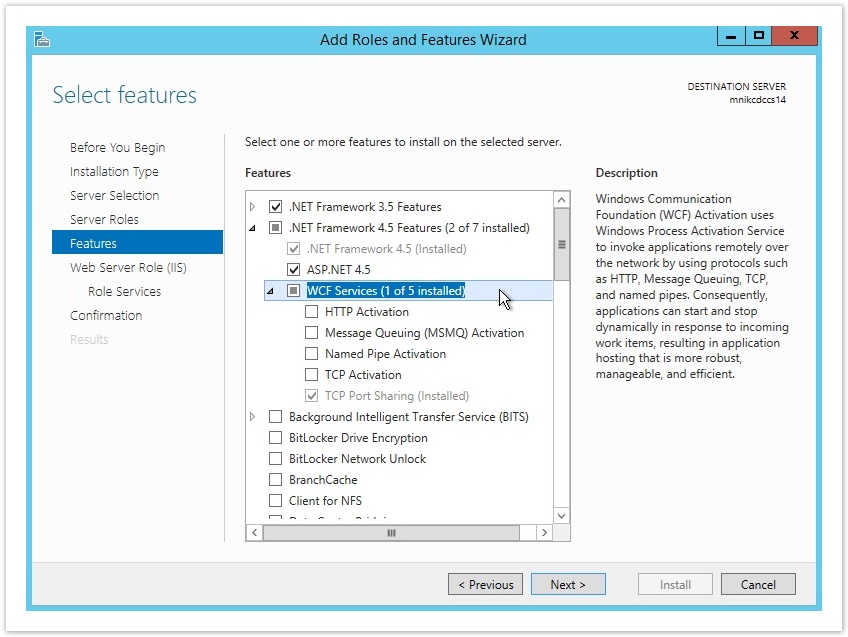
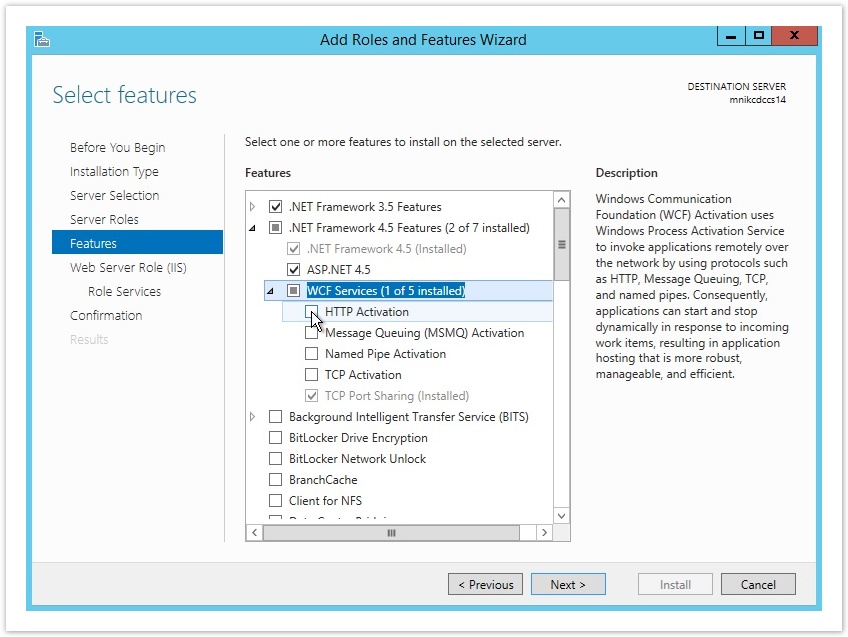
9) In the Features page, select .NET Framework 3.5 Features, expand .NET Framework 4.5 Features, select ASP.NET 4.5, expand WCF Services and select HTTP Activation.
Fig 10. Selecting .NET Framework 3.5 Features
Fig 11. Expanding .NET Framework 4.5 Features
Fig 12. Selecting ASP.NET 4.5 feature
Fig 13. Expanding WCF Services
Fig 14. Selecting HTTP Activation feature
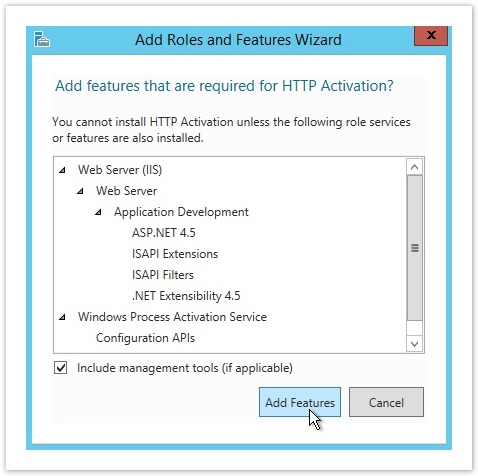
10) In the pop-up window, click on Add Features.
Fig 15. Adding selected features
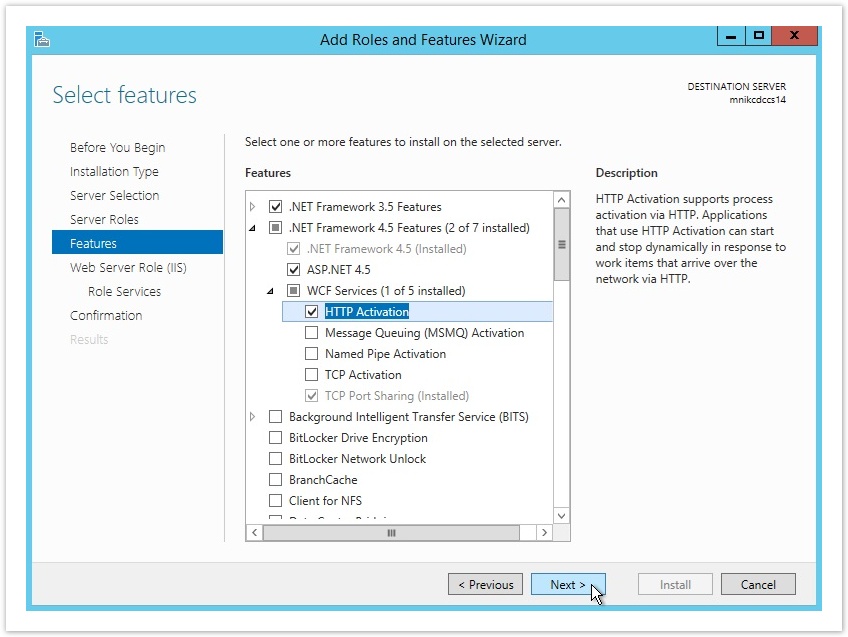
11) Once you have selected the required features, click on Next to continue.
Fig 16. Feature are selected
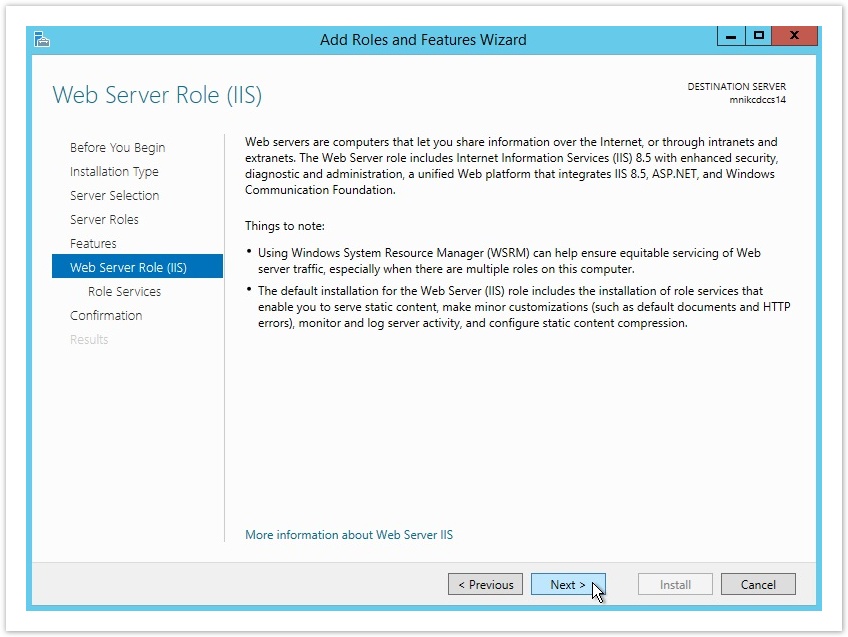
12) In the Web Server Role (IIS) page, click on Next.
Fig 17. Web Server Role (IIS) page
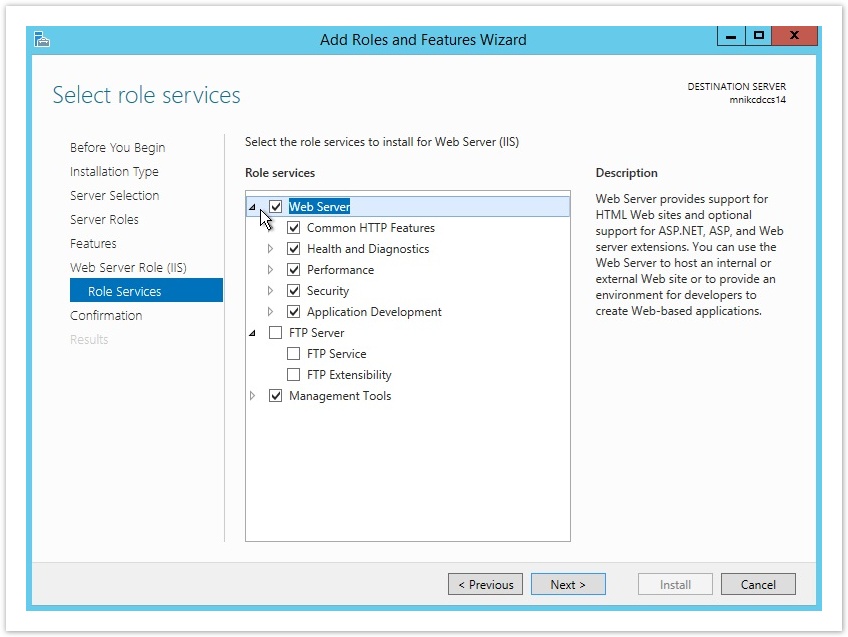
13) In the Role Services page, expand Web Server.
Fig 18. Expanding Web Server
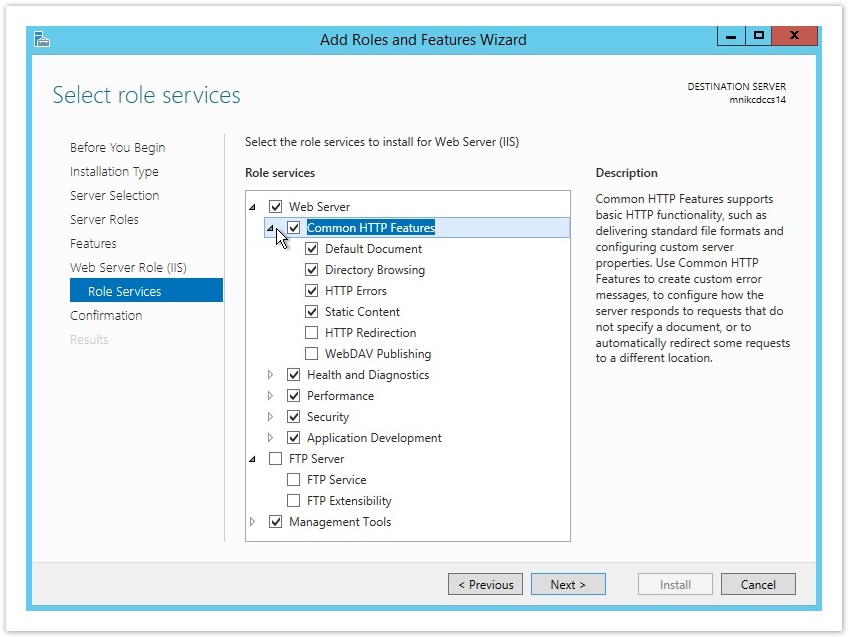
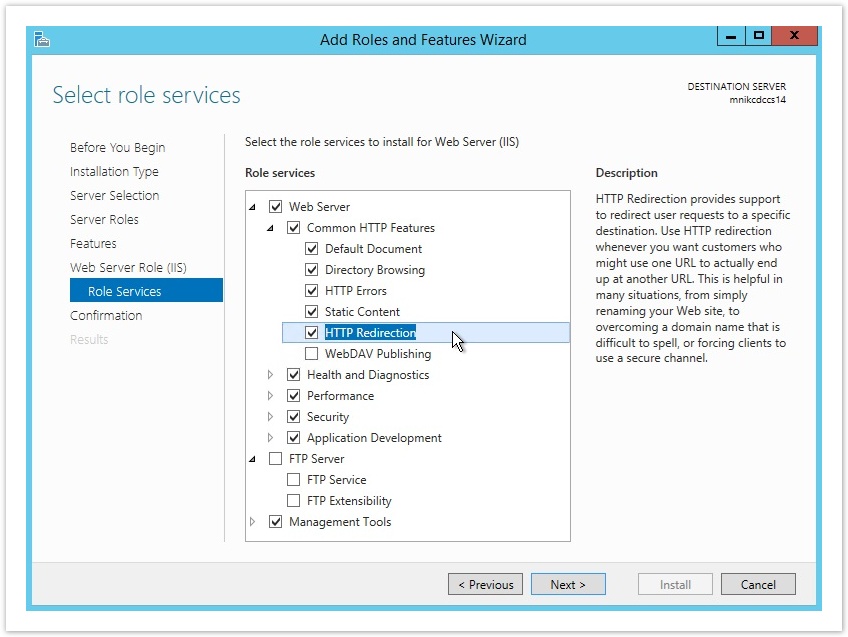
14) Expand Common HTTP Features and select HTTP Redirection.
Fig 19. Expanding Common HTTP Features
Fig 20. Selecting HTTP Redirection
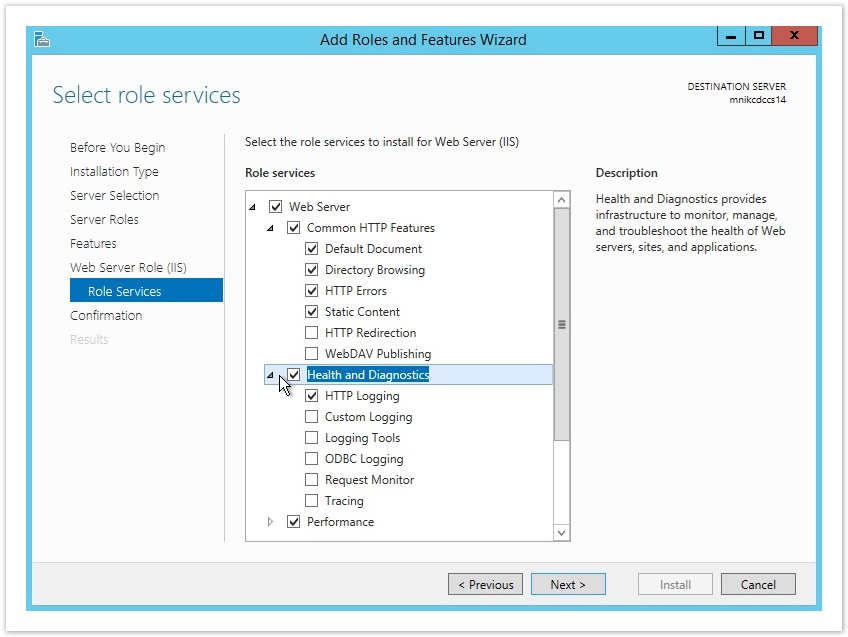
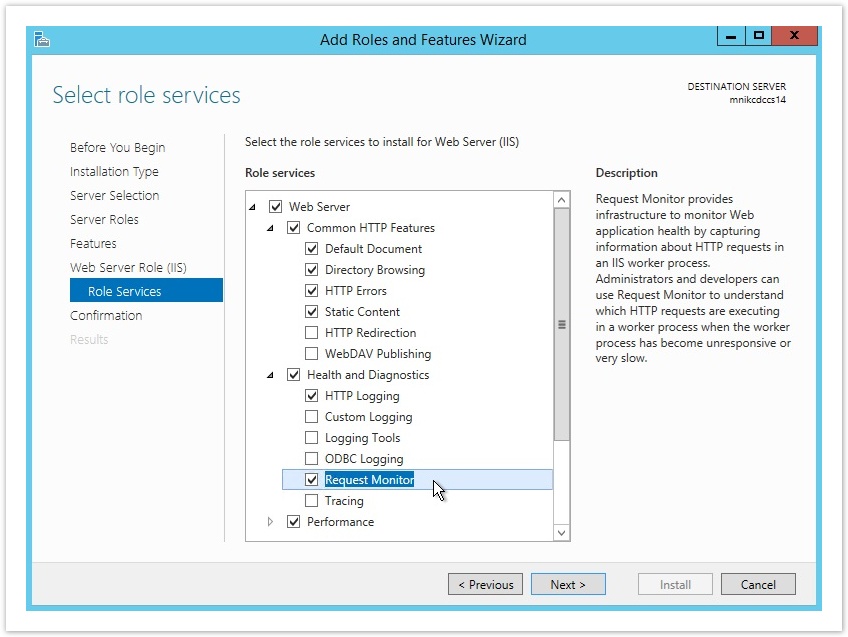
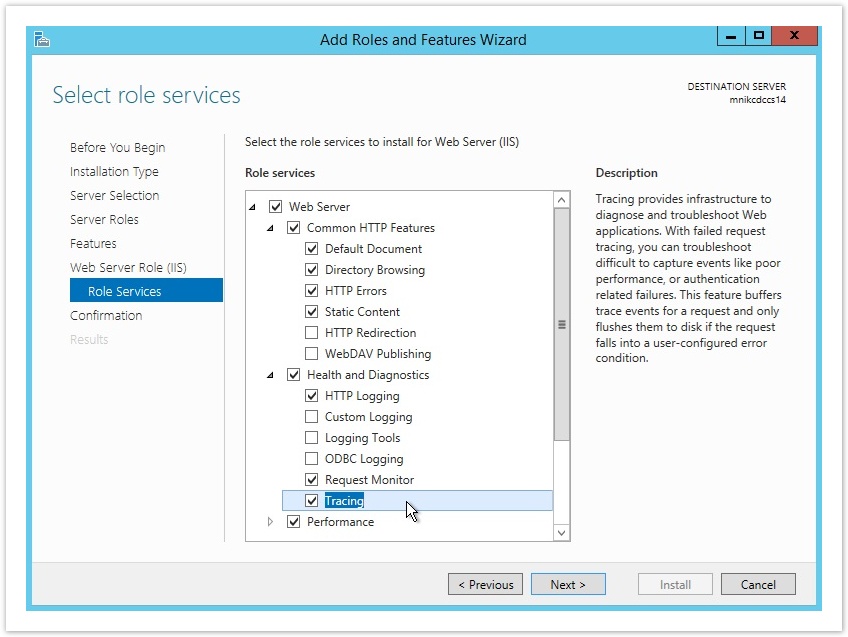
15) Expand Health and Diagnostics and select Request Monitor and Tracing.
Fig 21. Expanding Health and Diagnostics
Fig 22. Selecting Request Monitor
Fig 23. Selecting Tracing
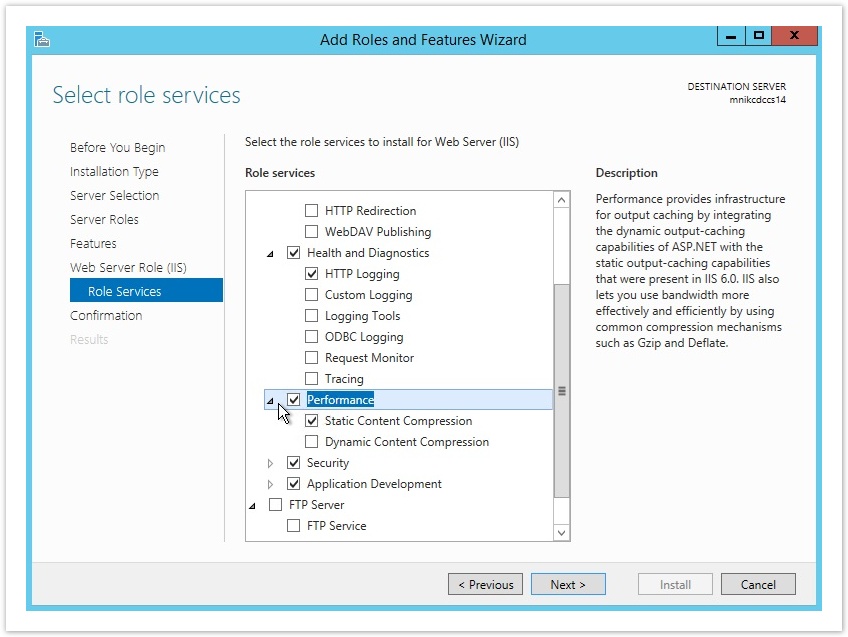
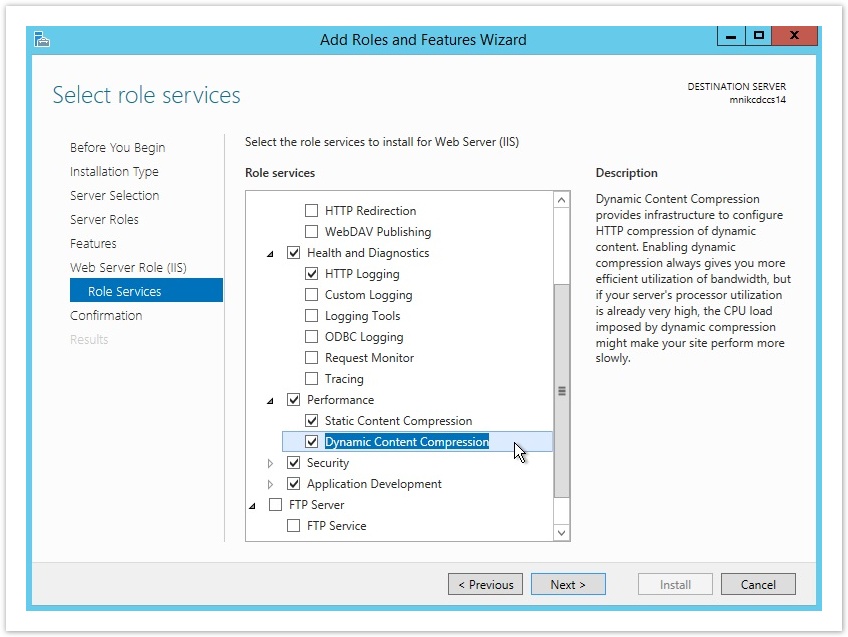
16) Expand Performance and select Dynamic Content Compression.
Fig 24. Expanding Performance
Fig 25. Selecting Dynamic Content Compression
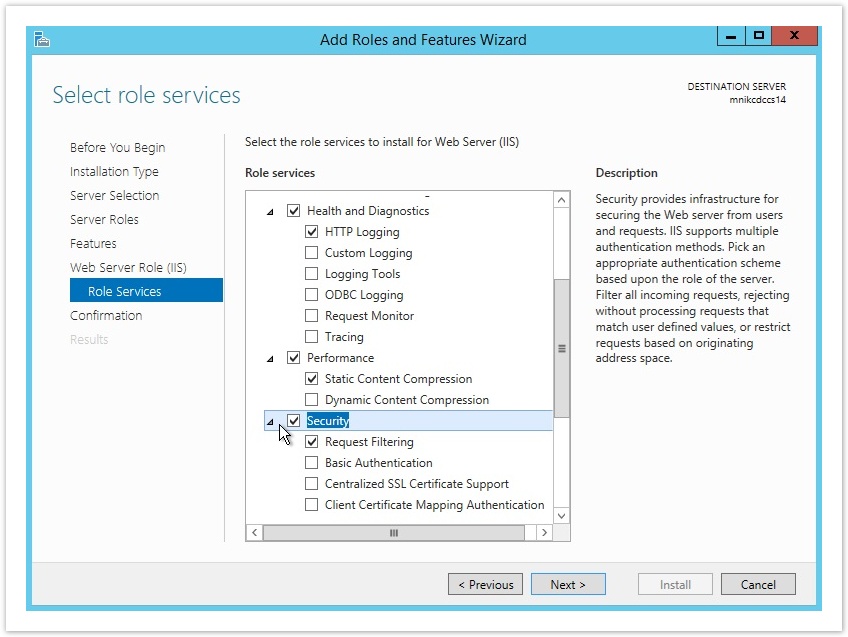
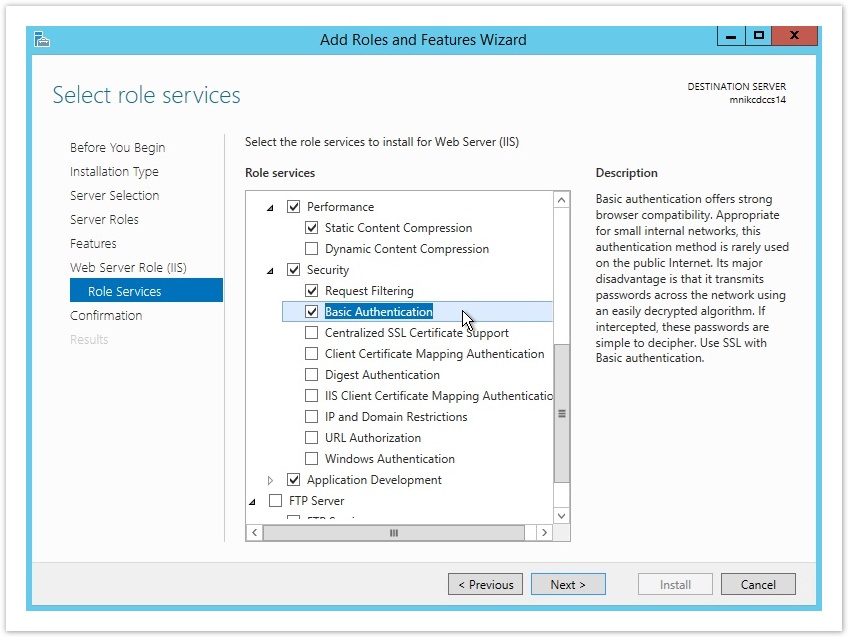
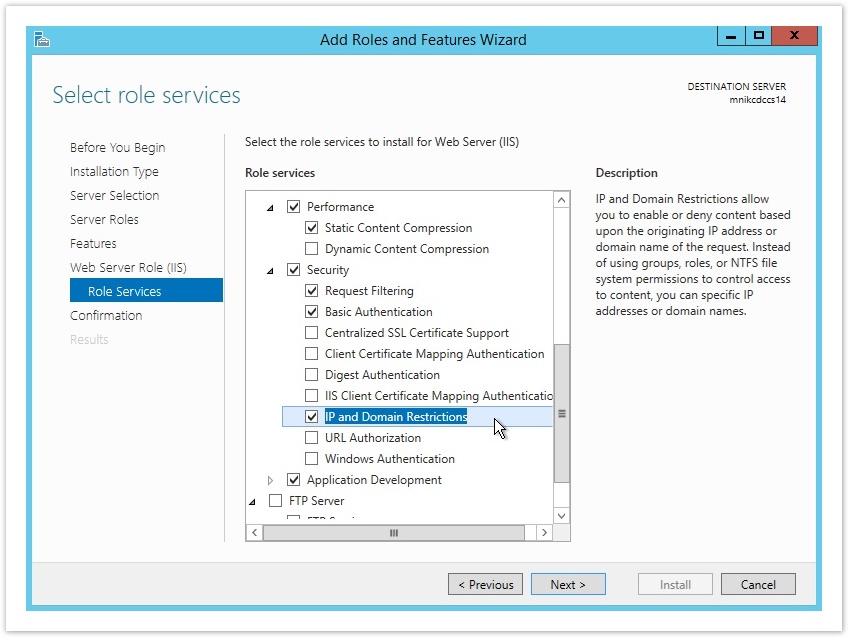
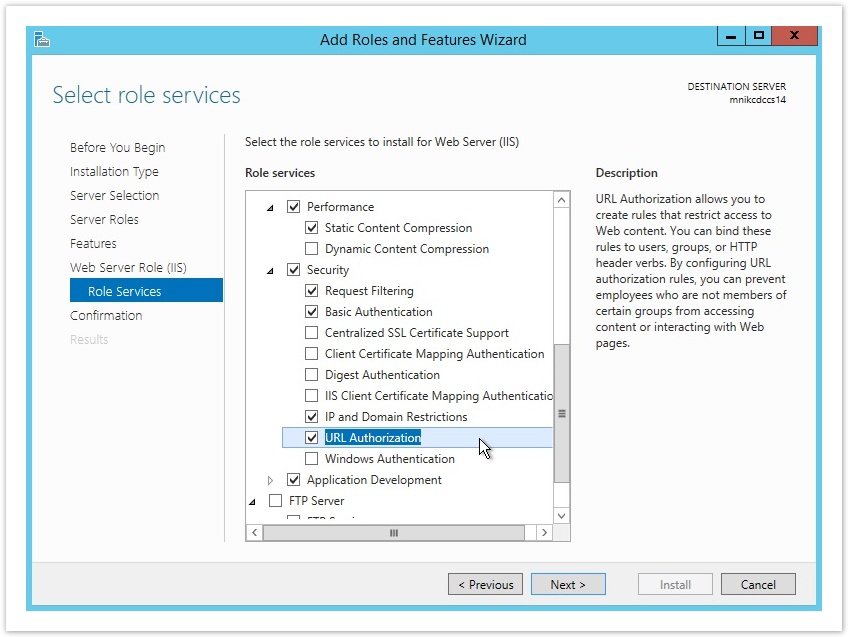
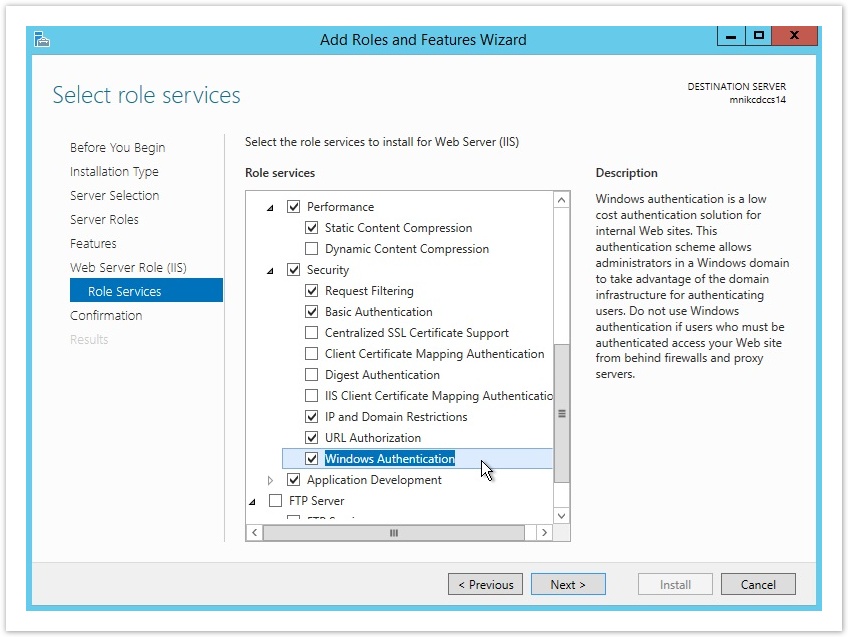
17) Expand Security and select Basic Authentication, IP and Domain Restrictions, URL Authorization and Windows Authentication.
Fig 26. Expanding Security
Fig 27. Selecting Basic Authentication
Fig 28. Selecting IP and Domain Restrictions
Fig 29. Selecting URL Authorization
Fig 30. Selecting Windows Authentication
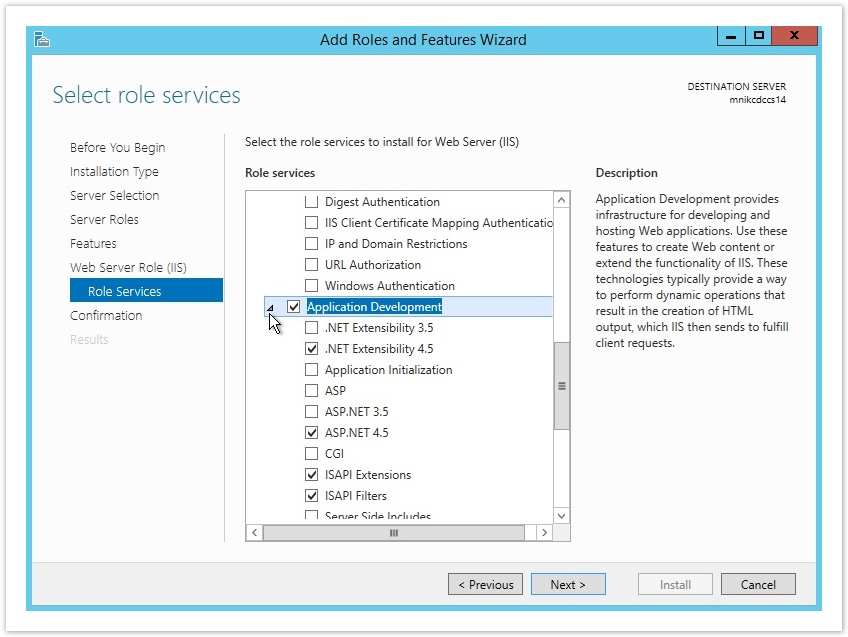
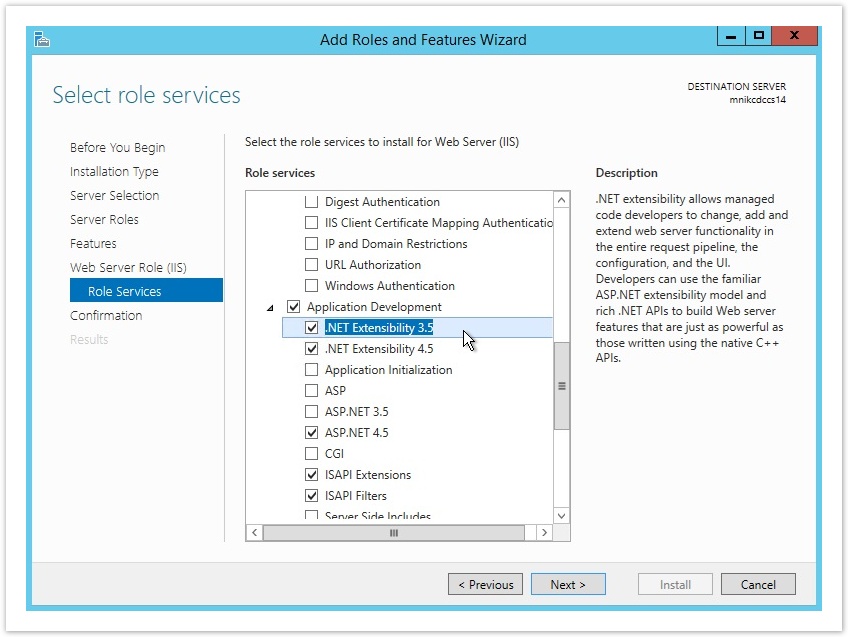
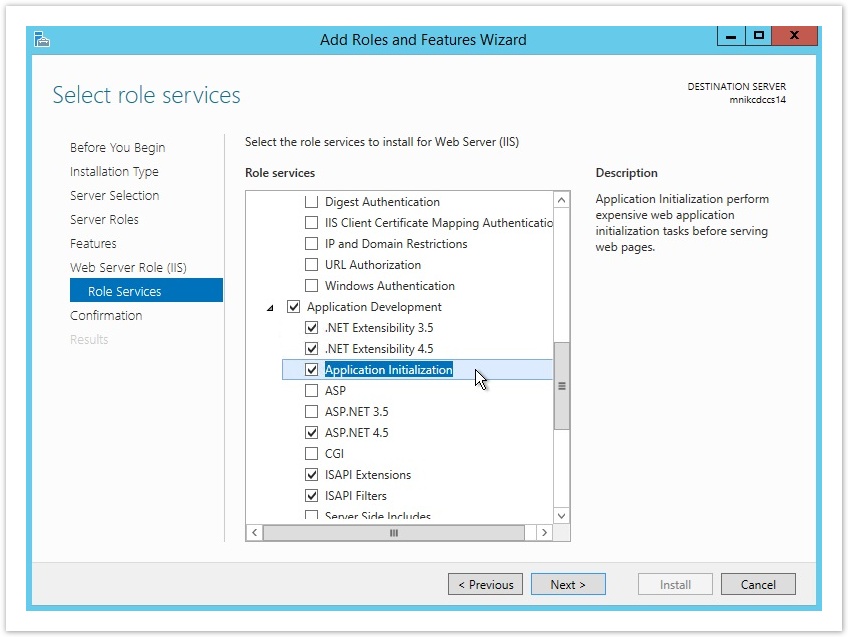
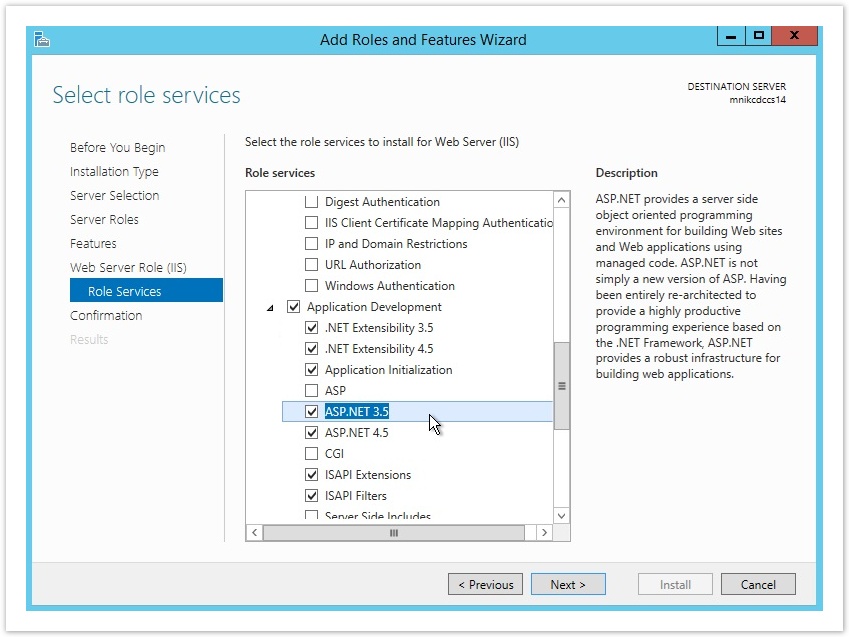
18) Expand Application Development and select .NET extensibility 3.5, Application Initialization and ASP.NET 3.5.
Fig 31. Expanding Application Development
Fig 32. Selecting .NET Extensibility 3.5
Fig 33. Selecting Application Initialization
Fig 34. Selecting ASP.NET 3.5
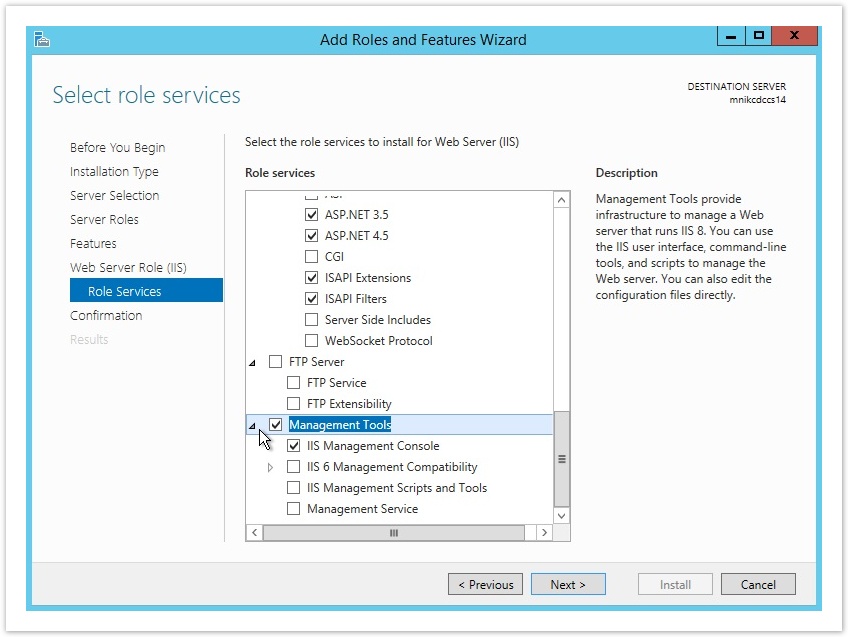
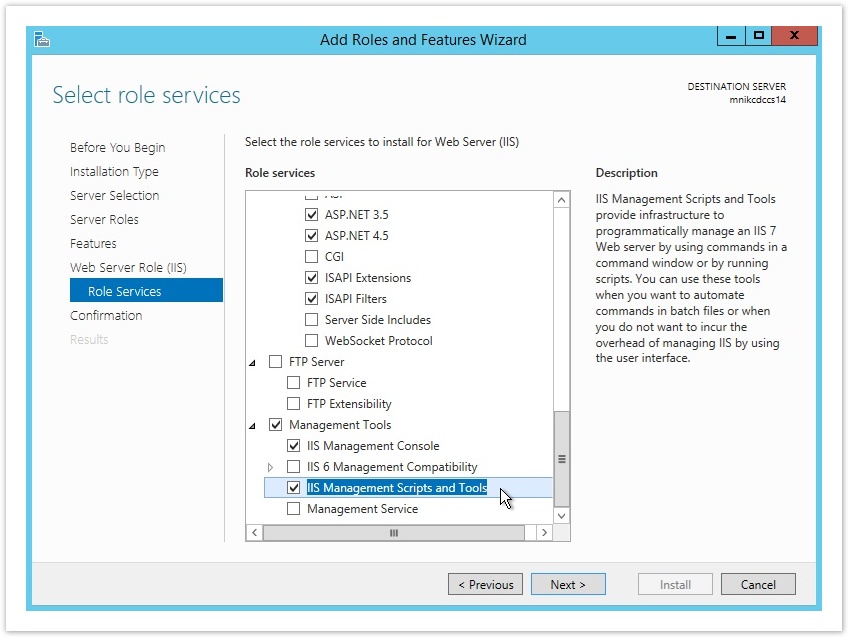
19) Expand Management Tools and select IIS Management Scripts and Tools.
Fig 35. Expanding Management Tools
Fig 36. Selecting IIS Management Scripts and Tools
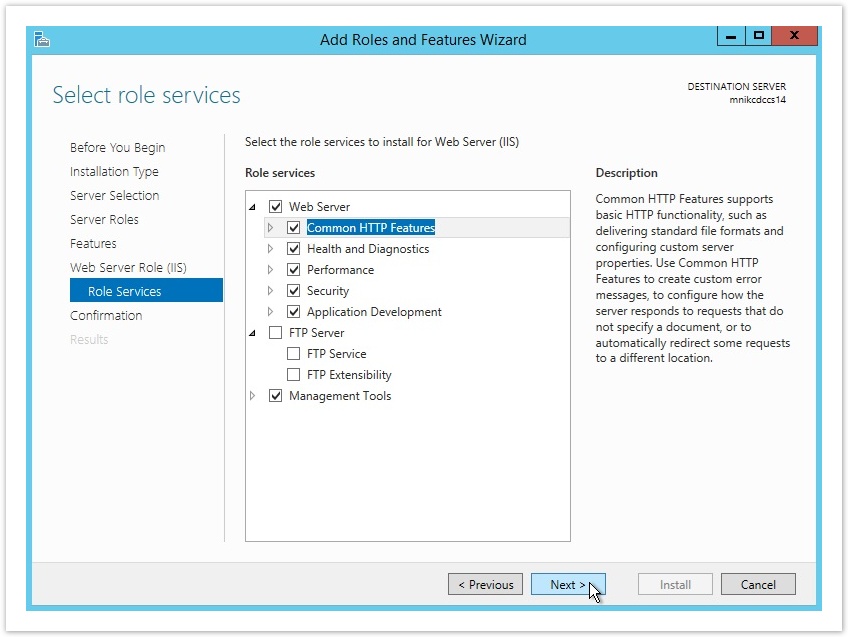
20) Once you have selected the Role Services to install for Web Server (IIS), click on Next to continue.
Fig 37. Role Services are selected
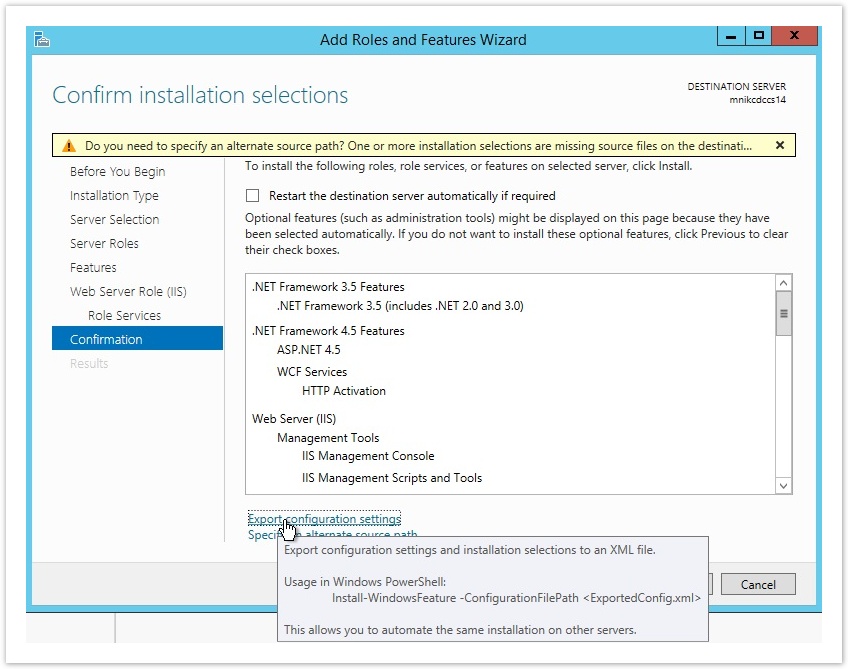
21) Click on Export configuration settings in order to export configuration settings and installation selections to an XML file. You can use this file in order to automate the same installation on other servers via the Windows PowerShell cmdlet:
Install-WindowsFeature -ConfigurationFilePath <ExportedConfig.xml>
Fig 38. Exporting configuration settings
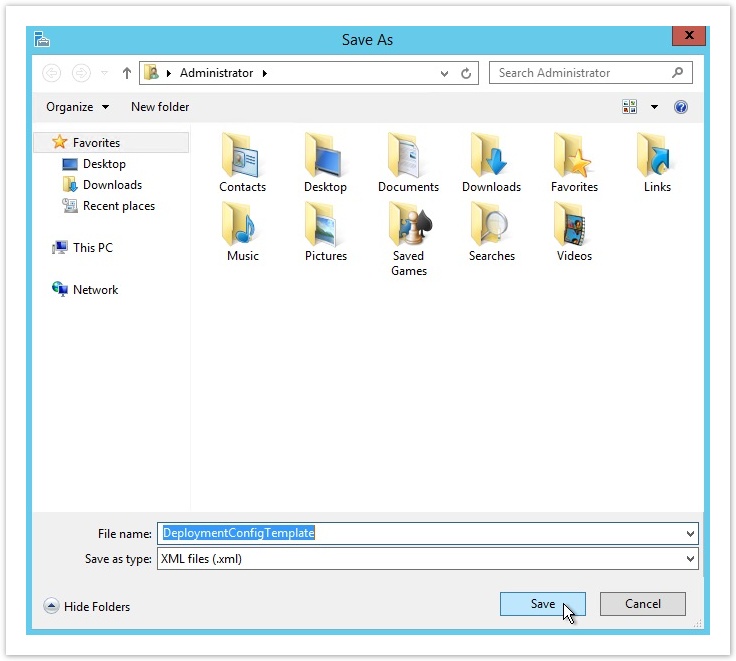
Fig 39. Saving XML file in a preferred destination folder
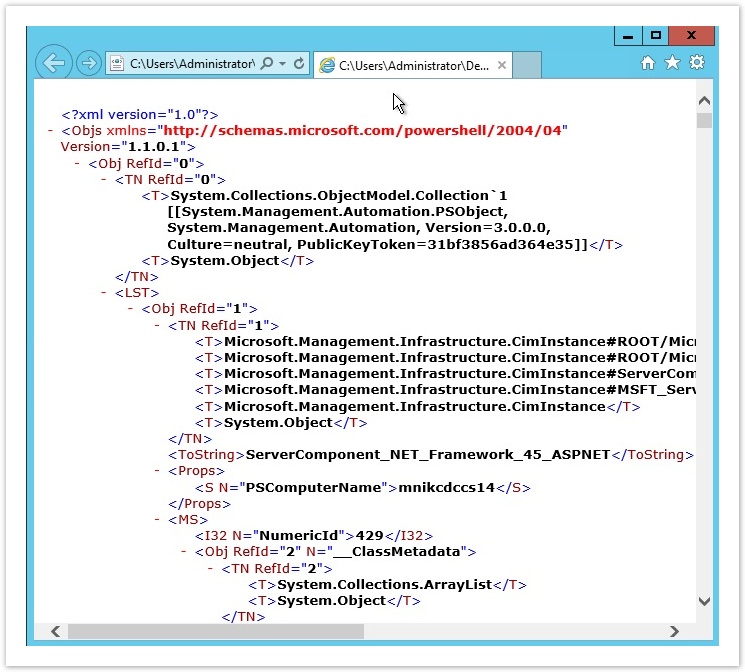
Fig 40. Deployment Configuration Template
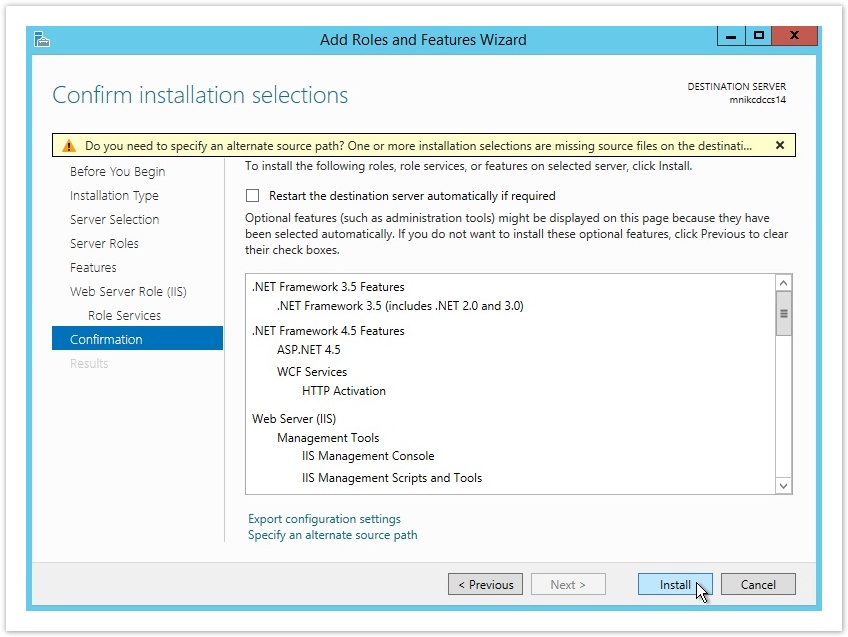
22) In the Confirmation page, click on Install in order to install the roles, role services and features that you selected above.
Fig 41. Confirmation page
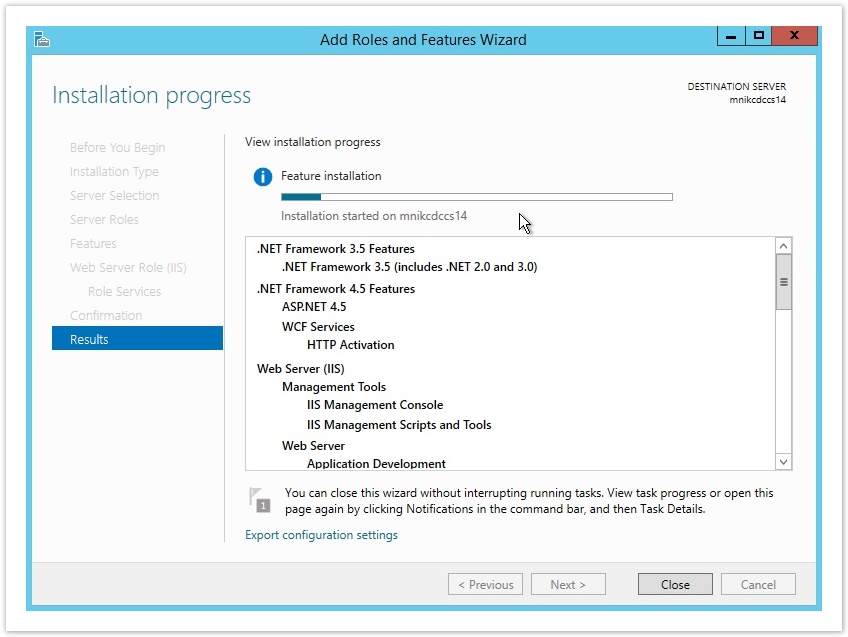
Fig 42. Installation started
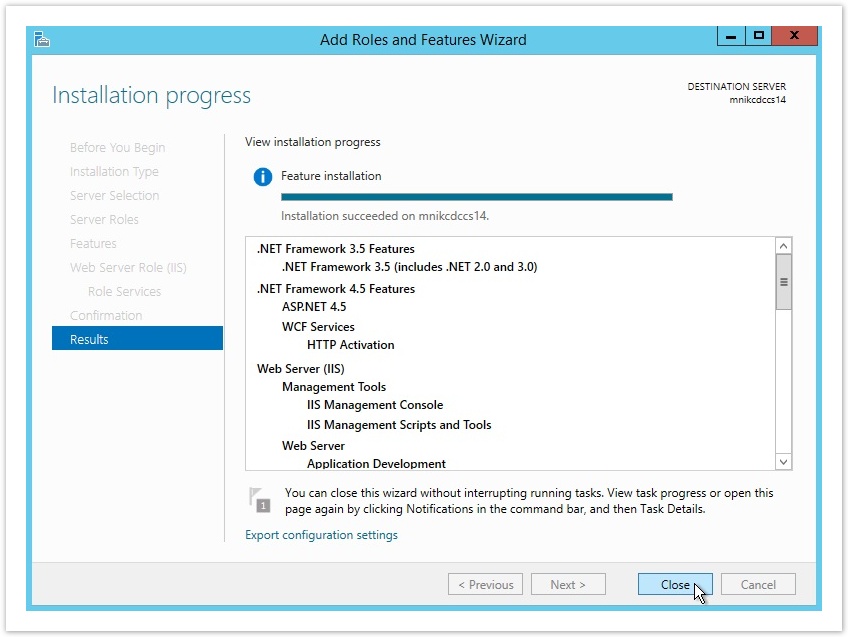
23) Once the installation process is completed, click on Close. You might need to restart your server so that the features are installed properly.
Fig 43. Installation is completed
24) Congratulations! Your server is now prepared for the installation of interworks.cloud Platform Components. Make sure you have also installed Microsoft .Net Framework 4.8 as well as all latest Windows updates and hotfixes
