Ordering an ESD License
The process that follows describes the steps that are needed to order an ESD product for an end-customer.
Ordering from Storefront
Customers or resellers of yours can order an ESD license with the following process.
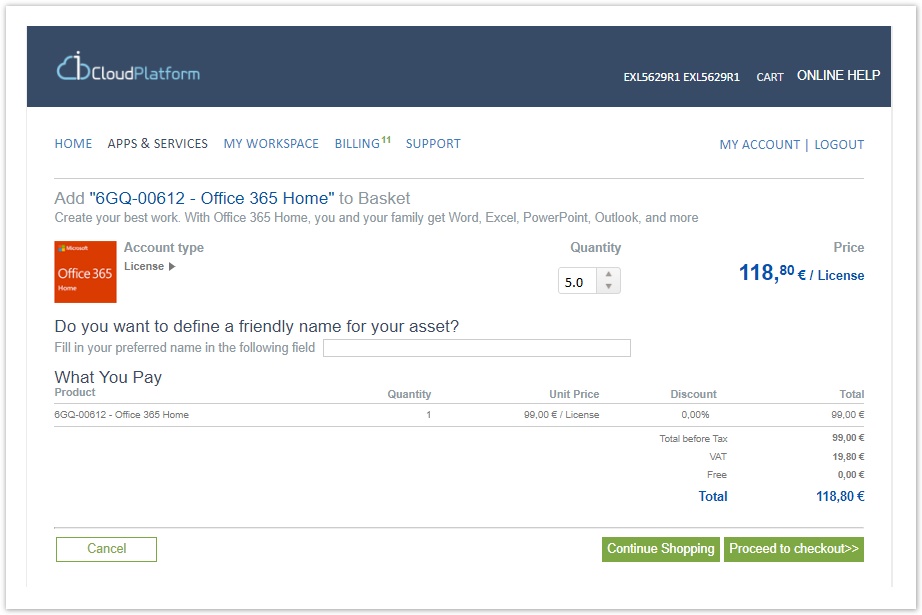
After logging in the Storefront, they can select an ESD product offering and proceed to checkout.
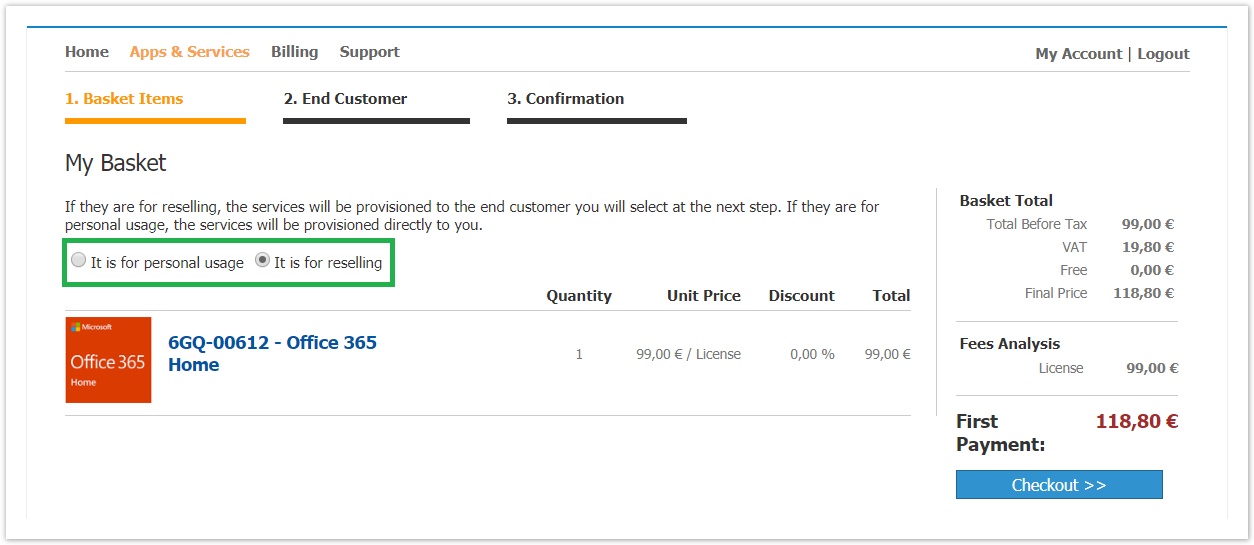
They should select the services that are for reselling, because this process concerns an end-customer.
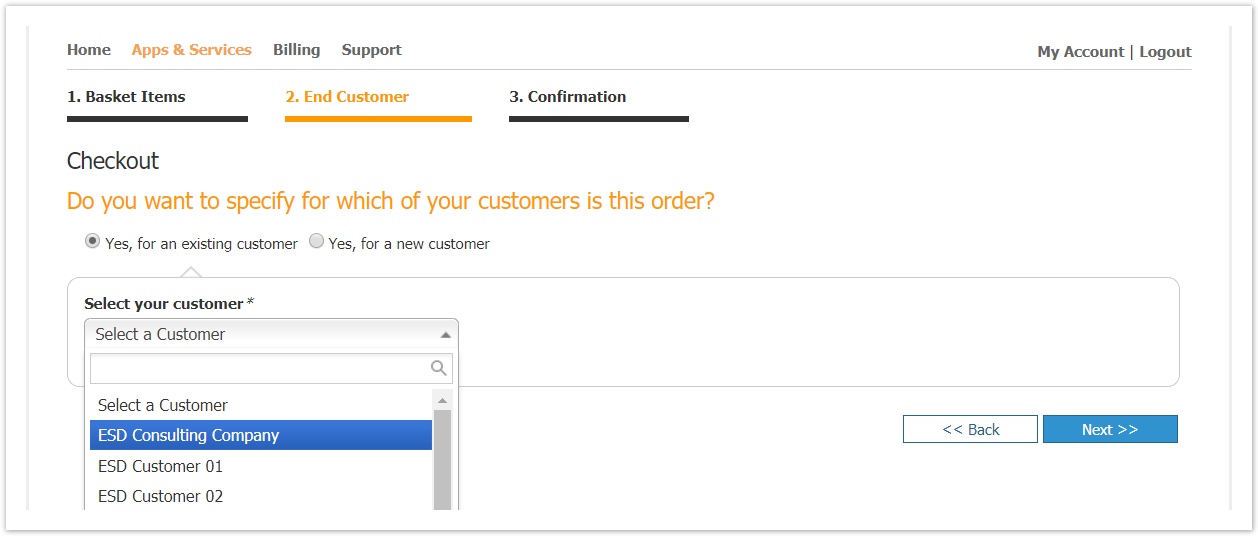
In the next step, they can choose if the order is for an existing customer or a new one:
Existing customers are showcased in a drop-down list for easy selection. Existing customers are also searchable.
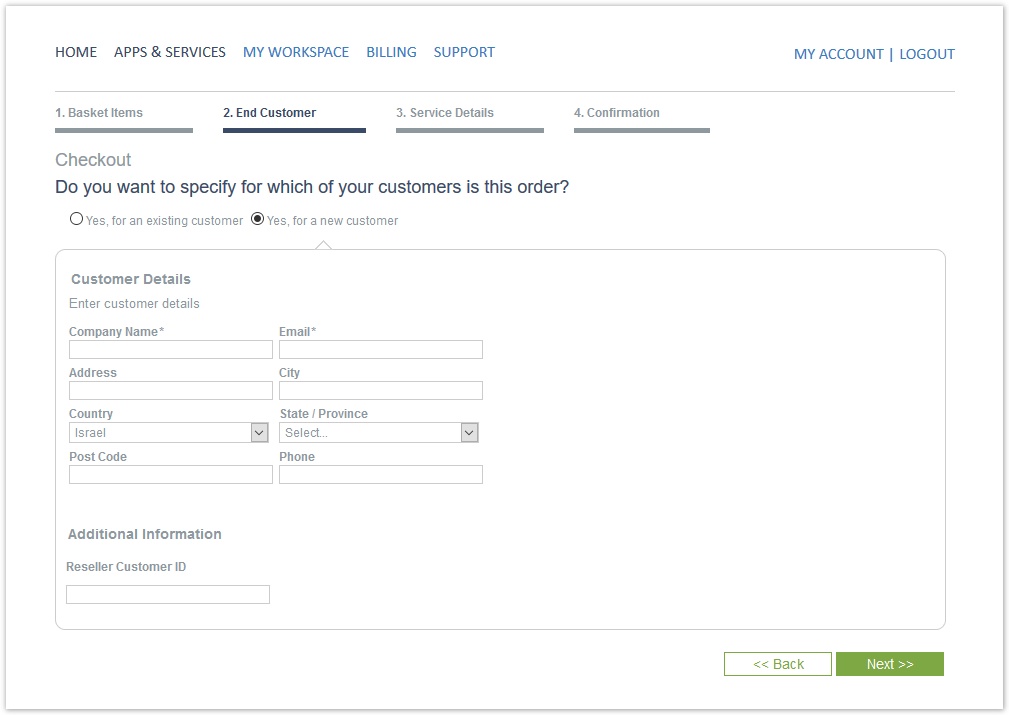
In the case of a new customer, a new section is displayed where they can fill in the respective details.
When the customer or reseller completes the checkout, the following process will be executed:
- A new asset record will be created in BSS for each ESD basket item.
- Microsoft ESD API will be called for the ESD token(s) to be produced.
- The customer will receive an email containing the ESD token and the activation link. This information is also recorded in the corresponding asset record in the BSS portal.
- If the Grouped ESD Notifications feature (mentioned below) is enabled, the customer will receive one email for all licenses ordered.
- If the Grouped ESD Notifications feature (mentioned below) is not enabled, the customer will receive multiple emails, with one email sent for each ESD license ordered.
An invoice will be generated for charging your customer or reseller for the ESD license(s). The ESD licenses are perpetual and are charged once. If the customer purchased more than one license, he will receive one invoice with multiple items, one per ESD license.
Invoicing from Microsoft to Distributors
Since there is a Purchase Order Number (PO Number) associated with a BSS order for ESD assets, this means that all items included within the same order share the same PO number and as a result, items sharing the same PO number will appear on a single invoice that is dispatched from Microsoft to the Distributors.
How the customer receives the ESD token and activation link
When the customer purchases a new ESD license, the system notification "Welcome Microsoft ESD customer" is dispatched. This notification can be found in BSS > Setup > Administration > Notifications > Customer Notifications > Assets.
This email includes all the details for the customer to activate and download the ESD license he has purchased. It includes the ESD token (i.e. the license key) and the download link. This email will be dispatched to the email address the customer entered in Service details details step plus to any other email defined in the notification TO field. In case your resellers provide managed services to your customers, you can fill in their email in the notification at the respective field so they receive this email.
A typical email looks like that: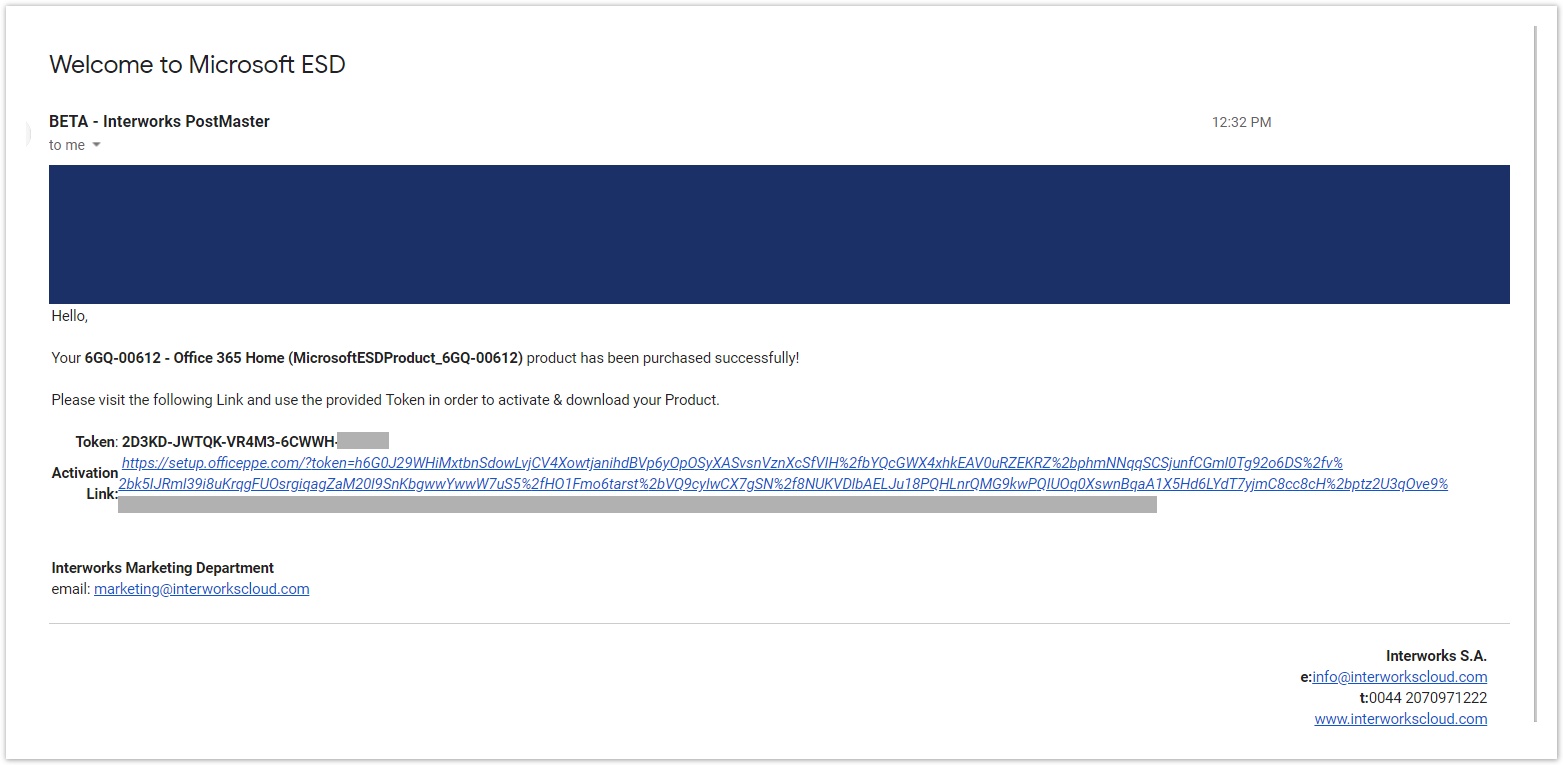
Grouping ESD Notifications
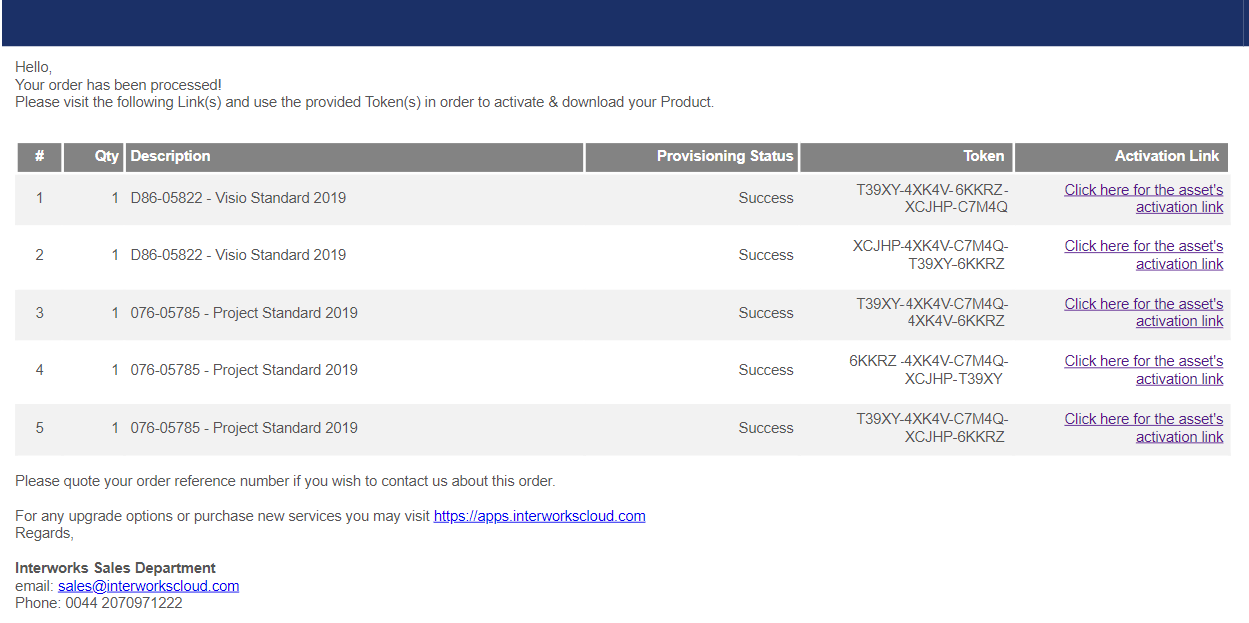
ESD email notifications can be grouped (even for organizations with parallel provisioning enabled), meaning that notifications can be received per order of ESD license(s). e.g. If a customer's order contains 10 ESD licenses, they will now receive one notification email instead of ten.
This feature is activated on demand by creating a support ticket to our respective team.
The figure below shows an email notification containing 10 licenses:
Ordering from Cloud BSS
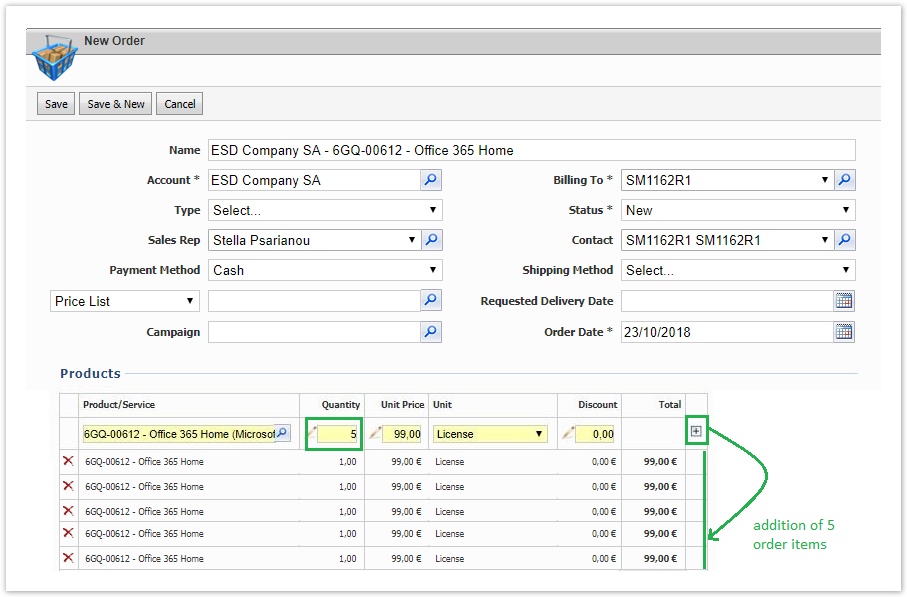
Here's how that works when your Account Manager needs to make an order for ESD offerings on Cloud BSS on behalf of his customer. The ordering process is similar to the rest of the products. The only difference is that we you purchase more than one ESD license, the system will create an order item per license with quantity = 1.
Upon creation of the order, the account manager must execute the order for the system to:
- A new asset record will be created in BSS for each ESD order item.
- Microsoft ESD API will be called for the ESD token(s) to be produced
- The customer will receive an email containing the ESD token and the activation link. This information is also recorded in the corresponding asset record in the BSS portal.
- If the Grouped ESD Notifications feature (mentioned above) is enabled, the customer will receive one email for all licenses ordered.
- If the Grouped ESD Notifications feature (mentioned above) is not enabled, the customer will receive multiple emails, with one email sent for each ESD license ordered.
An invoice will be generated for charging your customer or reseller for the ESD license(s). The ESD licenses are perpetual and are charged once. If the customer purchased more than one license, he will receive one invoice with multiple items, one per ESD license.
Invoicing from Microsoft to Distributors
Since there is a Purchase Order Number (PO Number) associated with a BSS order for ESD assets, this means that all items included within the same order share the same PO number and as a result, items sharing the same PO number will appear on a single invoice that is dispatched from Microsoft to the Distributors.
Synchronizing your Reseller and End Customer
Make sure that the account and the reseller have already been synchronized with the Microsoft ESD service.
If the account is not synchronized:
- Go to the Account
- Provisioning Sync Status
- Locate "Microsoft ESD"
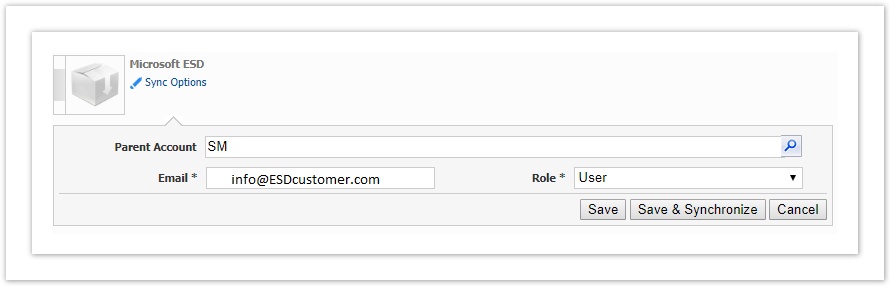
- Select Sync Options and complete all the required fields:
- If you try to sync a reseller:
- Parent Account must be blank
- Email has to be your Microsoft's contact email
- Role has to be Reseller
- Click Save & Synchronize

- If you try to sync an end customer:
- Parent Account must be blank
- Email has to be your Microsoft's contact email
- Role has to be User
- Click Save & Synchronize
- If you try to sync a reseller:
- In the pop-up window select OK
You can proceed by learning how you can manage the ESD service