interworks.cloud BSS Installation
- Former user (Deleted)
- George Sartzetakis
- Athanasia Kourti
interworks.cloud platform - interworks.cloud BSS | Deployment Guide |
|---|
Table of Contents
1. Document Revision History
For information about all the latest releases and updates on interworks.cloud platform, please visit Release Notes
2. About this Guide
This guide provides instructions that will assist you to install interworks.cloud platform.
This guide will be regularly updated as soon as new information becomes available.
2.1. Document Conventions
Throughout this guide, specific fonts and styles are used to identify user input, computer code, and user interface elements. The following table lists conventions used in this guide.
Convention | Usage |
|---|---|
Bold text, Arial font | Used for information you type as well as path names, file names, menus, and command keys. |
Italic text, Arial font | Used for column names, field names, window names. |
Bold, italic text enclosed in angle brackets | Used for variables you replace with the appropriate information. |
Normal text, Courier New | Used for system messages, screen text, and code examples. |
Table 1. Document conventions
3. Overview of interworks.cloud BSS Components
See also:
interworks.cloud platform is bridging the gap between OSS and BSS providing a turn key solution for the management of Cloud Services. It incorporates a CRM, Billing and Storefront functionality and a provisioning system. It can also be integrated with multiple provisioning platforms. This tight integration provides a unique user experience and facilitates all business operations.This chapter gives us an overview of interworks.cloud BSS related components and services. interworks.cloud BSS has the following components:
interworks.cloud BSS Database
interworks.cloud BSS Database, is the BSS component that is responsible for the creation of the database that stores all the data of interworks.cloud BSS and Storefront applications.
interworks.cloud BSS Application
interworks.cloud BSS Application is the basic application that manages the complex procedure of billing cloud services while supporting the whole sales cycle of an organization.
interworks.cloud BSS Storefront
interworks.cloud storefront is an application which allows End customers and resellers to browse a product catalogue, place an order, request a service upgrade and submit support tickets.
interworks.cloud BSS Administration
interworks.cloud BSS Administration is the application that allows the administrator to manage interworks.cloud BSS installations, to specify System Settings and manage, create or delete Organizations inside an interworks.cloud BSS installation.
4. Preparing for the Installation
See also:
This chapter explains how to prepare a hosting environment for the interworks.cloud BSS installation.
4.1. General Server Requirements
To install the interworks.cloud BSS you need to obtain the following servers:
- A Microsoft SQL server (or cluster of Microsoft SQL servers)
- A BSS Application server
Each of these servers must meet the general minimum requirements shown in the following table:
CPU: Pentium® class 1.5 GHz or faster Memory: At least 2 GB of RAM Hard disk space: At least 500 MB for interworks.cloud Cloud BSS Application and at least 200 MB for interworks.cloud BSS Database (plus any additional space that is required for OS Files, Logs, etc.) | At least one network adapter At least one static IP address | OS: Windows Server 2019 or Windows Server 2022 Microsoft .Net Framework 3.5/4.8 |
Hardware | Networking | Software |
|---|
Table 2. General server requirements
Any edition of the operating systems listed above is supported. Both 32-bit and 64-bit are supported. Before installation the operating system should be up to date with latest updates. Before deploying interworks.cloud BSS, follow the guide below in order to properly prepare your Windows Server Infrastructure:
For IIS 7.x installations only, it is required that you manually insert the following MIME type into the root list of supported MIME types on the server (extension: .json , MIME type: application/json ). This operation can be performed via the IIS MMC snap-in or by typing the following command at an elevated command prompt: appcmd set config /section:staticContent /+"[fileExtension=' .json',mimeType=' application/json ']"
A SQL Server is also required in order to host the internal interworks.cloud BSS Databases. interworks.cloud BSS Databases can be installed on any of the following versions of SQL Server:
- SQL Server 2022 Standard edition or higher (https://learn.microsoft.com/en-us/sql/sql-server/install/hardware-and-software-requirements-for-installing-sql-server-2022?view=sql-server-ver16)
- Next to each SQL Server version, a Microsoft's link is provided, with the minimum hardware and software that is required for the installation of each version of the SQL Server.
- interworks.cloud BSS Database Installer requires that SQL Server is configured to support Mixed mode Authentication.
- The "Full - Text Search" feature should be installed and running on SQL Server.
interworks.cloud BSS can be installed on a dedicated physical server or on a virtual machine, hosted in one of the following virtualization environments:
- Microsoft Hyper-V
- Virtuozzo
- VMware
- XenServer
- KVM
In order to access the web site pages of interworks.cloud BSS Components, all the latest versions of Web Browsers (Internet Explorer, Mozilla Firefox, Google Chrome, Opera, Safari etc.) are supported.
Important:
- You must have administrative access (either local or via Remote Desktop) to manage the servers, including permissions to install and configure server software, check system logs, etc.
- All servers must be connected to the Internet so that you are able to install and configure interworks.cloud BSS.
- Ensure that Web Server and ASP.NET Role Services are installed, as well as .NET Framework features.
4.2. Network, Domain and Storage Requirements
All network parameters will have to be configured correctly prior to installing interworks.cloud BSS. These parameters include:
- Static IP addresses for all servers
- Network Subnet masks
- Default gateway
- DNS settings
Firewall settings or access lists must be configured to allow communication between servers that will host interworks.cloud Platform components. The following table lists the necessary access rules and port requirements for the interconnection of all interworks.cloud Platform components.
Please note that ports not marked in bold denote default application ports that may actually differ, depending on each specific application installation settings.
Source | Destination | Protocol | Dest. Port | Notes | |
|---|---|---|---|---|---|
BSS Storefront Administration | BSS Database | TCP | 1433 | SQL Access to BSS Databases | |
Storefront Administration | BSS | TCP | 80, 443, 9011 | Web Access to BSS API end-points and BSS Web Services | |
BSS Storefront BSS Database Administration | downloads.interworkscloud.net | TCP | 80, 443 | Web Access to interworks.cloud platform Installer | |
Administration | licensing.interworkscloud.net | TCP | 80,443 | Web Access to interworks.cloud platform License Server | |
BSS Administration | download.finance.yahoo.com | TCP | 80, 443 | Web Access to Yahoo! Finance API | |
Table 3. Access Rules and Port Requirements
interworks.cloud platform uses a central storage repository to store various data and information, such as:
- E-mail attachments
- Uploaded files
- System reports
- Application log files
- Notification templates
- Product images
Important: The storage location is designated during the installation of the BSS and Storefront web applications. Please keep in mind that all BSS, Storefront and Administration servers must have concurrent access to this location. If the interworks.cloud platform components are not installed on the same server, this configuration can be accomplished using one of the following methods:
- Separate volumes (LUNs) per server and configuration of File Replication (using native Windows FRS/DFS replication service or 3rd party replication software) to synchronize data between the different volumes (LUNs). All systems should have the same path to the storage data (e.g.: D:\CloudPlatform\Data)
- A Clustered File System so that all servers have concurrent read/write access to the same common volume (LUN)
- A shared folder residing in a remote file server, NAS device or File server cluster. To use a shared network folder for data storage you must meet the following requirements:
- All participating servers (BSS, Storefront and Administration Web Application servers) must be members of an Active Directory domain.
- The web application pool, which is created during the installation, under the root BSS and StoreFront Web Application sites in IIS, must be manually configured to run under a domain account that has read/write access to the shared folder and that is a member of the local IIS_IUSRS windows group.
- The Data storage location which is entered during the installation, must be a valid UNC path (e.g.: \\FileSrv01\BSSData). Also, you can modify this setting after the installation via the BSS Administration Web Application page. Mapped network drives are currently not supported. NTFS permissions (read,write) must be granted to the domain account on that folder, in addition to the shared folder permissions as described in the previous requirement.
5. Installing interworks.cloud BSS
See also:
This chapter explains how to install interworks.cloud BSS.
5.1. interworks.cloud platform Installer
interworks.cloud platform Installer is the application responsible for installing and upgrading interworks.cloud platform components. interworks.cloud platform Installer's main function is to connect to interworks.cloud platform update server in order to retrieve the latest installation packages for every available component and initiate the installation package in order to install or upgrade a specific component. In addition, the interworks.cloud platform Installer can be used to change basic configuration settings of all installed components on a server.
In order to install interworks.cloud BSS you must first install interworks.cloud platform Installer on the server.
1) In order to install any interworks.cloud BSS component you must first install interworks.cloud platform Installer on the server. You can download interworks.cloud platform Installer installation package at the following URL:

Fig 1. Downloading interworks.cloud platform Installer
Note: interworks.cloud platform Installer needs to be installed on every server that will host at least one interworks.cloud BSS component.
2) Once the download is completed, run the interworks.cloud platform Installer installation package to install the application on the server.

Fig 2. Running interworks.cloud platform Installer

Fig 3. interworks.cloud platform Installer Welcome page

Fig 4. Selecting Installation Folder

Fig 5. Confirming Installation

Fig 6. interworks.cloud platform Installer has been successfully installed
3) Once the interworks.cloud platform Installer installation is completed, double click on Cloud Platform Installer shortcut on the server desktop to launch the installer.

Fig 7. Launching the Cloud Platform Installer
4) Click on View Available Components.

Fig 8. Viewing OSS Available Components
5.2. Installing interworks.cloud BSS Database
- The interworks.cloud BSS Database component must be installed on the Microsoft SQL server. It is necessary to start the installation process with the interworks.cloud BSS Database component since the existence of the database is a prerequisite for the installation of the other three components.
- The BSS Database Time Zone will be used as a base reference point for all date/time related operations of all the interworks.cloud BSS Components. Therefore, for the rest of the BSS Components it is strongly recommended that you select the same Time Zone as the one that is defined in BSS Database server, at operating system level.
5) In order to install interworks.cloud BSS Database launch interworks.cloud platform Installer, click on the View Available Components button and then click on the Install button next to BSS Database component.

Fig 9. Installing Cloud BSS Database
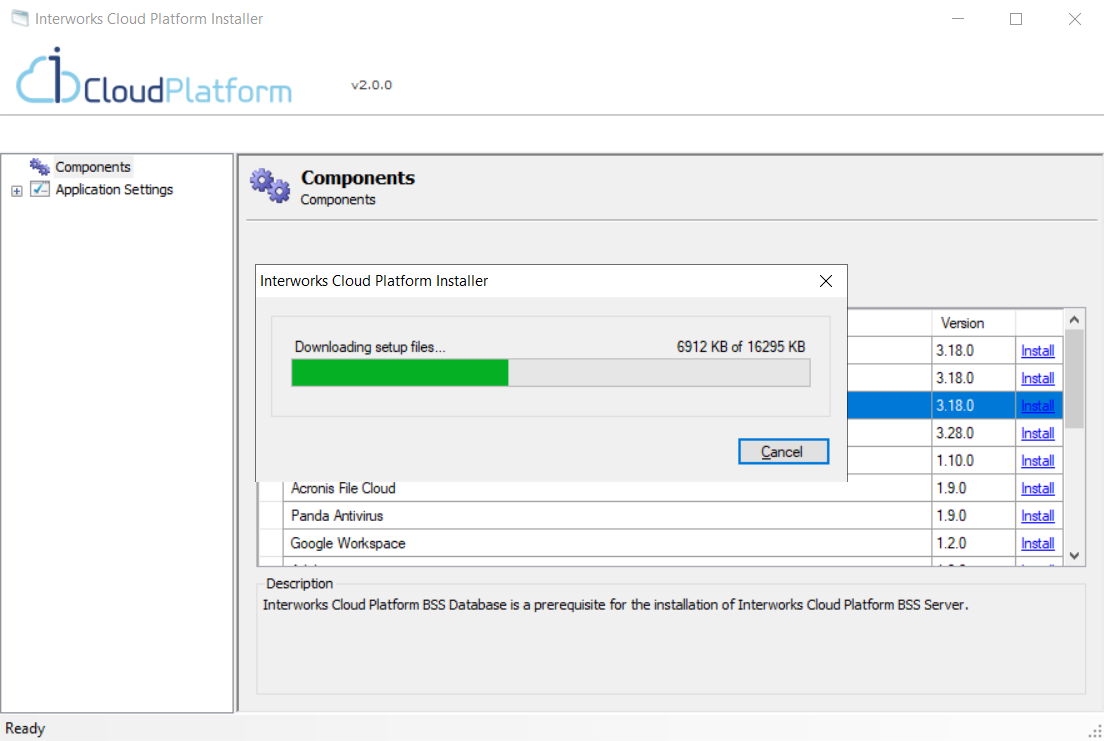
Fig 10. Setup Wizard is loading
6) Click on Next to proceed to interworks.cloud BSS Database Setup Wizard.

Fig 11. Cloud BSS Database Setup Wizard
7) Click on I Agree to accept the license terms of the product.

Fig 12. Accepting license terms
8) The interworks.cloud BSS Database Setup Wizard will check if the minimum system requirements are met and will activate the Next button upon successful validation. Click on Next to continue.

Fig 13. Prerequisites Check
9) In this step, select "Create a new installation" and click on Next.

Fig 14. Selecting Installation Type
10) In the Database Setting page, enter an existing SQL Server instance name in the SQL Server Instance field. Select either Windows Authentication or SQL Authentication and provide a valid database name in the Database field for the new interworks.cloud BSS Database that will be created. Once you specify the Database Settings, click on Next.

Fig 15. Specifying Database Settings
Note: Database Settings which are specified in the Database Settings Setup Wizard page, will also be used during future installations or upgrades of other interworks.cloud BSS components, so make sure they can be used in the future to access the specified SQL Server instance.
11) Specify a Username and a Password for the Database User. The information provided in this step will be used in the connection string for connecting to the interworks.cloud BSS Application. Once you specify Database User's credentials, click on Next.

Fig 16. Specifying Database User's credentials
12) Specify the Database's Data, Log and miscellaneous file locations where the database's data files and log files will be stored, by clicking on Browse or leave the default path and click on Next. Also, you have to specify the Additional support files location which is reserved for future storage space of any additional database related files.

Fig 17. Specifying the Database's Data, Log and miscellaneous file locations
Note: The selected file locations must reside in the Database's volume or in the SQL Cluster volume, in the case of Highly Available Deployment Scenario.
13) Click on Next in order to proceed with the installation.

Fig 18. Proceed with the Installation

Fig 19. Installing BSS Database
14) When the installation is completed, click on Next to continue.

Fig 20. Installation is completed
15) Once the BSS Database setup is completed, you will receive the following page:

Fig 21. Setup completion page
16) In order to verify that the installation was successful, open SQL Server Management Studio. Two databases should have been created. One database, with the name that was specified during the installation process (iCloud360) which will store the application's data, and one central configuration database with the name "iCRM2Config".

Fig 22. Installation was successful
NOTE: If you are deploying a highly available infrastructure (SQL Servers), the installation procedure must be deployed on the Active SQL Server and once the installation is completed, you must install the interworks.cloud platform Installer on the Passive SQL Server and copy paste the C:\Program Files (x86)\Interworks Cloud Platform Installer\Cloud360.Installer.exe.config file to the similar directory on the Passive SQL Server.
5.3. Installing interworks.cloud BSS Administration
17) In order to install interworks.cloud BSS Administration launch interworks.cloud platform Installer, click on the View Available Components button and then click on the Install button next to Administration.

Fig 23. Installing Cloud BSS Administration

Fig 24. Setup Wizard is loading
18) Click on Next to proceed to Cloud BSS Administration Setup Wizard.

Fig 25. Cloud BSS Administration Setup Wizard
19) Click on I Agree to accept the license terms of the product.

Fig 26. Accepting license terms
20) interworks.cloud BSS Administration setup wizard will check if the minimum system requirements are met and will activate the Next button upon successful validation. Click on Next to continue.

Fig 27. Prerequisites Check
21) Specify the Destination Folder -which is the folder where interworks.cloud BSS Administration application will be installed - by clicking on Browse or leave the default path and click on Next.

Fig 28. Selecting Destination Folder
22) Specify the settings of interworks.cloud BSS Administration Web Site. If you are not going to provide interworks.cloud BSS Administration to external clients, it is strongly recommended to keep 127.0.0.1 as the web site IP address and 9080 as the default TCP port; otherwise you should select a different static IP address (either private or public) and – optionally – a different TCP port for the interworks.cloud platform Administration web site.Once you specify the Web Settings, click on Next.

Fig 29. Specifying Web Settings
23) The Security Settings Setup Wizard page allows you to specify a user account that will act as the interworks.cloud BSS Administration web site anonymous access and application pool identity (for IIS 7.x and later versions). The setup wizard will provide an auto-generated password for this account, specified in the Password and Confirm Password fields. Change the password value only if you are going to manually modify the web site or application pool settings after the interworks.cloud BSS Administration installation. If you are installing interworks.cloud BSS Administration in an Active Directory environment, you have the option to check Create Active Directory account; otherwise a local Windows (SAM) account will be created. Once you specify the Security Settings, click on Next.

Fig 30. Specifying Security Settings
Note: The interworks.cloud BSS Administration application pool must run under a user account without administrative privileges. By default, interworks.cloud BSS Administration installation creates an account which is a member of the "IIS_IUSRS" (for IIS 7.x and later versions) group only. As a best security practice, it is recommended to create a local user account for the interworks.cloud BSS Administration.
24) In the Database Settings page, enter the SQL Server and the Database name you specified in the Database Settings during the installation of interworks.cloud BSS Database (step 11). In the Authentication field, you will notice that only the SQL Server Authentication choice is available. In the Login name and Password fields, use the Username and Password of the Database User that you specified during the installation of interworks.cloud BSS Database.Once you specify the Database Settings, click on Next.

Fig 31. Specifying Database Settings
25) In the Administrator settings page, specify the Company Name which will be displayed to the users of the interworks.cloud BSS Application when they login, the Company Currency which will be used as the default company's currency, the Company Country, the Admin Username and Admin Password for the administrative account that will be used to log in to the interworks.cloud BSS Application and finally the desired Time Zone. Once you specify the Administrator Settings, click on Next.

Fig 32. Specifying Administrator Settings
Important: The selected Time Zone will be used as a base reference point for all date/time related operations of the application. It is highly recommended that you select the same Time Zone as the one that is defined in BSS Database server, at operating system level. Please note that you cannot modify the Time Zone once the installation is completed, so make sure that you have set a desired Time Zone setting in the server that hosts the BSS Database. Select the same Time Zone setting in the Administration settings page, as shown above.
26) In the Notification Services settings page, specify the e-mail account settings that will be used by the interworks.cloud BSS Application for sending notification e-mails to other users about changes that occur to various objects, based on the setup settings of the application. Once you specify the Notification Services settings, click on Next.

Fig 33. Specifying Notification Services settings

Fig 34. Installing BSS Administration
27) When the installation is completed, click on Next to continue.

Fig 35. Installation is completed
28) Once the BSS Administration setup is completed, you will receive the following page:

Fig 36. Setup completion page
29) In order to verify that the installation was successful, enter the interworks.cloud BSS Administration URL in a web browser.

Fig 37. Installation was successful
Important: Please review the Network, Domain and Storage Requirements section of this guide for additional information regarding the configuration of the storage folder, when interworks.cloud platform components are not all installed on the same server. The same principles also apply to deployments that include multiple servers, web farms, load balancing scenarios, etc. If interworks.cloud BSS Administration is not installed on the same server with the BSS and Storefront components, the following actions must be taken: The Cloud Platform Billing service and the Cloud Platform Notification Management service windows services must be reconfigured to run under an account with both local administrative privileges and read-write access to the central storage location (to the BSS and Storefront application storage folder)
5.4. Installing interworks.cloud BSS
30) In order to install interworks.cloud BSS, launch interworks.cloud platform Installer, click on the View Available Components button and then click on the Install button next to BSS.

Fig 38. Installing Cloud BSS

Fig 39. Setup Wizard is loading
31) Click on Next to proceed to interworks.cloud BSS Setup Wizard.

Fig 40. Cloud BSS Setup Wizard
32) Click on I Agree to accept the license terms of the product.

Fig 41. Accepting license terms
33) The interworks.cloud BSS Setup Wizard will check if the minimum system requirements are met and will activate the Next button upon successful validation. Click on Next to continue.

Fig 42. Prerequisites Check
34) Specify the Destination Folder -which is the folder where interworks.cloud BSS will be installed - by clicking on Browse or leave the default path and click on Next.

Fig 43. Selecting Destination Folder
35) Specify the Application Storage Folder - which is where the interworks.cloud BSS will store each user's personal data such as uploaded files, e-mail attachments etc. - by clicking on Browse or leave the default path and click on Next. In this step you may also specify a UNC path for the user's personal data storage. In such a case, the system's administrator must manually go to the specified UNC path and apply read/write permissions to the user account that will be created during the installation, in order to act as the interworks.cloud BSS Application web site anonymous access and application pool identity (for IIS 7.x and later versions). Once you specify the Application Storage Location, click on Next.

Fig 44a. Selecting Application Storage Location
(Standalone Deployment Scenario)

Fig 44b. Selecting Application Storage Location in File Server
(Distributed Deployment Scenario)

Fig 44c. Selecting Application Storage Location in File Cluster
(Highly Available Deployment Scenario)
Note: Please review the Network, Domain and Storage Requirements section of this guide for additional information regarding the configuration of the storage folder, when interworks.cloud platform components are not all installed on the same server. In case you are deploying a Distributed Deployment Scenario or a Highly Available Deployment Scenario, you will have to create a shared folder, named "bssdata", in the File Server or in the File Cluster respectively and enter the Shared location in the Application Storage folder field, as shown in Figures 44b and 44c. The same principles also apply to deployments that include multiple servers, web farms, load balancing scenarios ,etc.
36) Specify the Destination Folder – which will be used as the installation folder of the Web Services component - by clicking on Browse or leave the default path and click on Next.

Fig 45. Selecting Destination Folder
37) Specify interworks.cloud BSS Web Settings. These settings apply to the web site that will host interworks.cloud BSS. Specify the web site's IP address and Port. If a Host name is specified, an adequate DNS A record pointing to the selected IP address must be properly defined by the administrator to make the web site accessible to external users. Once you specify the Web Settings, click on Next.

Fig 46. Specifying BSS Web Settings
38) Respectively, specify the Web Services web Settings. This is the web site that will host interworks.cloud BSS Web Services API, in order to provide connectivity with other 3rd party systems. Specify the web site's IP address and Port. If a host name is specified, an adequate DNS A record pointing to the selected IP address must be properly defined by the administrator to make the web site accessible to external users.Once you specify the Web Services web Settings, click on Next.

Fig 47. Specifying Web Services web Settings
39) The Security Settings setup wizard page allows you to specify a user account that will act as the interworks.cloud BSS web site anonymous access and application pool identity (for IIS 7.x and later versions). The setup wizard will provide an auto-generated password for this account, specified in the Password and Confirm Password fields. Change the password value only if you are going to manually modify the web site or application pool settings after the interworks.cloud BSS installation. If you are installing interworks.cloud BSS in an Active Directory environment, you have the option to check Create Active Directory account; otherwise a local Windows (SAM) account will be created. Once you specify the Security Settings, click on Next.

Fig 48. Specifying Security Settings
Note: interworks.cloud BSS Application pool must run under a user account without administrative privileges. By default, interworks.cloud BSS installation creates an account which is a member of the "IIS_IUSRS" (for IIS 7.x and later versions) group only. As a best security practice, it is recommended to create a local user account for the interworks.cloud BSS Application.
40) Respectively, the Security Settings setup wizard page allows you to specify a user account that will act as the Web Services anonymous access and application pool identity (for IIS 7.x and later versions). Once you specify the Web Services Security Settings, click on Next.

Fig 49. Specifying Web Services security settings
Note: interworks.cloud BSS Web Services pool must run under a user account without administrative privileges. By default, interworks.cloud BSS installation creates an account which is a member of the "IIS_IUSRS" (for IIS 7.x and later versions) group only. As a best security practice, it is recommended to create a local user account for the interworks.cloud BSS Web Services.
41) In the Database Settings page, enter the SQL Server and Database names that you specified in the Database Settings during the installation of interworks.cloud BSS Database. In the Authentication field, you will notice that only the SQL Server Authentication choice is available. As Login name and Password use the Username and Password of the Database User you specified during the installation of interworks.cloud BSS Database (step 11). Once you specify the Database Settings, click on Next.

Fig 50. Specifying Database Settings
42) Setup Wizard is ready to proceed with the installation. Click on Next to continue.

Fig 51. Setup Wizard is ready to proceed with the installation

Fig 52. BSS is being installed
43) When the installation is completed, click on Next to continue.

Fig 53. Installation is completed
44) Once the interworks.cloud BSS setup is completed, you will receive the following page:

Fig 54. Setup completion page
45) In order to verify that the installation was successful, enter the interworks.cloud BSS's URL in a web browser.

Fig 55. Installation was successful
5.5. Installing interworks.cloud Storefront
In order to be able to install interworks.cloud storefront successfully, first you have to install the latest version of the IIS URL Rewrite extension on the server that you are going to install interworks.cloud Storefront. You can download IIS URL Rewrite extension from the following link:
http://www.iis.net/downloads/microsoft/url-rewrite
You should also update BSS Database component to the latest version.
46) In order to install interworks.cloud storefront launch interworks.cloud platform Installer, click on the View Available Components button and then click on the Install button, next to Storefront.

Fig 56. Installing Cloud Storefront

Fig 57. Setup Wizard is loading
47) Click on Next to proceed to Cloud Storefront Setup Wizard.

Fig 58. Cloud Storefront Setup Wizard
48) Click on I Agree to accept the license terms of the product.

Fig 59. Accepting license terms
49) The Cloud Storefront Setup Wizard will check if the minimum system requirements are met and will activate the Next button upon successful validation. Click on Next to continue.

Fig 60. Prerequisites Check
Note: When installing interworks.cloud storefront on a server that is running IIS 7 or later versions, please keep in mind that Microsoft URL Rewrite version 2.0 must also be installed on the same server. You can install Microsoft URL Rewrite by downloading the appropriate installation package from Microsoft Downloads Center or by using Microsoft Web Platform Installer.
50) Specify the Destination Folder – which is the folder where interworks.cloud storefront application will be installed - by clicking on Browse or leave the default path and click on Next.

Fig 61. Selecting Destination Folder
51) Specify the Application Storage Folder – which is where interworks.cloud storefront Application will store user's personal data such as uploaded files, e-mail attachments etc. - by clicking on Browse or leave the default path and click on Next. Note that the Application Storage Folder for the personal data of interworks.cloud storefront application must be the same as the Application Storage Folder for the personal data of Cloud BSS, as shown in step 35. In this step you may also specify a UNC path for the user's personal data storage. In such a case, the system's administrator must manually go to the specified UNC path and apply read/write permissions to the user account that will act as the interworks.cloud storefront web site anonymous access and application pool identity (for IIS 7.x and later versions).

Fig 62a. Selecting Application Storage Folder
(Standalone Deployment Scenario)

Fig 62b. Selecting Application Storage Folder in File Server
(Distributed Deployment Scenario)

Fig 62c. Selecting Application Storage Folder in File Cluster
(Highly Available Deployment Scenario)
Note: Please review the Network, domain and storage requirements section of this guide for additional information regarding the configuration of the storage folder, when interworks.cloud platform components are not all installed on the same server. In case you are deploying a Distributed Deployment Scenario or a Highly Available Deployment Scenario, enter in the Application Storage Folder field the "bssdata" file that you created in the File Server or in the File Cluster respectively, during the installation of BSS Application, as shown in Figures 62b and 62c. The same principles also apply to deployments that include multiple servers, web farms, load balancing scenarios ,etc.
52) Specify interworks.cloud Storefront Web Site Settings. Specify the web site's IP address and Port. If a Host name is specified, an adequate DNS A record pointing to the selected IP address must be properly defined by the administrator to make the web site accessible to external users. Once you specify the Storefront web settings, click on Next.

Fig 63. Specifying Web Settings
53) The Security Settings setup wizard page allows you to specify a user account that will act as the interworks.cloud storefront web site anonymous access and application pool identity (for IIS 7.x and later versions). The setup wizard will provide an auto-generated password for this account, specified in the Password and Confirm Password fields. Change the password value only if you are going to manually modify the web site or application pool settings after the interworks.cloud storefront installation. If you are installing interworks.cloud storefront in an Active Directory environment, you have the option to check Create Active Directory account; otherwise a local Windows (SAM) account will be created. Once you specify the Security Setting, click on Next.

Fig 64. Specifying Security Settings
Note: interworks.cloud storefront application pool must run under a user account without administrative privileges. By default, interworks.cloud storefront installation creates an account which is a member of the "IIS_IUSRS" (for IIS 7.x and later versions) group only. As a best security practice, it is recommended to create a local user account for the interworks.cloud storefront.
54) In the Database Settings page, enter the SQL Server and Database name you specified in the Database Settings during the installation of interworks.cloud BSS Database. In the Authentication field, you will notice that only the SQL Server Authentication choice is available. In the Login name and Password fields use the Username and Password of the Database User you specified during the installation of interworks.cloud BSS Database (step 11). Once you specify the Database Settings, click on Next.

Fig 65. Specifying Database Settings
Note: The Database, whose settings you are specifying in step 54, should be the same with the database that you specified during BSS installation (step 41).
55) Setup Wizard is ready to proceed with the installation. Click on Next to continue.

Fig 66. Setup Wizard is ready to proceed with the installation

Fig 67. Storefront is being installed
56) Once the installation is completed, click on Next to continue.

Fig 68. Installation is completed
57) Once the interworks.cloud storefront setup is completed, you will receive the following page:

Fig 69. Setup Completion Page
58) In order to verify that the installation was successful, enter the interworks.cloud storefront URL in a web browser.

Fig 70. Installation was successful
6. Activating interworks.cloud platform
See also:
59) In order to activate interworks.cloud platform, enter the interworks.cloud BSS Administration URL (found in step 28) in a web browser and click on Start Activation.

Fig 71. Activating interworks.cloud platform
60) In the Registration info pop-up window, enter your contact details and the license key that was provided to you by interworks.cloud and click on Activate.

Fig 72. Entering Registration info

Fig 73. Activating Installation

Fig 74. Installation is activated
61) In order to verify that activation was successful, enter the interworks.cloud BSS's URL (found in step 44) in a web browser, and login using the username and password specified in step 25.

Fig 75. Login to interworks.cloud platform
62) Via interworks.cloud platform welcome page you can administrate your business according to your needs.

Fig 76. interworks.cloud platform welcome page
7. Upgrading interworks.cloud platform Components
See also:
This chapter provides information about upgrading existing interworks.cloud platform components. Notice that you must upgrade interworks.cloud platform components with the same sequence you installed them. First, you have to upgrade interworks.cloud BSS Database component, next you have to upgrade interworks.cloud BSS Administration component, next you have to upgrade interworks.cloud BSS component and finally you upgrade interworks.cloud storefront component.
63) In order to upgrade any interworks.cloud platform component, you should use interworks.cloud platform Installer. Launch interworks.cloud platform Installer, select the desired component in the navigation tree on the left and then click on the Check For Updates button, on the properties page in the right pane.

Fig 77. Checking for Updates
64) If there are no available updates, the following window will pop up. Click on OK to close the window. If there are available updates, click on Yes to download and launch the Update Setup Wizard. Follow the wizard's instructions to complete the upgrade operation.

Fig 78. Closing the pop-up window
8. Uninstalling interworks.cloud platform Components
See also:
This chapter provides information on how to uninstall interworks.cloud platform components.
65) In order to uninstall an interworks.cloud platform Component, launch interworks.cloud platform Installer. Select the component that you want to uninstall from the navigation tree on the left and click on Uninstall.
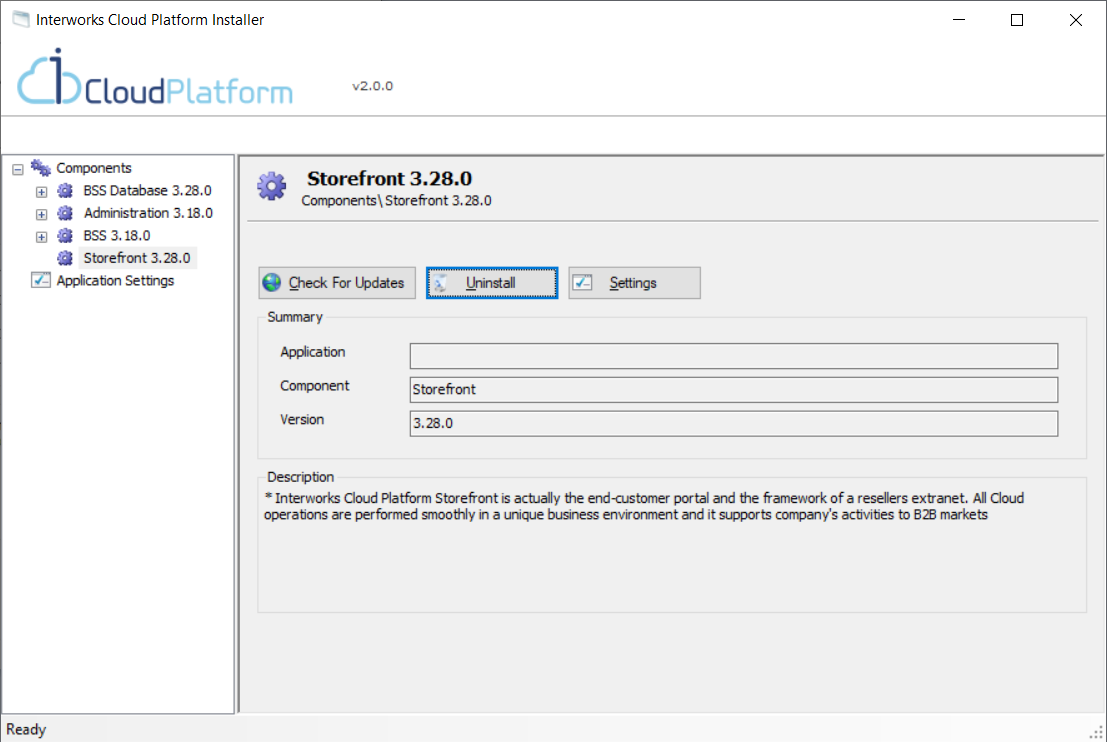
Fig 79. Uninstalling interworks.cloud BSS Components
66) Follow the Setup Wizard instructions to uninstall the selected component.

Fig 80. Setup Wizard is launching
67) Click on Next to continue.

Fig 81. Setup Wizard welcome page
68) Click on Next in order to uninstall the selected interworks.cloud BSS Component. Repeat the same procedure for all the interworks.cloud BSS components you wish to uninstall.

Fig 82. Uninstalling the selected interworks.cloud BSS Component
9. APPENDIX: Troubleshooting
See also:
This appendix provides information that will help you troubleshoot issues with interworks.cloud platform.
9.1. Troubleshooting Installation Issues
ISSUE 1
Could not start interworks.cloud platform Installer on Windows 2008 |
|---|
Answer:
This might occur due to enabled User Account Control (UAC). As a solution, you could disable UAC or run interworks.cloud platform Installer in "elevated" mode by right clicking its shortcut and selecting "Run as Administrator".
ISSUE 2
Viewing interworks.cloud platform Installer Error Log |
|---|
Answer:
To view the interworks.cloud platform Installer application log, click on Application Settings in the navigation tree on the left and then click on View System Log. The interworks.cloud platform Installer log file will be opened with the default editor application (e.g.: Notepad).


Fig 83. Viewing System Log Fig 84. interworks.cloud platform Installer log file
9.2. Troubleshooting Upgrade Issues
If you experience any issues right after an interworks.cloud platform upgrade, try the following basic troubleshooting steps:
- Make sure all interworks.cloud platform components were upgraded to the same version.
- Reset interworks.cloud platform components application pools in IIS Manager.
See also: