
Your BSS users can now view the logs of the notifications that are being generated and dispatched each time they are triggered by a relative action either from BSS or Storefront. This tool, although in Beta stage, is introduced as a means to monitor and better understand which specific notifications are being dispatched as well as whether they are successfully dispatched by the notification service or not. Moreover, this tool is particularly handy while troubleshooting the notifications that are being dispatched from the system.
Locating the Notification Logs (Beta)
To access the Notification Logs, please navigate to BSS Setup > Administration > Notifications > Notification Logs (Beta) option.

Navigation & Options
Inside the “Notification Logs” tool, you are provided with the options necessary to access the logs of the notifications that the system dispatches. You are provided with a list(1), that will be populated with the notification data, two date selectors, the “From” and the “To”(2) to filter the notifications based on the dates you define, and lastly, you are provided with two buttons; one for initiating the search(3) of notification logs based on the defined dates, and another one for clearing all the filters from the list’s columns(4). Furthermore, you will find one Export button on the right-upper part of the screen, namely the "Export to Excel" button.

Accessing the Notification Logs
After you have defined the dates (From & To) for which you wish to view the notification logs, you need to click on the Apply Dates Filter button to initiate the search of the logs for that specific period. By default, the current date is displayed on From and To fields, and the relevant notifications are displayed. As a result, the tool will display the resulted logs such as in the following example:
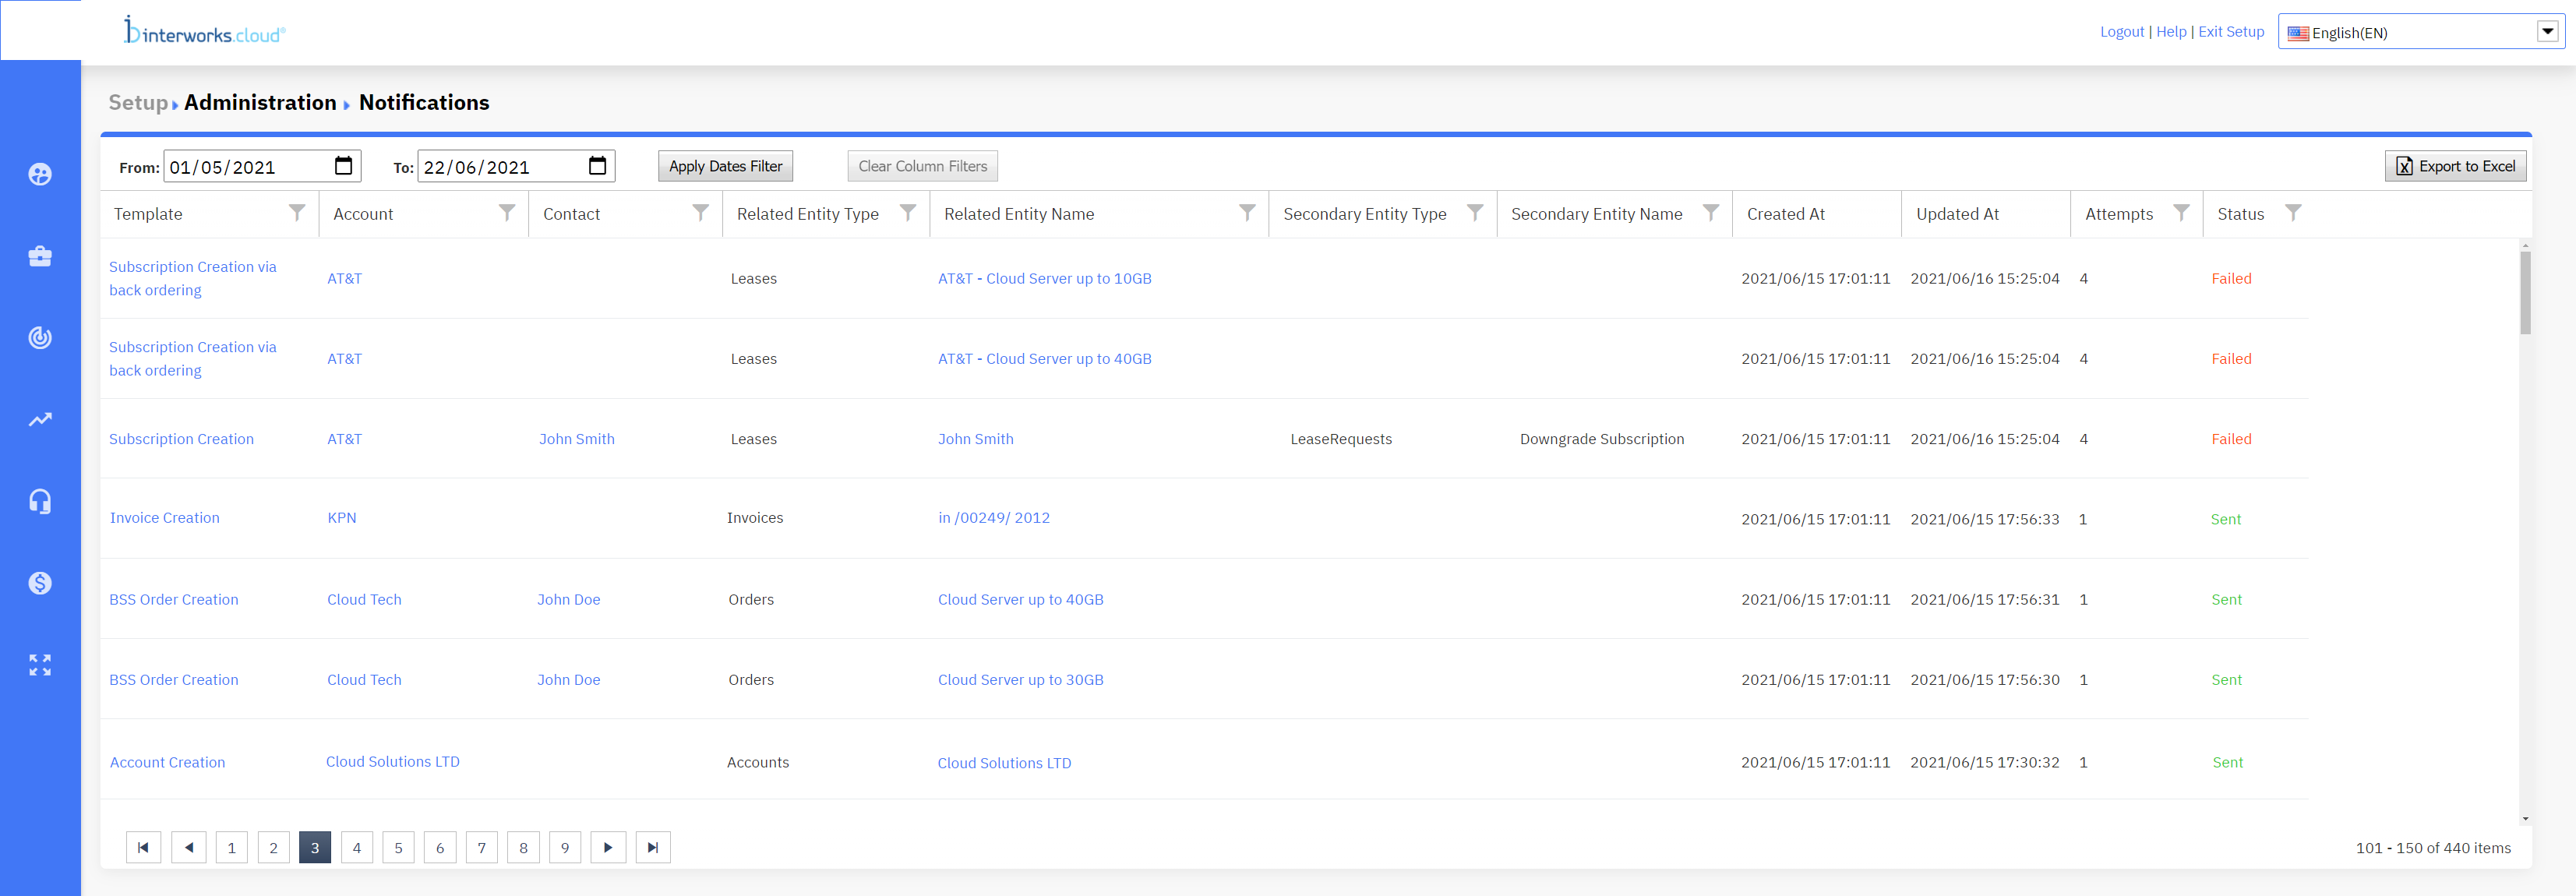
The list contains the following columns which have filtering and sorting capabilities:
Template: This is the name of the template of the email notification.
Account: This is the name of the account that the email notification has been created for.
Contact: This is the name of the contact and appears only if the “Related Entity Type“ has inside its “Related Entity Name“ a defined Contact name.
Related Entity Type: This is the notification’s type which is either “Leases“(subscriptions), “Invoices“, “Accounts“, or “Orders“.
Related Entity Name: This is the
Secondary Entity Type: This field is populated only when there is an available “Secondary Entity Type” defined inside the notification template.
Secondary Entity Name: This field is populated only when there is an available “Secondary Entity Name” of the “Secondary Entity Type” defined inside the notification template.
Created At: This is the date that the email notification was initiated for dispatch.
Updated At: This is the date that the email notification was actually dispatched. It is linked with both the “Attempts“ and the “Status“ columns since if a notification fails to be dispatched after four (4) attempts then the date on display will be that of the last attempt.
Attempts: This is the number of total attempts the notification mechanism had to make in order to dispatch the email notification. The maximum number is four(4). After the four attempts, the Status becomes “Failed“.
Status: This is the dispatching status of each email notification. Please check the following table for an analysis of each status.
Status | Explanation |
|---|---|
 | The notification email has been successfully dispatched from the system. |
 | The notification email has failed to be dispatched from the system (usually after 4 attempts). |
 | The notification email is currently been dispatched from the system. |
Filtering Results: You are able to filter the notifications based on the column records, by selecting the Filter symbol and the desired records. Please note that when filtering is applied on more than one column, then the intersection of the filtered records is displayed.
Sorting Results: Each column of the “Notification Logs” list can be sorted alphabetically, except for the columns “Created At” and “Updated At”. The sorting symbol appears when the column is clicked. You can select ascending (A-Z) or descending (Z-A) order by clicking it. Please note that when sorting is applied to more than one column, then a number is displayed next to the sorting symbol to represent the sorting order.
Clearing Filters: You can remove the applied filters by clicking on the Clear Column Filters button. The button becomes available as soon as you have selected at least one record on one column filter.
Exporting the Notification Logs
The results can be exported to an Excel spreadsheet by clicking on the Export to Excel button. All the records from all the pages are included on the exported Excel file, following the same sorting sequence. Otherwise, if a filter has been applied, then the exported Excel file will contain only the filtered data. The excel file-name is in the form of <Notification Logs Report - yyyy_mm_dd_hh_mm.xlsx>.