
The first step to employ BitTitan solutions to an interworks.cloud instance is to activate the BitTitan Service Manager. This action will enable the necessary components in interworks.cloud platform so that you can then import the available BitTitan SKU's and configure the presentation layer in the form of a BitTitan Product Group. You can see how by reading the following instructions.
Getting the BitTitan API Credentials
It is assumed that there is a standing agreement with BitTitan.
Production Credentials
To create your BitTitan API production credentials, all you have to do is to click the following link https://www.bittitan.com/account/register and begin your registration by providing your information on the BitTitan's registration form, as indicated in the following example:
Upon finishing and clicking on the "Create Account" button, the following message appears informing you that you have to confirm the provided email address. 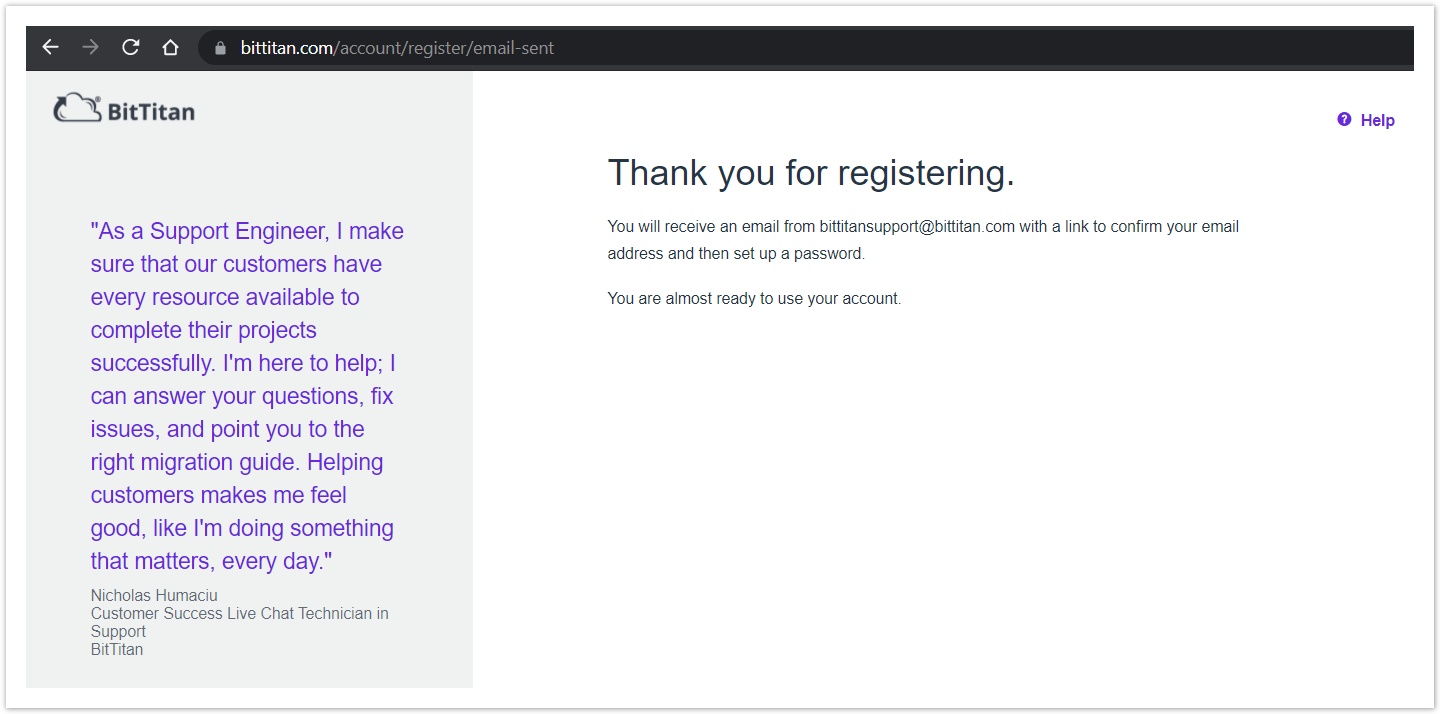
By accessing your email address and locating BitTitan's verification email (bittitansupport@bittitan.com), you must click on the link to create your account's password.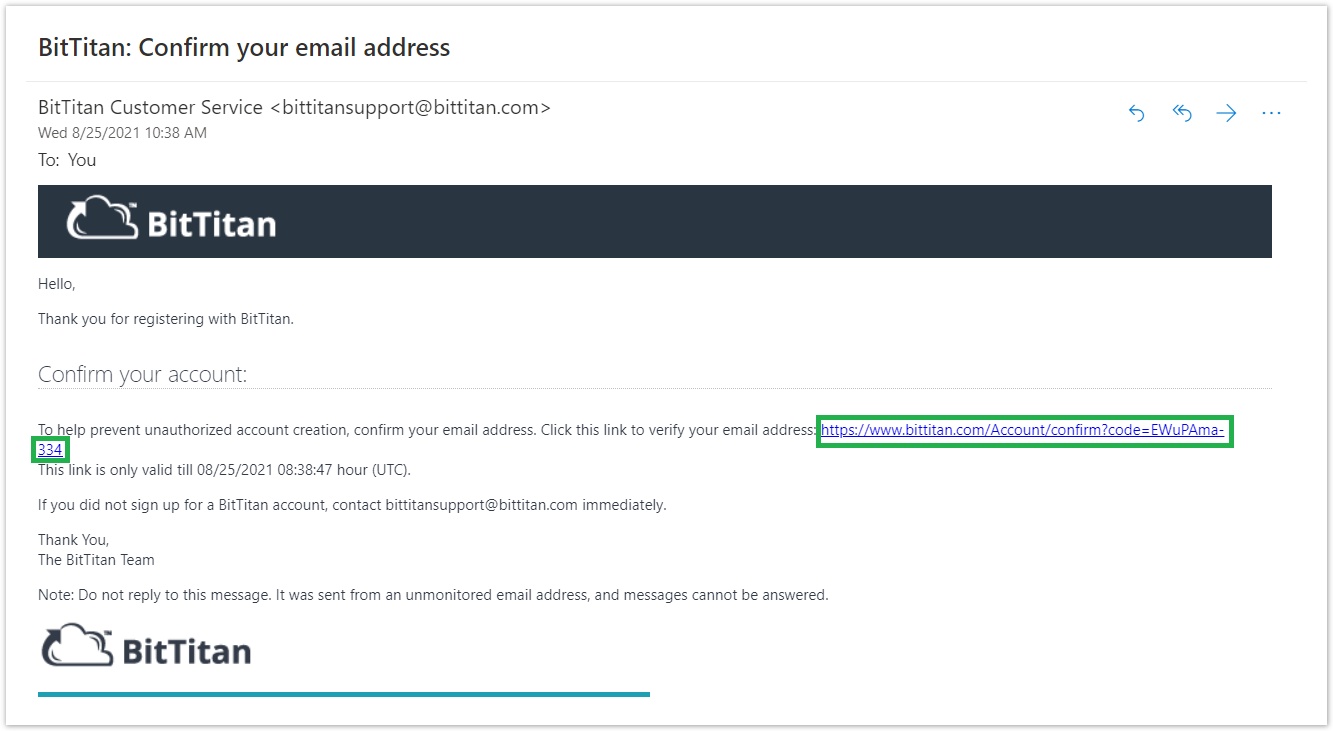
Once the link is clicked, you are being redirected to the page where you define your BitTitan's account password.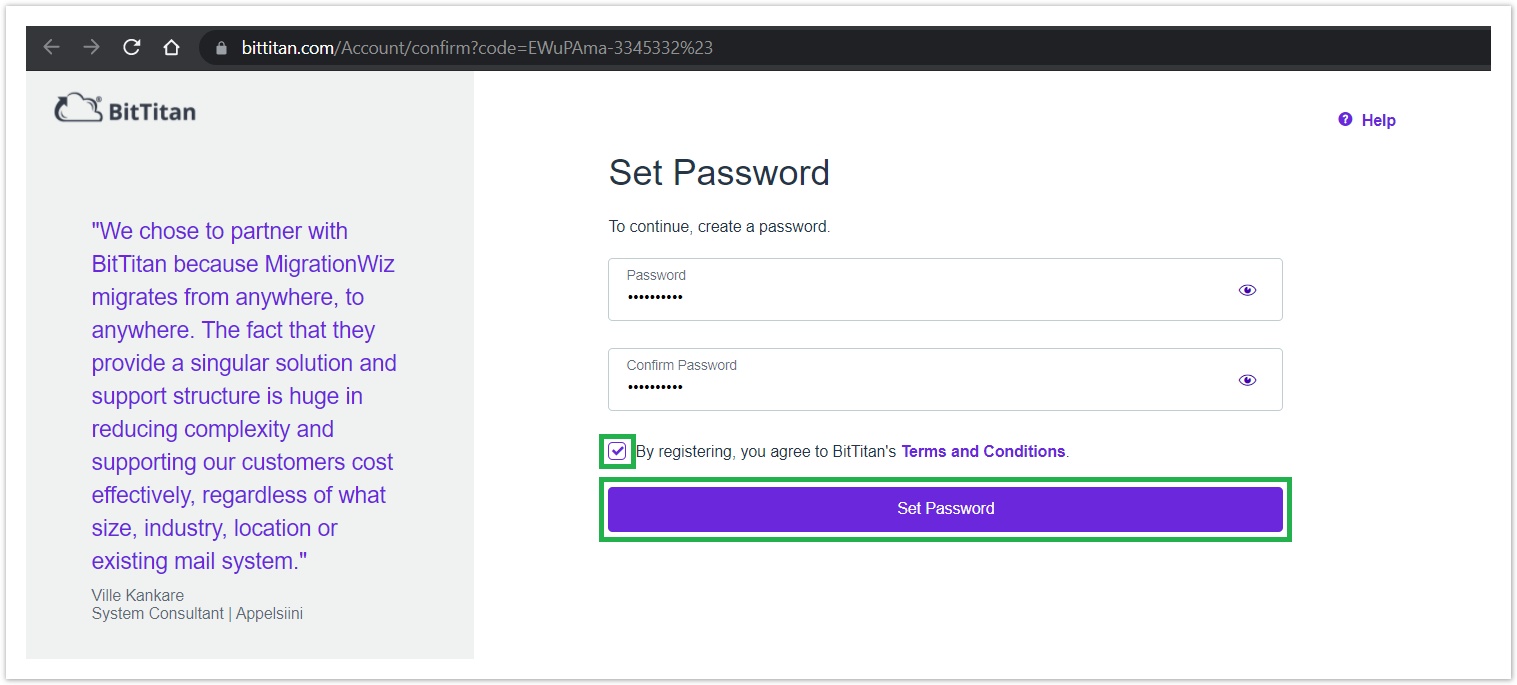
By defining your password twice and agreeing to BitTitan's "Terms and Conditions" checkbox, you can click on the "Set Password" button.
Congratulations! Your production BitTitan account has been successfully created, and you are automatically being redirected to BitTitan's MigrationWiz Production Dashboard.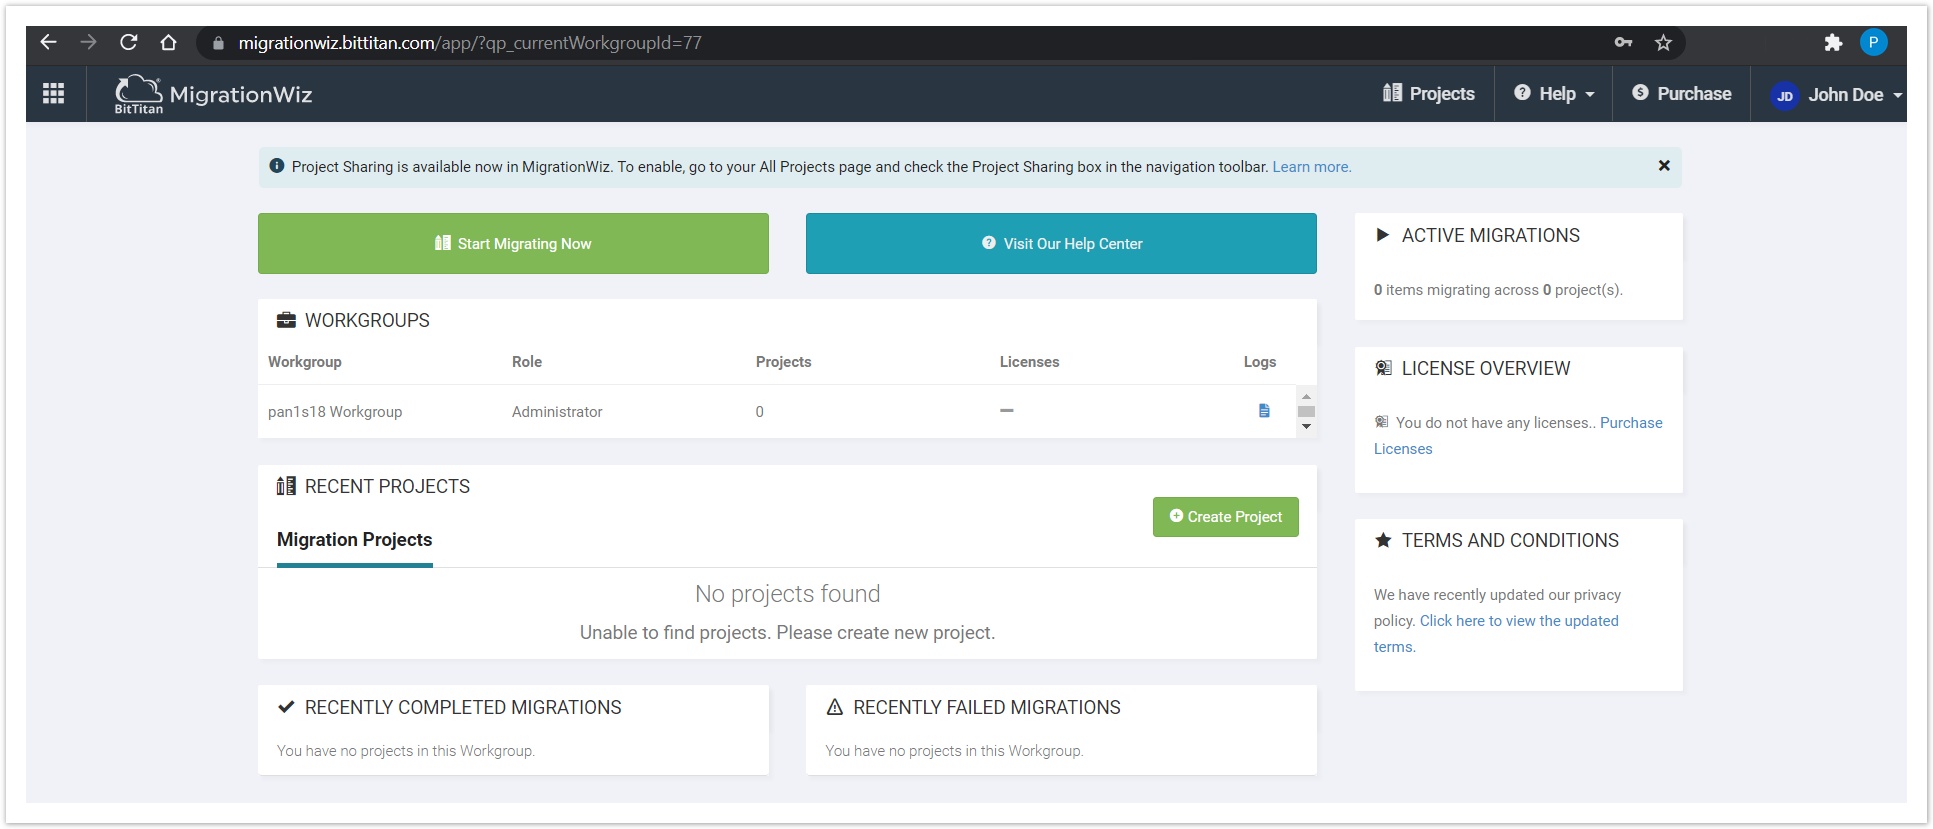
Consequently, via the above steps, you can now utilize the email and password you provided to BitTitan during the registration by filling them in the BitTitan integration production instance in BSS. Now you can continue to the "Configuring BitTitan API Access on BSS" section.
Sandbox/Test Credentials
To create your BitTitan API sandbox/test credentials, all you have to do is to click the following link https://www.bittitan.net/account/register and begin your registration by providing your information on the BitTitan's registration form, as indicated in the following example:
The process for the registration of a sandbox/test account to create your BitTitan test credentials is the same as that of the production. The only actual difference is that the registration form for the creation of the test account along with the test credentials is on a different web address "https://www.bittitan.net/account/register", instead of the production's registration form, which is this "https://www.bittitan.com/account/register".
After finishing all the aforementioned registration steps, your beta/test BitTitan account is successfully created, and you are automatically being redirected to BitTitan's MigrationWiz Beta Dashboard. You are also greeted with a Beta notification message, as illustrated in the following screenshot.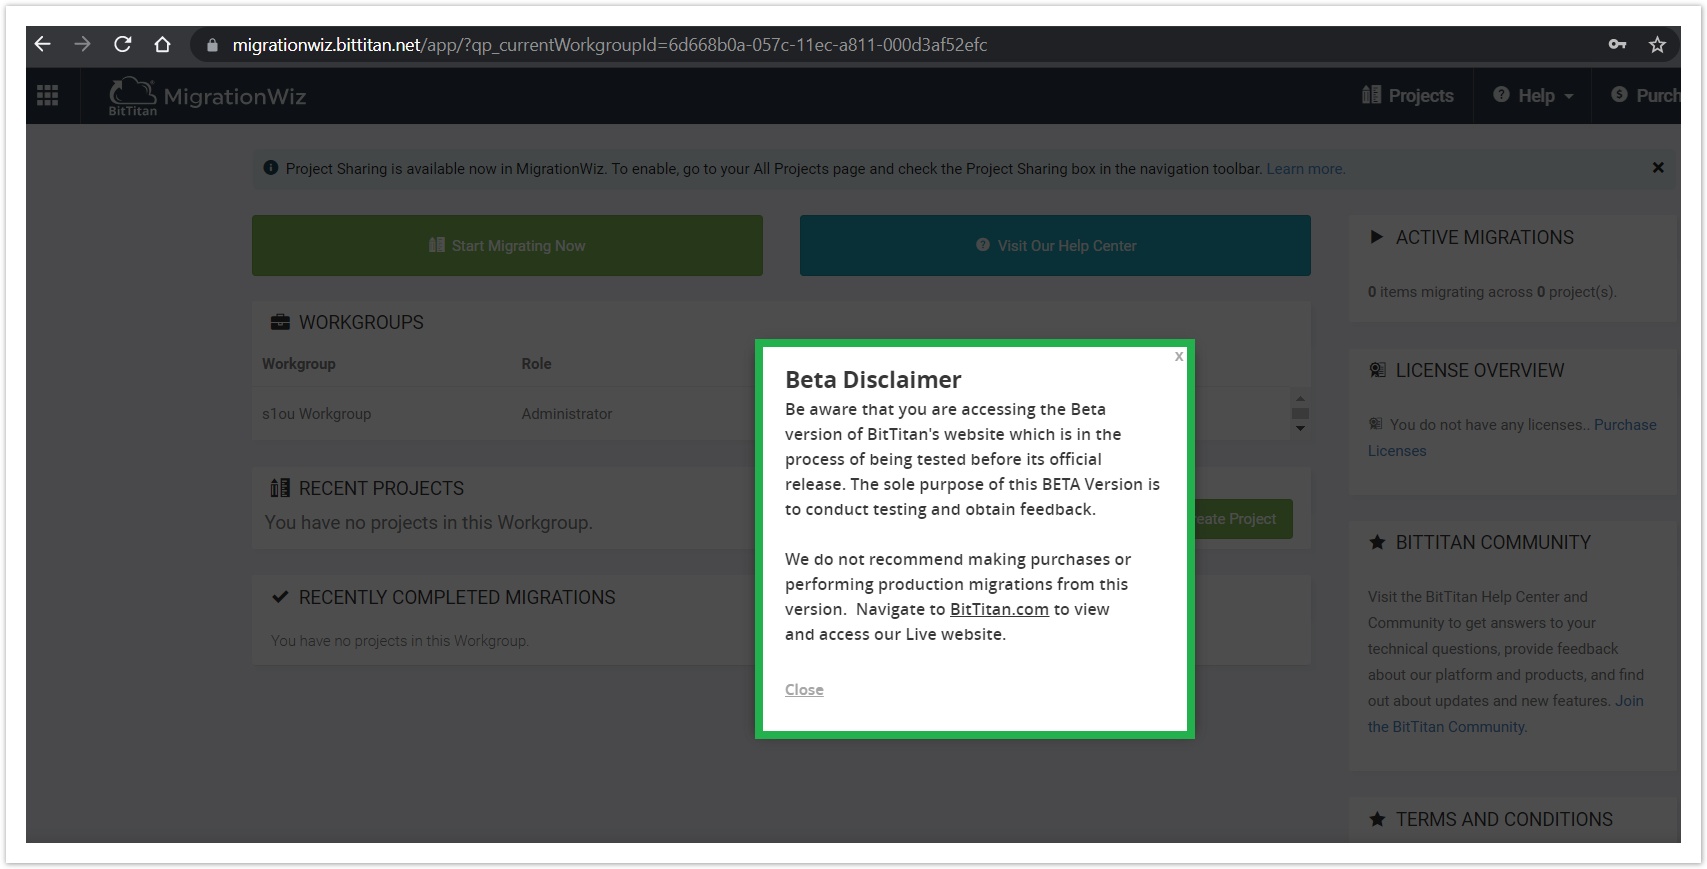
Consequently, via the above steps, you can now utilize the email and password you provided to BitTitan during the registration by filling them in the BitTitan integration test instance in BSS. Now you can continue to the "Configuring BitTitan API Access on BSS" section.
Configuring BitTitan API Access on BSS
To configure the BitTitan integration instance, please proceed with the following steps.
- Navigate to BSS Setup > Administration > System Options > Applications Setup > BitTitan Services > Settings.
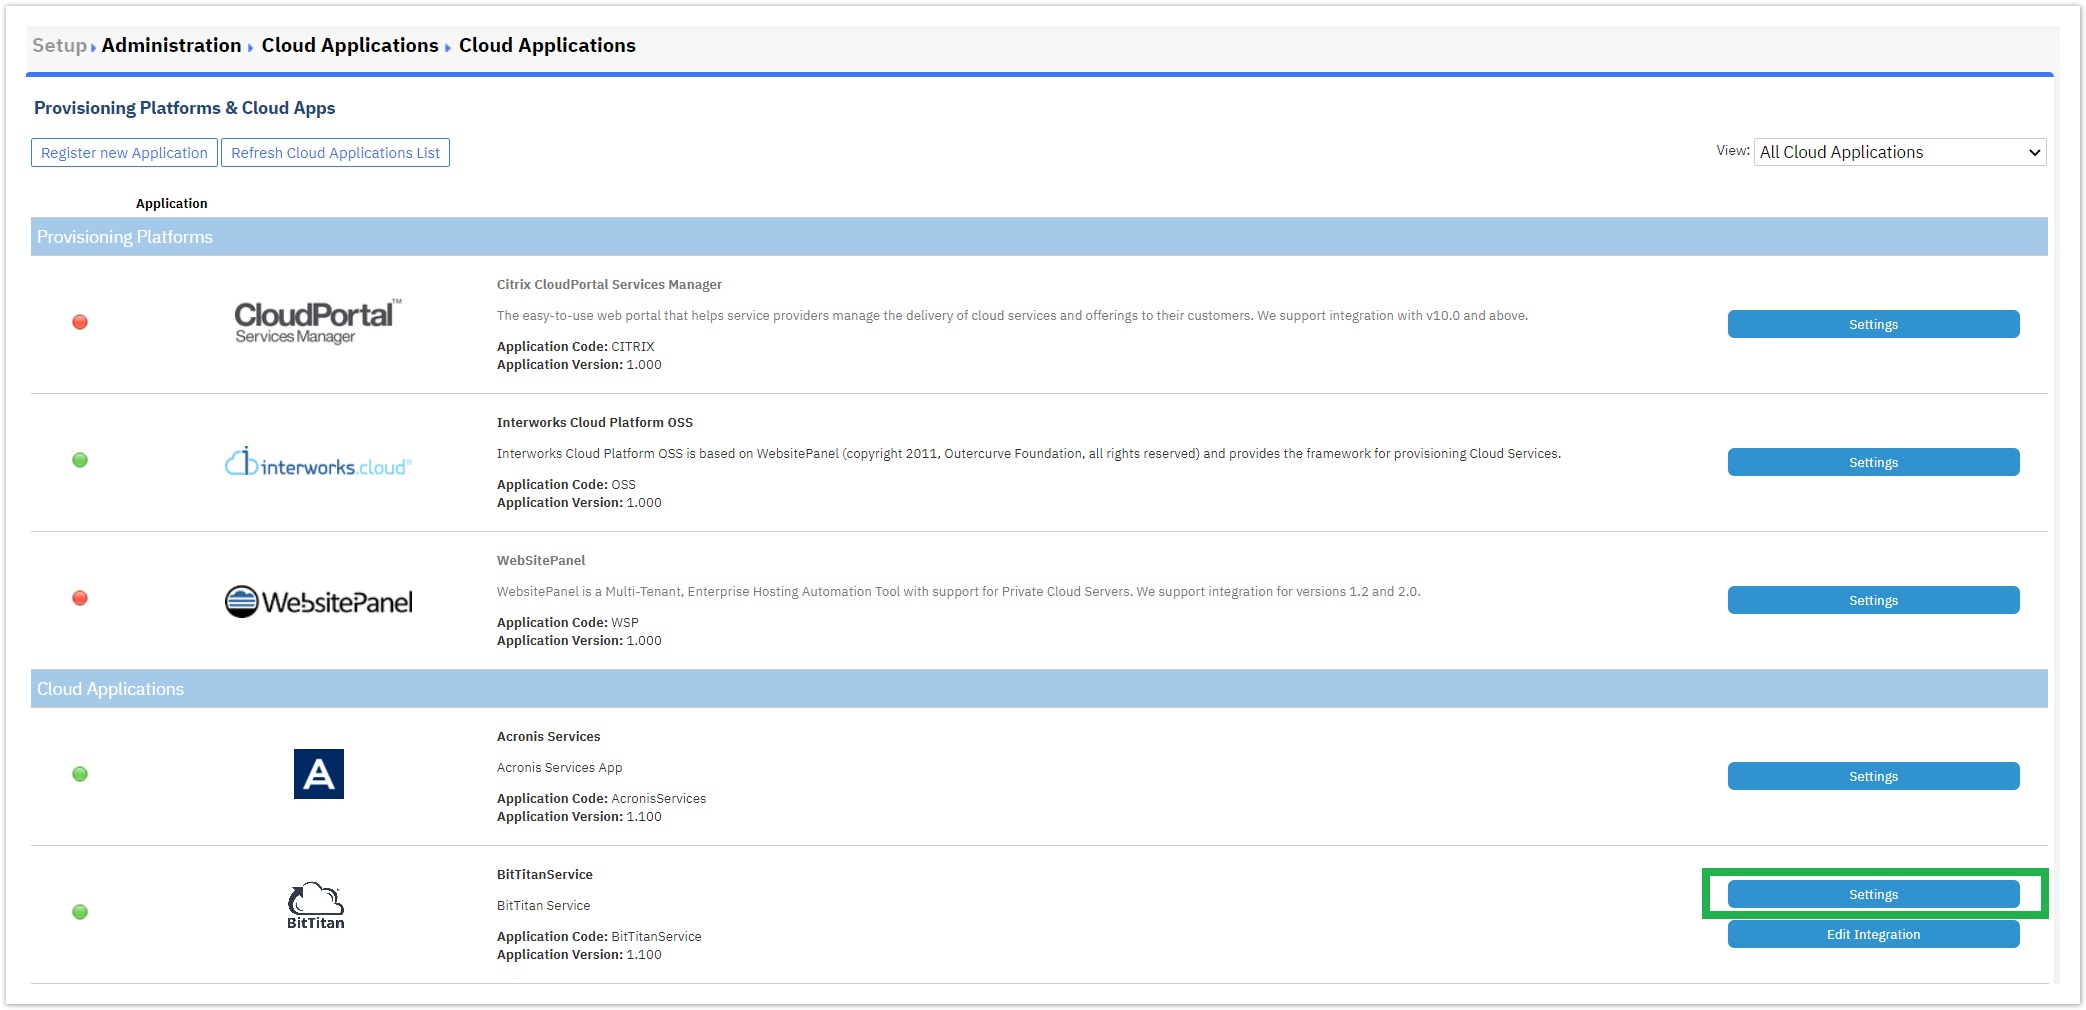
- There are some simple attributes there that define the connection to the BitTitan API, either for the production environment or the test environment:
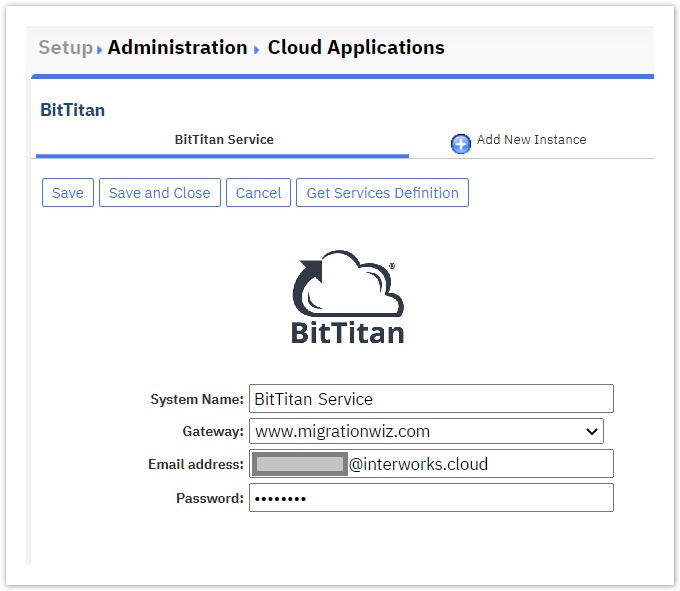
- System Name: In this field, you define how the instance is named, for example: "BitTitan Service".
- Gateway: This field is pre-filled with the Bittitan's Production URL "www.migratonwiz.com", meaning that the service manager will be predefined for your production environment by default.
However, you can choose to utilize the Test URL "www.migrationwiz.net", if you wish to test the instance and the services before switching to the production environment, but you have to create your test credentials also, from Bittitan. - Email address: In this field, you provide the email you have filled in during your Bittitan registration as your login email. Please note that your production environment email is different from your test environment email.
- Password: In this field, you provide the password you have filled in during your Bittitan registration as your login password. Please note that your production environment password is different from your test environment password.
- Once you fill in the "System Name", the "Email Address", and the "Password" click on the "Save" button.
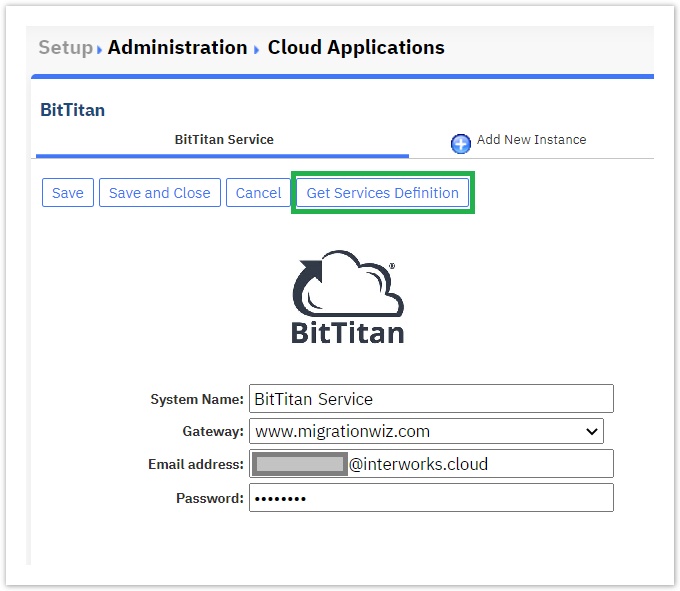
- Now, you can select the "Get Services Definition" button to import the BitTitan Product Types automatically to BSS.
On the following pop-up window, you are being informed about the names of the two Product Types that will be imported within BSS, which are:
- BitTitan User Migration Bundle
- BitTitan Mailbox License
Click on the "OK" button to proceed.

- After the process is finished, click on the "Close" button. You are done creating the required BitTitan Product Types and/or updating the Service Manager with the latest functionality.
