| Excerpt |
|---|
This page offers information on how to the default asset custom fields that appear in the Asset’s view page in Storefront, based on different product types. Also, you can find a guide on how you can publish to Storefront asset custom fields in an Asset’s view page, as well as how you can define a Display Rule for the manually created asset custom fields. |
Default Asset Custom Fields in Storefront
In Storefront, certain automatically-published (extra) custom fields for assets are by default visible, since they are created and published during the “Get Services Definition” process. The following list contains the already available and visible custom fields of the following assets:
Legacy Azure Reserved Instances: Reservation ID, Expiration Date
Microsoft Software subscriptions: Software Expiration Date
Azure Plan Reserved Instance: Reserved Instance Expiration Date, Reserved Instance ID
Enabling Asset Custom Fields in Storefront
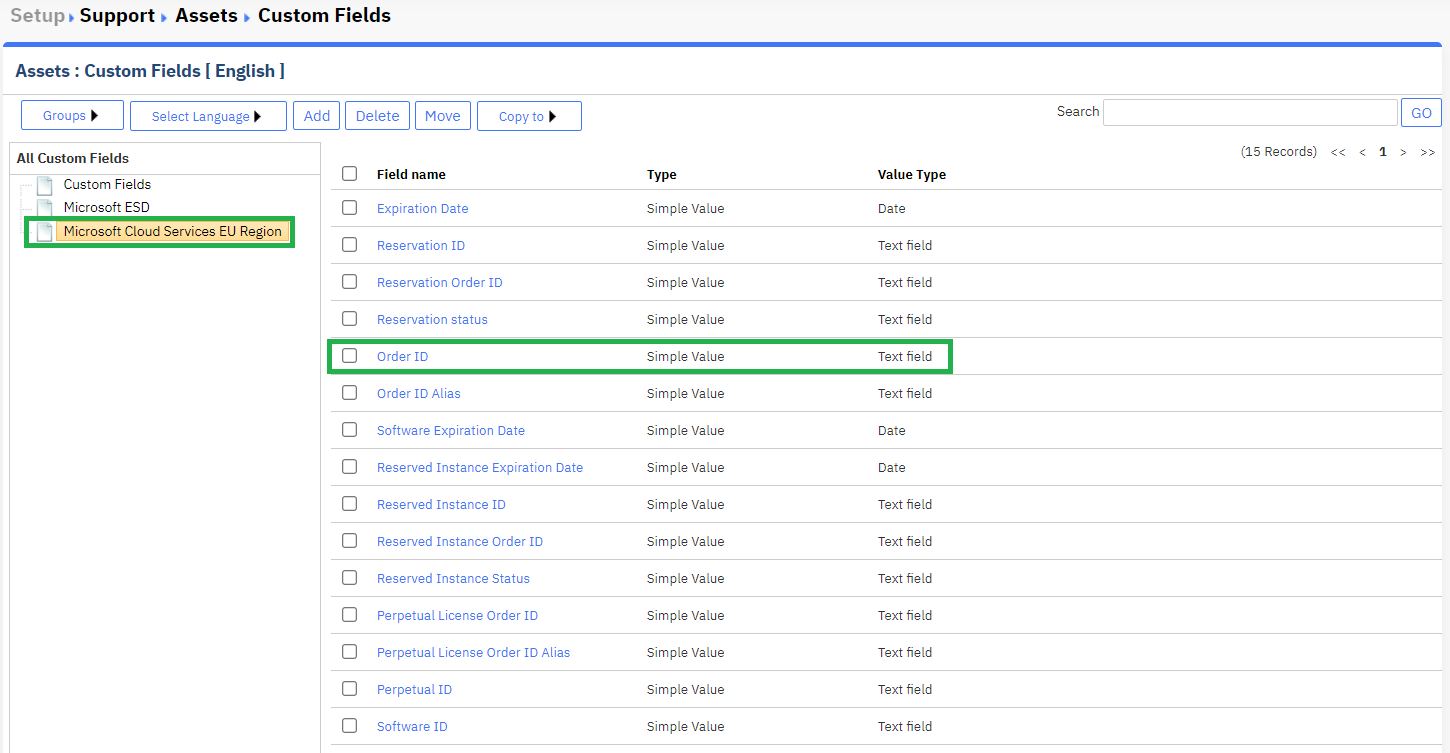
If you want to display more information to your customers or keep certain user-specific information on display, you can publish asset (extra) custom fields in the "Asset" view page in Storefront. To do so, you can navigate to BSS Setup > Billing > Assets > Custom Fields and choose from the Asset Entities(left-hand side list) the asset custom field(s) (right-hand side list) you wish to publish in your Storefront.
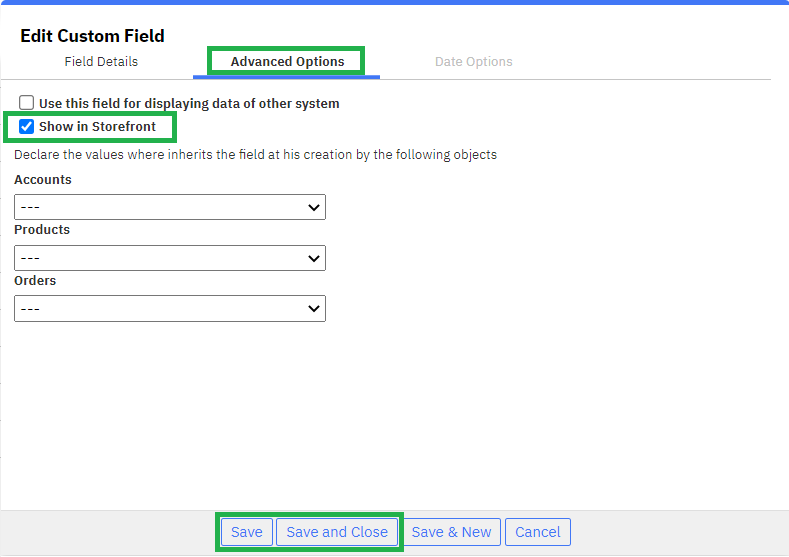
By clicking on one of the asset’s custom fields and selecting the “Advanced Options“ tab from the “Edit Custom Field“ pop-up window, you can choose to publish it in Storefront once the “Show in Storefront“ checkbox is enabled.
| Rw ui textbox macro | ||
|---|---|---|
| ||
Requirement for Manually Created Don’t forget to define the Display Rule for the manually-created Asset Custom Fields If you have manually created an asset custom field and not one that was automatically created and published in Storefront by the Get Services Definition process such as the ones mentioned previously, you are required to assign the proper Display Rule for each manually created custom field. 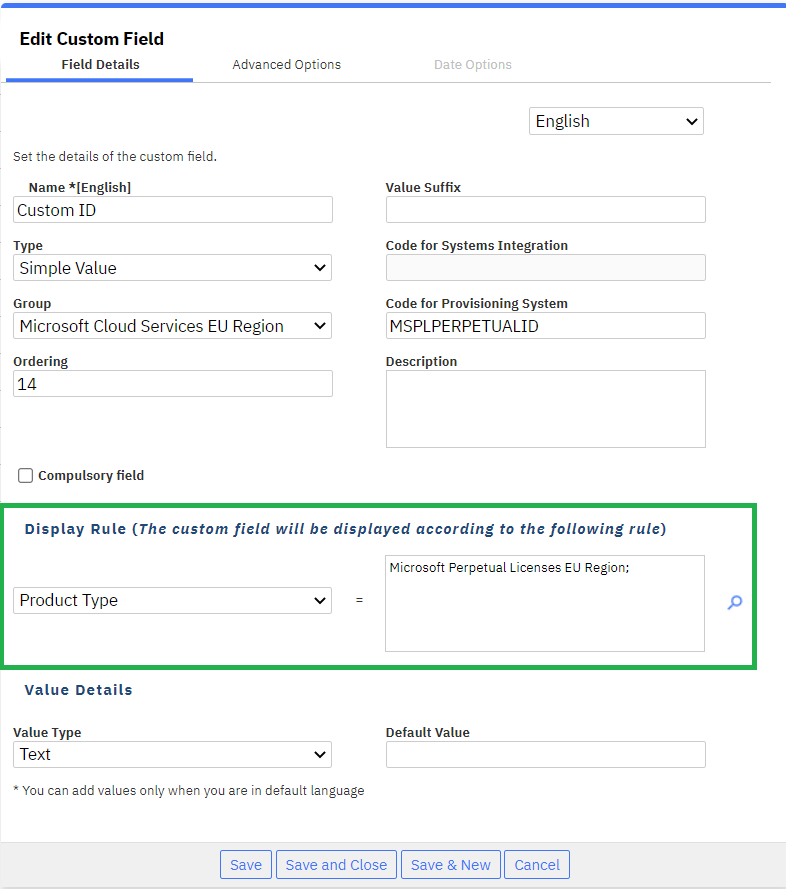 |
After finishing those changes, by clicking on the Save or Save and Close button, the changes will be in effect and the particular custom field that you have chosen will be displayed on the correct Asset’s view page in Storefront, based on the product type.
Viewing Asset Custom Fields in Storefront
You can verify your changes by logging into your Storefront and navigating to the active Assets' Licenses list, and choosing the assets with the product type that you have made the changes to. For example the following Software Subscription asset.
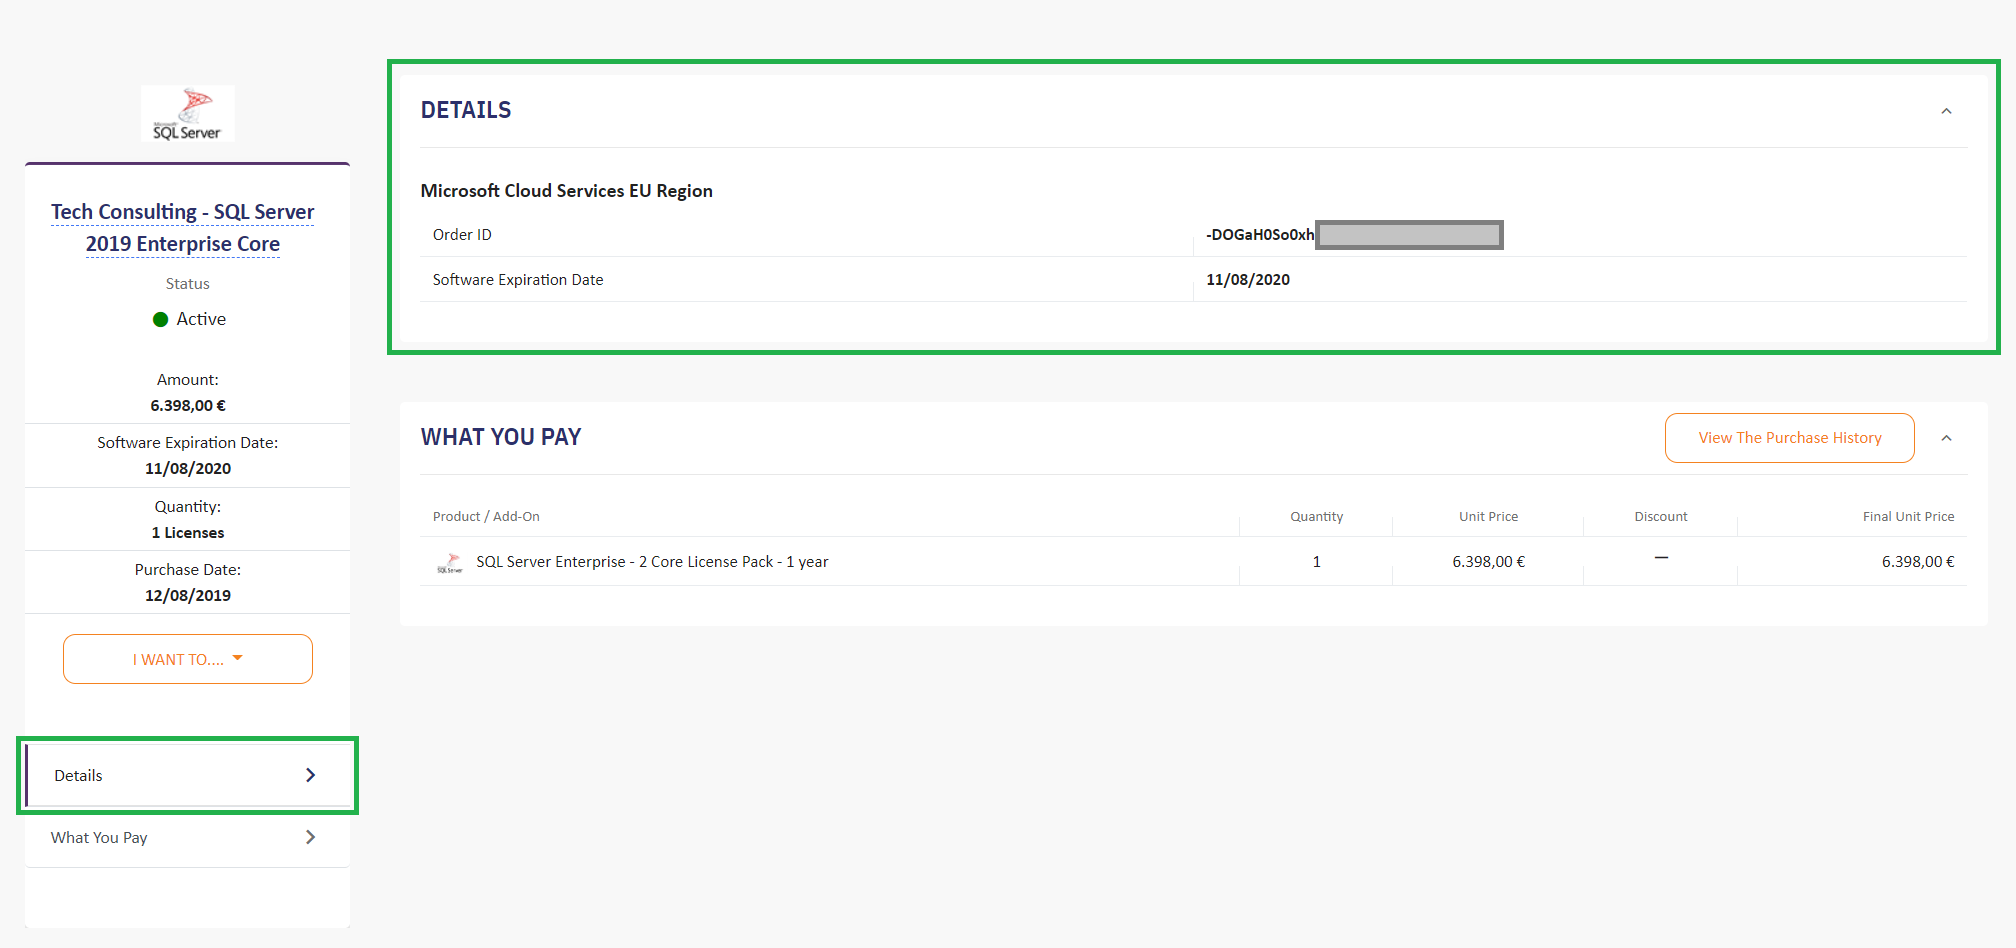
The asset’s (extra) custom field(s) that you will select to publish on an "Asset’s" view page are displayed on the Details section, directly above the What You Pay section, as highlighted in green color.
In this example, the “Order ID” was the custom field that we have previously enabled to be displayed here, whereas the “Software Expiration Date” is a default asset custom field that was automatically published to the Storefront, based on the asset’s product type.
Table of Contents
| Table of Contents | ||||||
|---|---|---|---|---|---|---|
|