| Excerpt |
|---|
| This page offers information on how to Publish a Product in Storefront. Learn how to configure the Storefront Settings of a Product or a Product Group. |
Configure the Storefront Settings of a Product
In order to configure the Storefront Settings of a particular Product of your Storefront, follow the steps below:
- Login to Cloud BSS and select Billing > Products.
- Select a Product from the list of Products available in your Storefront.
- Click on "Storefront Settings" from the Shortcuts menu on the left.

In the Storefront Settings page of a Product, you can configure the details of a product's presentation in your Storefront. On the top of the page, you are presented with the "Publish to Storefront" option. You need to enable that option in order for a product to be visible and available in your Storefront.
Product Catalogue Options
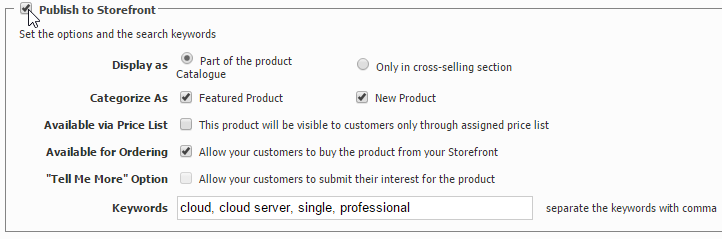
Once you enable that flag a box is presented to you with some basic options, concerning the display of your product in Storefront. For example you can:
- Choose between displaying this product as Part of your product Catalogue or Only in a cross-selling section.
- Categorize this product as Featured and New.
- Define if this product will be visible to customers only through an assigned price list by enabling the "Available via Price List" option.
- Allow your customers to buy this product from your Storefront by enabling the "Available for Ordering" option.
- Allow your customers to submit their interest for this product by enabling the "Tell Me More" option.
- Specify the Keywords for this product.
Below the "Publish to Storefront" box, there is a section under the name of the product, where you can:
- Upload the logo of this product.
- Add a Short Description for this product, that will appear in Storefront under the name of the product, in order to give your customers a better understanding of the application.
- Add a Long Description for this product, that will appear in Storefront when the product is displayed in lists.
| Gliffy | ||||
|---|---|---|---|---|
|
Product Overview Settings
In the section below, there is a "one to one" representation of the Overview, Features and Support tabs of the detailed page of this product in your Storefront.
In the Overview tab, on the left side of the page there is a "what you see is what you get" editor where you can add information in order to give to customers a high level of understanding of this product. On the right side of the page, under the Screenshots, Demo & Documents sections, you can add screenshots, demo links and documentation links related to this product.
| Gliffy | ||||
|---|---|---|---|---|
|
Product Features and Support Settings
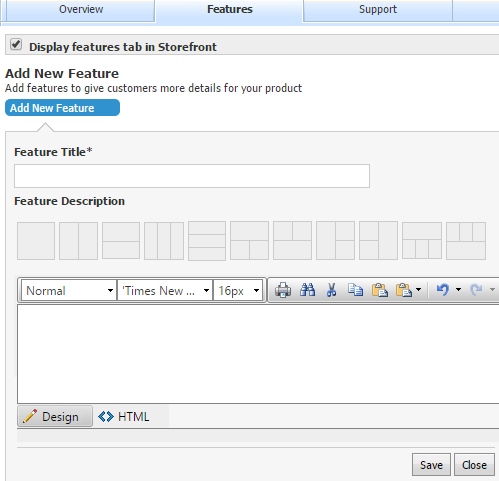
In the Features tab, check the "Display features tab in Storefront" flag in order to make Features tab visible in your Storefront. In order to add features to this product, click on "Add New Feature". You will be presented with a form where you have to fill inFeature Title and Feature Description. Once you finish editing, click on Save.
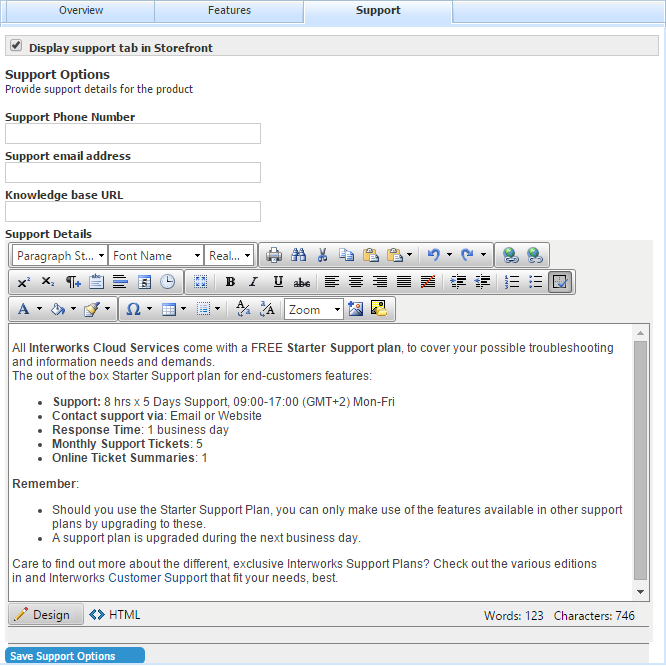
In the Support tab, check the "Display support tab in Storefront" flag in order to make Support tab visible in your Storefront. Under Support Options, you are able to provide support details for this product, such as:
- Support Phone Number
- Support email address
- Knowledge base URL
- Any Support Details, for example, the available support plans that you offer for this product.
Configure the Storefront Settings of a Product Group
In case you want to offer your customers a number of plans for the same service (e.g. Mailbox plans), then you need to create a Product Group and create Products under this Product Group.
A product group is marked with the  icon.
icon.
In order to configure the Storefront Settings of a particular Product Group of your Storefront, follow the steps below:
- Login to Cloud BSS and select Billing > Products.
- Select a Product Group from the list of Products available in your Storefront.
- Click on "Storefront Settings" from the Shortcuts menu on the left.

- In order to add a product in this Product Group click on "New Product".
The Storefront Settings page of a Product group is similar to that of a Product. The only difference is that here there is an extra tab, concerning Editions.
In the Editions tab, in the Products section you will find the Products included in this Product Group. You are able to drag and drop the Products in order to sort which Product will appear first in Storefront. Next to each Product there is a box where you can add a Short Description for this Product. Once you finish configuring Editions, click on "Save Editions Options".
| Gliffy | ||||
|---|---|---|---|---|
|
Storefront Display of the Properties of Product Types
When you create a Product or Product Group you have to specify the Product Type of this Product or Product Group (e.g. Mailbox). In order to add two (or more) Products in the same Product Group, these Products must be of the same Product Type. Each Product Type contains a set of Properties (Product Characteristics) which in fact are the attributes of the Service of a Product.
In order to configure the Properties of a particular Product Type, follow the steps below:
- Login to Cloud BSS and select Setup > Billing > Products > Product Types.
- Select the Product Type you wish to configure from the list of available Product Types of your Storefront.
- In the Product Type Details page you can configure the Properties of this Product Type.
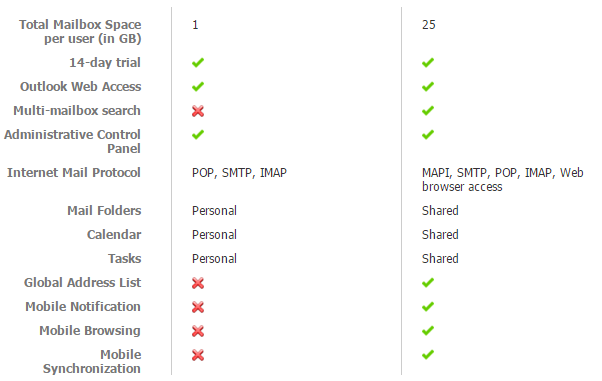
In order to display a comparison matrix between the Properties of the Editions of a Product Group in your Storefront:
- Select the "Storefront Options" tab of the Product Type Details page.
- Select which Product Characteristics of this Product Type will be displayed in the comparison matrix in Storefront, by moving a product characteristic from the list of Available Characteristics to the list of Selected Characteristics, using the blue arrows.

In the below image you can view a Storefront Display of the comparison matrix.
Enable the Terms of Use
In order to enable and configure the Terms of Use for a particular Product or Product Type:
- Login to Cloud BSS and select Billing > Products.
- Select a Product from the list of Products available in your Storefront.
- Click on "Storefront Settings" from the Shortcuts menu on the left.

- Check the "Enable the Terms of Use" option. By enabling this option, your customers must accept the terms of use for this product before proceeding to checkout in your Storefront.

- Upload the terms of use either From local system or From Cloud BSS file system or by Using the Editor and click on Save.

Table of Contents
| Table of Contents | ||
|---|---|---|
|