| Excerpt |
|---|
Azure AD B2C authentication has been introduced for allowing single sign-on between your Azure AD B2C and your Storefrontthe BSS. Users that have already logged in Azure AD B2C will be able to automatically login to your Storefront the BSS without entering their credentials. |
| Rw ui textbox macro | ||
|---|---|---|
| ||
How to Create an Azure AD B2C |
| Rw ui textbox macro | ||
|---|---|---|
| ||
Since the following guide contains four main steps with some back-and-forths between our BSS Setup web page and the portal.azure.com web page, we advise you to keep both pages open on different tabs of your web browser. |
Setting up Azure AD B2C
| Status | ||||
|---|---|---|---|---|
|
| Rw ui textbox macro | ||
|---|---|---|
| ||
First of all, you should register an application in Azure Active Directory B2C if you haven't already, by following this guide: |
To enable the Azure AD B2C (OIDC) feature in StorefrontBSS, please proceed with the following guide:
Go to this link: https://portal.azure.com/ and click on the "Azure AD B2C".
Click on the "Applications" option, from the Manage menu.
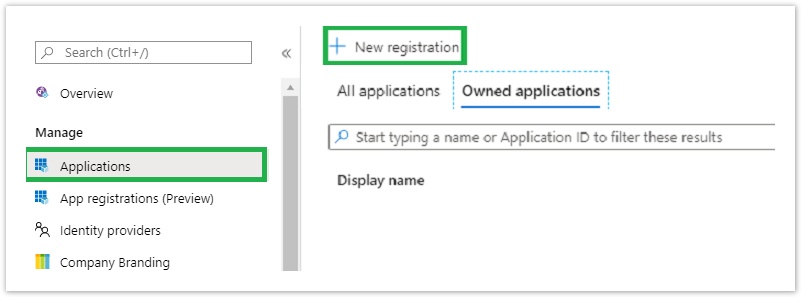
Then click on the "+ New registration" button to register an application.
On the following window, enter a name for your application under the Name text field. Example: "Open Id Connect AAD B2C"
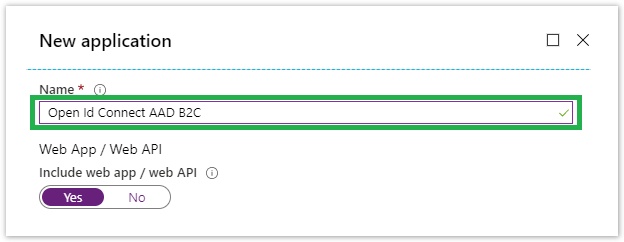
Continue by clicking on the "Create" button.
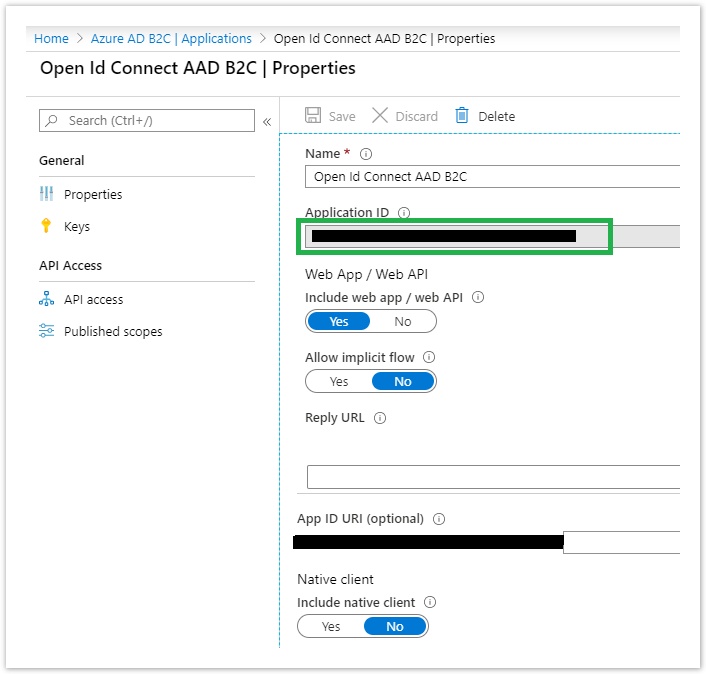
From the next window, copy and store for later use, the "Application ID".
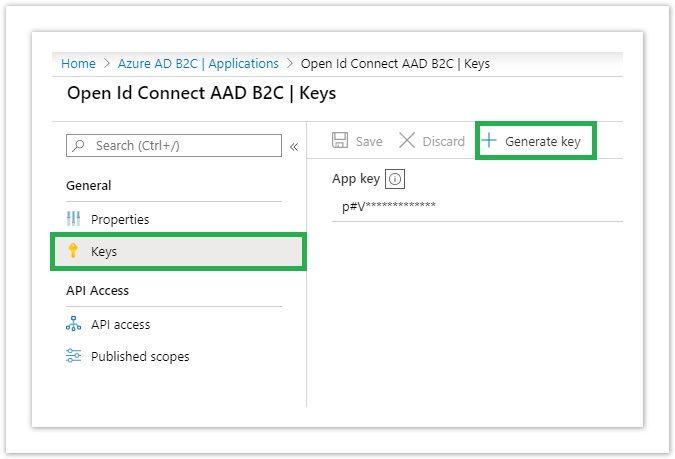
Back to the Manage menu, click on the "Keys" and then click on " + Generate key".
Copy and store, for later use, the "App key" that was created.
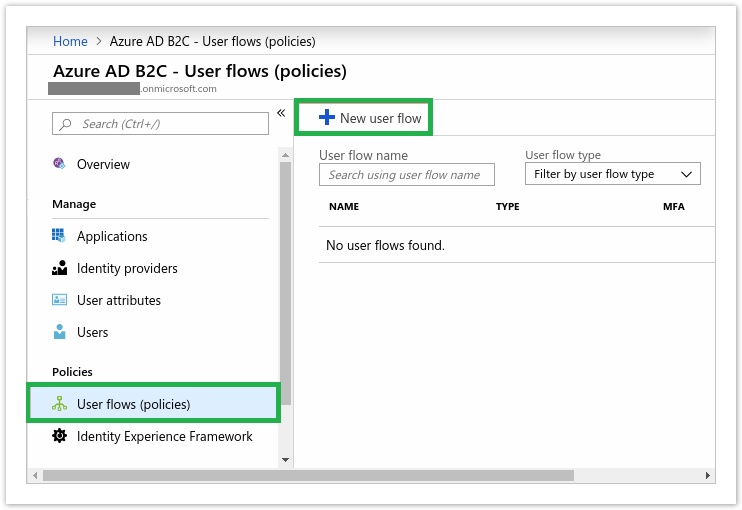
Back to Manage menu, you will find under it the Policies menu, click on the "User flows (policies)" and then click on " + New user flow".
- Afterwards, continue this sub-step with the following guide: https://docs.microsoft.com/en-us/azure/active-directory-b2c/tutorial-create-user-flows
- After you have finished the steps from the linked Microsoft guide above, copy and store the "Name" for later use.
Then go to "User flows (policies)" → "Properties".
Copy and store, for later use, the "Issuer (iss) claim" (Example: https://<domain>/78ae85c0-087f-4938-8942-4b4316c55c96/v2.0/).
Setting up the BSS Mechanism
| Status | ||||
|---|---|---|---|---|
|
Now on BSS, go to: BSS Setup > Administration > System Options > External AuthenticationBSS Login Settings (as explained on this Documentation).
Click on the "Settings (OIDC)" button.

ID and Secret - Setup
On the following page, you are required to utilize the previously-stored IDs from "Step 1" and paste them to their corresponding fields. More specifically:
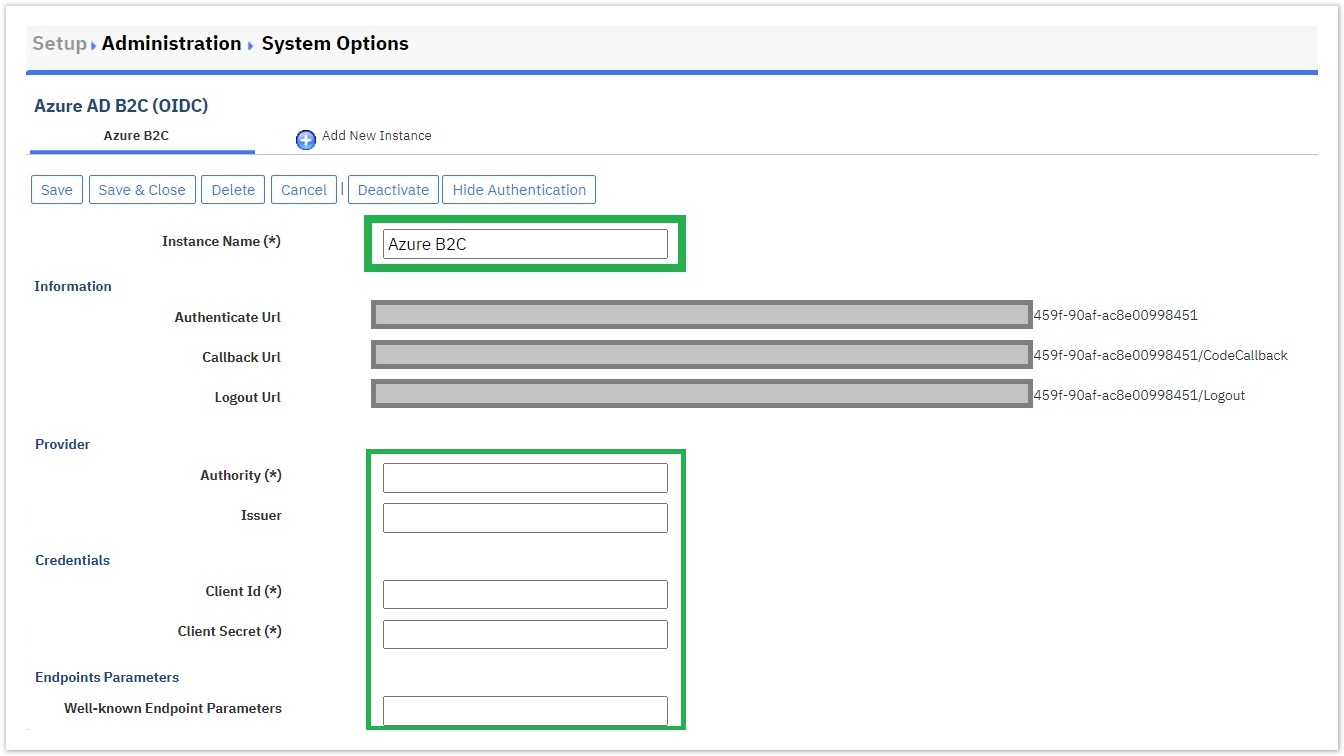
- Provide a name to the Instance Name text field.
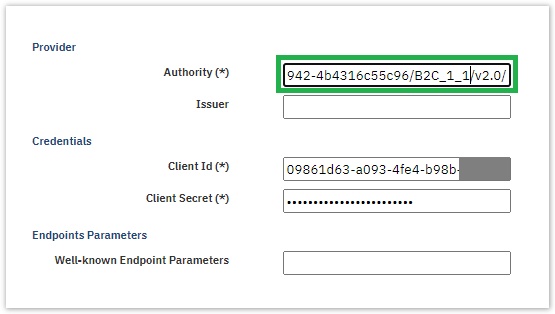
Paste your stored [Issuer (iss) claim] https://<domain>/78ae85c0-087f-4938-8942-4b4316c55c96/v2.0/ to the Authority text field (domain: <tenant subdomain>.b2clogin.com).
Rw ui textbox macro type note The Issuer field was changed to the Authority field
Please note that the Authority text field was formerly the Issuer text field.
Consequently, if you fill in the Authority field with the [Issuer (iss) claim], you need to leave blank the Issuer field, because it is used only for backward compatibility reasons.- Paste your stored [Application ID] to the Client Id text field.
- Paste your stored [App key] to the Client Secret text field.
In order to paste your stored [User Flow Name] to a field, please read the following information:
Rw ui textbox macro type info Information on "Well-Known Endpoint Parameters", also known as "Policy"
You can paste the stored [User Flow Name] value in either of the two following BSS fields:
- Authority(*): In this field, you can add the [User Flow Name] value in the following form, (Example: https://{tenant}.b2clogin.com/{tenant}.onmicrosoft.com/{policy}/v2.0/).
- Well-known Endpoint Parameters: In this field, you can add the [User Flow Name] value in the following form, (Example: p=B2C_1_1).
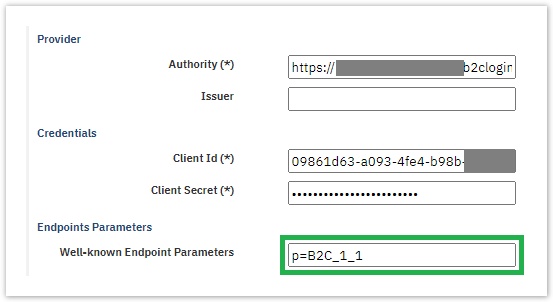
Any of the aforementioned options will work as intended but Microsoft prefers the 1st option. For more information please read the following Microsoft documentation page on "Sending Authentication Requests with a Policy Parameter".
- Authority(*): In this field, you can add the [User Flow Name] value in the following form, (Example: https://{tenant}.b2clogin.com/{tenant}.onmicrosoft.com/{policy}/v2.0/).
Attribute Mapping - Setup
Concerning the Attribute Mapping section of this page, it is introduced as an easy way to map the JSON response of the identity provider to a Property of the BSS Account/Contact/User.
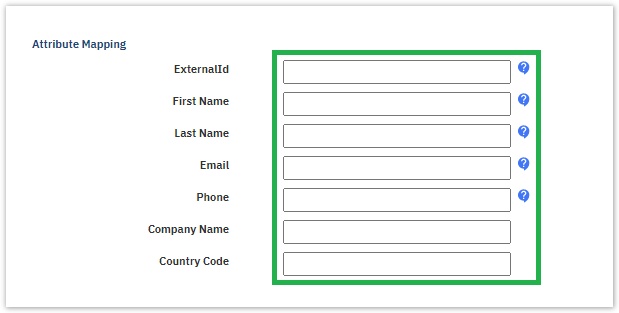
Next to the first five attribute-mapping fields, there is a question mark icon, that upon hovering over it, it displays the default mapping values for your aid.
You don't need to fill in the Attribute Mapping text fields, since the attributes "ExternalId", "First Name", "Last Name", "Email", and "Phone" already have the default mapping (claims), which you can witness below.
| Field | Value |
|---|---|
ExternalId | 'sub' |
First Name | 'given_name' or 'name' if empty |
Last Name | 'family_name' |
'email' or 'preferredUsername' if empty | |
Phone | 'phone_number' |
Company Name | |
Country Code |
However, if you wish to alter the default mapping, you can do so with either of the two JSON response objects namely IdToken, UserInfo that are utilized for the attribute mapping and the attribute matching.
Please also note that many Attribute Mapping fields can be declared with a comma "," and the priority with which they are written applies (if no value is found in the first, the code checks the second).
Below you will find the two aforementioned JSON files that can be used as an example.
| Rw ui expands macro | ||||||||
|---|---|---|---|---|---|---|---|---|
|
| View file | ||||||||
|---|---|---|---|---|---|---|---|---|
|
| View file | ||||||||
|---|---|---|---|---|---|---|---|---|
|
As it is evident from the JSON files, any extra parameter set at the OIDC provider, can be placed within the ExtraParameters.
For example, if you want to set the Company Name based on the value of the "cp1" field, then as mapping you must set "IdToken.ExtraParameters.extension_cp_gan". The same logic applies to any other extra parameters that are needed.
Attribute Matching - Setup
Concerning the Attribute Matching section of this page, it is one of the most important functionalities during the registration process, because after filling in the Account Code field, there will be a check via the identity provider's response on whether an account exists under the Azure Portal with that specific account code, or not. If a match is found between a BSS account and an identity provider's account, then there will be no need for registration on our systems. However, if no match is found, then the registration on our systems is required.
Advanced Settings - Setup
Concerning the Advanced Settings section of this page, it is the most important option during the registration process, because this checkbox, if enabled, can allow the BSS registration process to be initiated in the event that a matching account(based on the "Account Code" entered in the previous section) has not been found during the check between the BSS and the identity provider. In its default disabled state, the checkbox will not allow the BSS registration process to be initiated, and the authentication will not proceed.
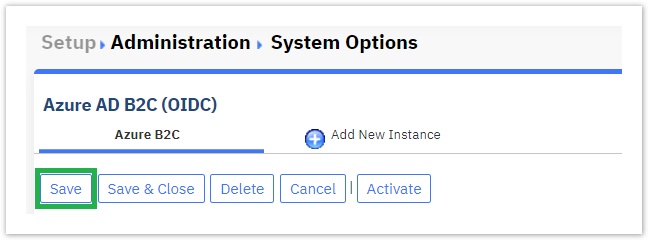
Saving Configured Changes
After you have finished with this page's configuration, you must click on the "Save" button.
Now that you have saved all those aforementioned settings of this page, you can copy and store, for later use, the following URL:
- The "Callback Url".
Setting up Azure AD B2C - Continued
| Status | ||||
|---|---|---|---|---|
|
Now, by going back to the https://portal.azure.com/ you can perform the next five easy actions:
- Click on "Azure AD B2C".
- Click on "Applications".
- Find the application with name "Open Id Connect AAD B2C" or any other name that you have assigned to your application during its creation.
- Paste your stored [Callback Url] to the
- Click on "Save".
Testing & Activation
| Status | ||||
|---|---|---|---|---|
|
The final steps of the initialization of the External Authentication feature, require you to once more go back to the BSS Setup > Administration > System Options > External Authentication and click on the "Settings (OIDC)" button.
- Click the "Activate" button on the top bar.
- Copy the "Authenticate Url" and open a new web browser tab to paste that URL.
- Your web browser will redirect you to Azure AD B2C in order to log in with your Azure AD B2C credentials.
- After a successful login, you will redirect back to the Storefront and our system will log in/register you.
By clicking on the "Show Authentication" button from the top bar and the External Authentication will from now on be available to the Storefront.
First Storefront Login with Azure AD B2C Credentials
After the configuration and activation of the Azure AD B2C external authentication for Storefront, you can choose to login to Storefront via your Azure AD B2C credentials.
You can click on the "Azure AD B2C" button, located under the External Authentication section.
Provide your corresponding credentials on the new Azure AD B2C login page that you are redirected to or choose one of your "Microsoft Login" saved accounts.
After a successful login, you are again redirected to our Storefront.
During every first-time login via any external identity provider, the following registration form might appear, depending on the following factors:
- For matching Account Codes between the BSS and the identity provider, the registration form will appear with all its fields pre-filled for you to check them and proceed with the log-in or update them and then proceed with the log-in.
- Otherwise, if no matching of the Account Codes is found between the BSS and the identity provider, the registration form will appear with all its fields empty for you to fill them in but only if the Allow Automatic Registration checkbox is enabled. Else, the registration form will not appear and the log-in process will stop.
In the event that the registration form appears, it will do so only once, and with it you can:
- Either update your pre-existing BSS account as well as your BSS contact,
- Or register a BSS account as well as a BSS contact, since the external identity provider does not possess all the required information that our systems need if there is no pre-existing BSS account.
If you have updated your pre-existing BSS account via the registration form as well as accepted the "terms of use" via the dedicated checkbox and clicked on the "Update" button, the Storefront is now fully accessible to you.
If you have registered a BSS account as well as a BSS contact by filling in all the required fields as well as accepting the "terms of use" dedicated checkbox and clicking on the "Update" button, a BSS account and contact are created based on the provided information and the Storefront is now fully accessible to you.
Saving Configured Changes
After you have finished with this page's configuration, you must click on the "Save" button.
Now that you have saved all those aforementioned settings of this page, you can copy and store, for later use, the following URL:
- The "Callback Url".
Setting up Azure AD B2C - Continued
| Status | ||||
|---|---|---|---|---|
|
Now, by going back to the https://portal.azure.com/ you can perform the next five easy actions:
- Click on "Azure AD B2C".
- Click on "Applications".
- Find the application with name "Open Id Connect AAD B2C" or any other name that you have assigned to your application during its creation.
- Paste your stored [Callback Url] to the
- Click on "Save".
Testing & Activation
| Status | ||||
|---|---|---|---|---|
|
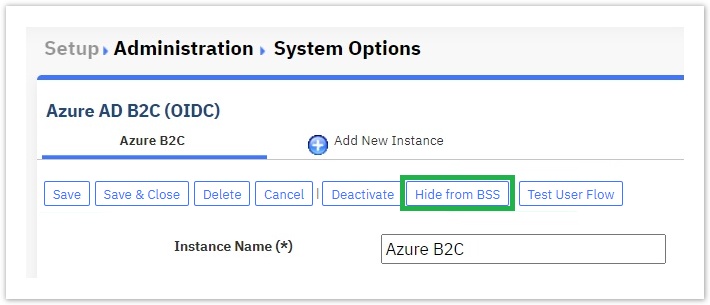
The final steps of the initialization of the External Authentication feature, require you to once more go back to the BSS Setup > Administration > System Options > BSS Login Settings and click on the "Settings (OIDC)" button.
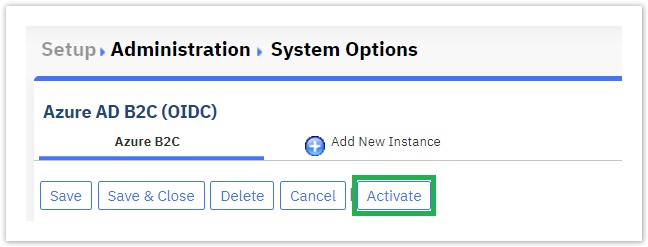
- Click the "Activate" button on the top bar.
- Copy the "Authenticate Url" and open a new web browser tab to paste that URL.
- Your web browser will redirect you to Azure AD B2C in order to log in with your Azure AD B2C credentials.
- After a successful login, you will redirect back to the BSS and our system will log in/register you.
By clicking on the "Show in BSS" button from the top bar and the External Authentication will from now on be available to the BSS.
The same button will then display the “Hide from BSS“ in case you wish to hide this External Authentication option from the BSS.
First BSS Login with Azure AD B2C Credentials
After the configuration and activation of the Azure AD B2C external authentication for BSS, you can choose to login via your Azure AD B2C credentials.
You can click on the "Azure AD B2C" button, located under the "---- or ----" section.
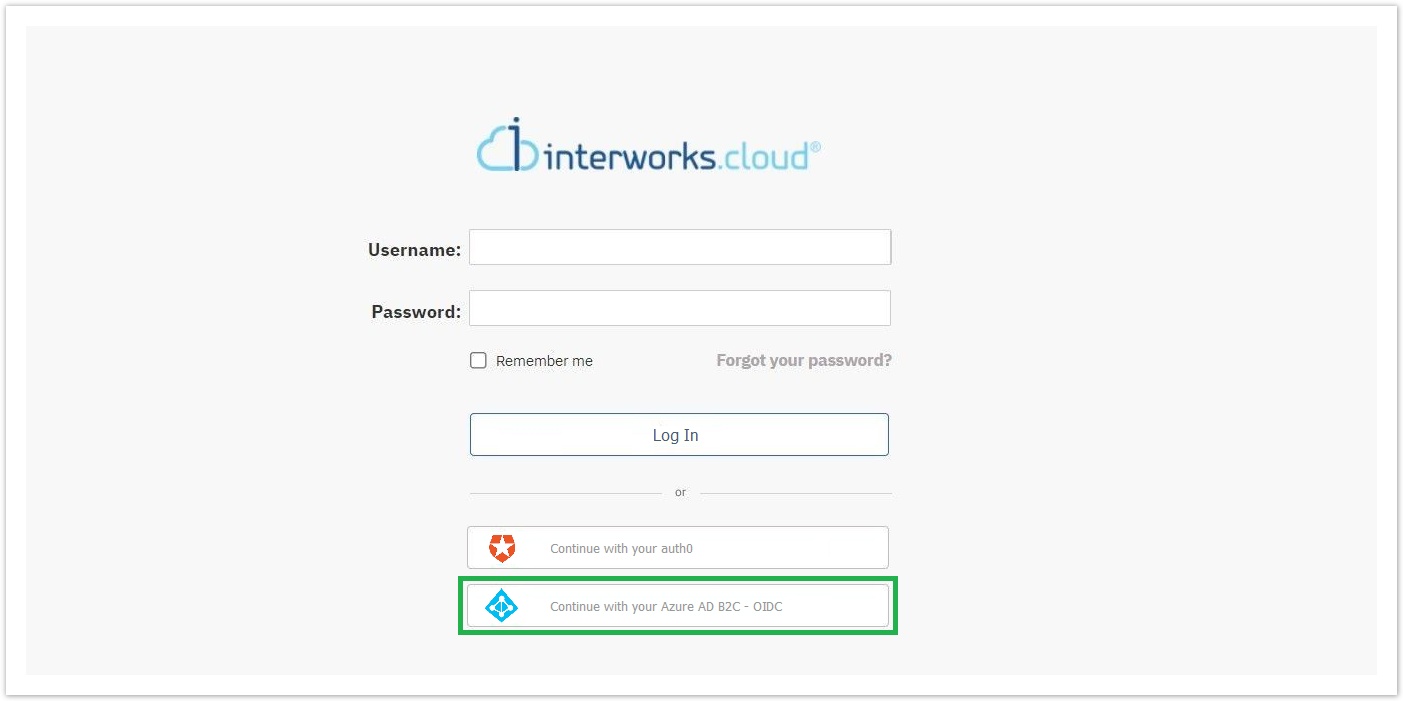
Provide your corresponding credentials on the new Azure AD B2C login page that you are redirected to or choose one of your "Microsoft Login" saved accounts.
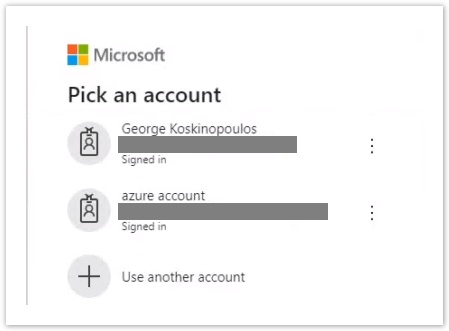
After a successful login, you are again redirected to the BSS.
As a result, the account and contact that have been created in our BSS are now connected with the Azure AD B2C account used to login to the StorefrontBSS.
Table of Contents
| Table of Contents | ||
|---|---|---|
|