This page provides detailed information on configuring and utilizing the interworks.cloud email notifications engine to reflect your business requirements. The system comes ready with some basic notifications, but the user is free to enable new notifications according to emerging operational needs. The notification engine supports the management and dispatch of an extensive array of email notifications, pertaining to most business entities of the Cloud Platform. Through a comprehensive set of options, the user can define the nature of the notification, i.e. the underlying entity on which the notification is based along with the rules of utilization, and the contents of the notification, i.e. the text and the marketing material. Another feature that can be changed by the user is the dispatch options (From, To, CC, BCC). The module comes with an extensive list of definitions from the application database so that the user can select the appropriate ones. |
An email notification is dispatched from the system at the following cases:
- Upon creation of an entity (e.g.the creation of an order)
- During the update of an entity (e.g. change of accounts details)
- When an entity is deleted (e.g. deletion of a subscription).
The notification engine leverages the Email Preferences of the system to dispatch the notifications at: BSS > Setup > Administration > System Options > Organization Profile. These settings must be configured in order for the email notifications to function properly. |
Editing an Existing Notification
Accessing the Notifications
The user can access the notification settings at BSS > Setup > Administration > Notifications > Customer Notifications
The initial view displays the entity list on the left part and on the right part the notifications. The user here can create a 'New Notification', 'Activate' an existing one, 'Deactivate' an existing one and 'Delete' an existing notification. Bu selecting an entity on the left, the results on the right pane are limited to the notifications that are attached to this specific entity.

The system comes with an out-of-the-box list of preconfigured notifications that cover the most common communication scenarios, Check Setup a Notification page for a full list of the available notifications.
Locating the Notification
Since the system comes with a complete set of initial notifications when first configuring the platform, you must modify those to reflect your marketing material. Let's see how this can take place:
- From the Customer Notification screen (previous step), select an entity on the left to locate its notifications
- Click on the notification legend on the right. Of course, you can peruse the available notifications on the right pane and select the one you need.
- In the screen below, the 'Contact' entity is selected. On the right, the window displays the Contact notifications. Note that the notifications are marked either with a green check (
 ) or with a green check on a cogwheel (
 ). The first signifies that the notification is a user-made notification and can be deleted. The latter means that the notification is a system one and cannot be deleted, only amended.
 - Click on the 'Storefront account activation' notification.

You will notice that most fields are completed and that some are greyed out. This is because the system notifications are specific in scope and can accept only modification in discreet settings like sorting the fields, the dispatch options, and the marketing content. Let's view them in detail.
Editing the Dispatch Options
You can set up the dispatch options, using the merge fields facility for generic details and any other email you want this notification to be dispatched.
By clicking the 'Display Notification' checkbox, this email will be linked to the Account details of the customer, under section 'Communication'

Rebranding the Notification Content
The next section contains a WYSIWYG editor where you can tailor the look and feel of the notification, along with inserting the wording of your choice, according to the context.
The editor has two modes of operation, the 'Design' mode, where you can paste text and pictures, and manipulate the content using the tools, and an 'HTML' mode, where you can use html code to create the content.
Among other things, you can:
- Insert the company logo
- Fix Headers and footers to match your marketing guidelines
- Insert Hyperlinks to other internet content
- Add pictures
- style the fonts according to your site
Under the 'Email Notification' section, you will also notice the 'Merge fields' facility. This is a shortcut to having a database field into the dispatch fields and content editor window so that your notification will be completed with generic functions. To locate a field, you only have to select the entity, at the first drop-down list, then the field in question from the second drop-down list, and then just click on the place you want the field to be displayed and click 'Add'.


When you are done with configuring the content, don't forget to use the 'Valid Template' button ( |
 ) to verify that the syntax is correct!
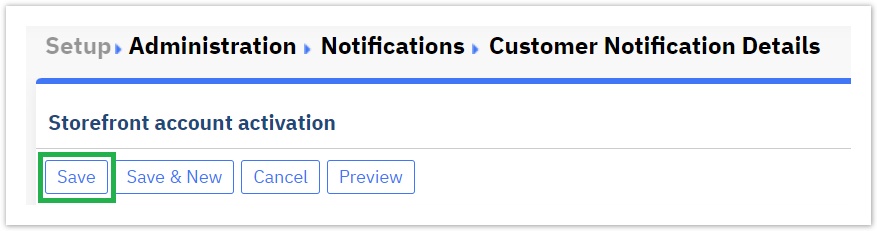
After you complete changes at the notification, don't forget to click Save on the top left of the screen to commit the changes!

Preview Your Changes
Also, you can use the 'Preview' facility to check your progress. By clicking 'Preview', a pop-up will be displayed to select the notification entity. The pop-up derives contents from entities already stored in the system. Click on one to view the preview of your notification with data from the existing entity!

Creating a New Notification
Accessing the Notifications Module
You can create a new notification just as easily, following the following steps:
- Navigate to BSS > Setup > Administration > Notifications > Customer Notifications
- Use the 'Create New Notification' button on the Customer Notifications screen.

Notification Basic Settings
On the 'New Notification' screen, you will need to fill in the details in the section 'General':
- Notification: The notification name
- Description: A description of the notification for internal use
- When to Send: The user selects the dispatch method, either 'Once' - upon creation, 'On Update' - every time an entity is updated, 'On Delete' - when an entity is deleted
- Active Notification: Signifies if the notification is active or inactive
- Related Entity: The user selects the entity where the notification is based
- Secondary Entity: In some cases, after selecting a basic entity, the user may specialize the notification further by selecting a secondary entity (usually after conferring with interworks.cloud)
- Apply Rule: The user decides if the email notification will concern only new records or older records as well.

Business Rules Setup
At the 'Conditions' section, the user can fine-tune the notification to be dispatched according to various rules, so as to cover a specific business case. The rules engine is based on various arguments that can function together in order to reflect scenarios of various complexities. Here is how that works:
- The user first selects an entity.
- Based on the entity the available data will be available on the 'Field' column.
- The user also picks an operator from the respective column
- Finally the appropriate 'Value' must be selected, so that the rule is complete.
- By clicking '
 ' at the right of the condition row, the condition is inserted as a notification rule.
E.g. For a notification that concerns the Subscription basic entity, a rule could be:
- Entity=Subscriptions
- Field= Subscription.IsTrial
- Operator= Is Equal
- Value= Yes
That would mean that the notification would be dispatched only to trial subscriptions.
At the 'Fields Sorting' section, the user can select how the contents of the notification will be sorted.
Editing the Dispatch Options
At the 'Email Notification' section, enter the dispatch details you need

Rebranding the Notification Content
Using the WYSIWYG editor you can fashion the text and visuals according to your needs. Use the 'Design' mode to quickly add pictures and text. You can also use the 'Merge Fields' facility here as well.

When you are done with configuring the content, don't forget to use the 'Valid Template' button ( |
After you complete changes at the notification, don't forget to click Save on the top left of the screen to commit the changes!
Preview Your Changes
Also, you can use the 'Preview' facility to check your progress. By clicking 'Preview', a pop up will be displayed to select the notification entity. The pop up derives contents from entities already stored in the system. Click on one to view the preview of your notification with data from the existing entity!
Table of Contents
More Resources
- Setup a Notification. The out-of-the-box notifications that are available in Cloud Platform
- For more information on configuring your email notifications check the guide interworks.cloudPlatform_TemplateGuide.pdf